Fried Fish Sandwich Recipe

The Perfect Crispy Fried Fish Sandwich Recipe for Seafood Lovers

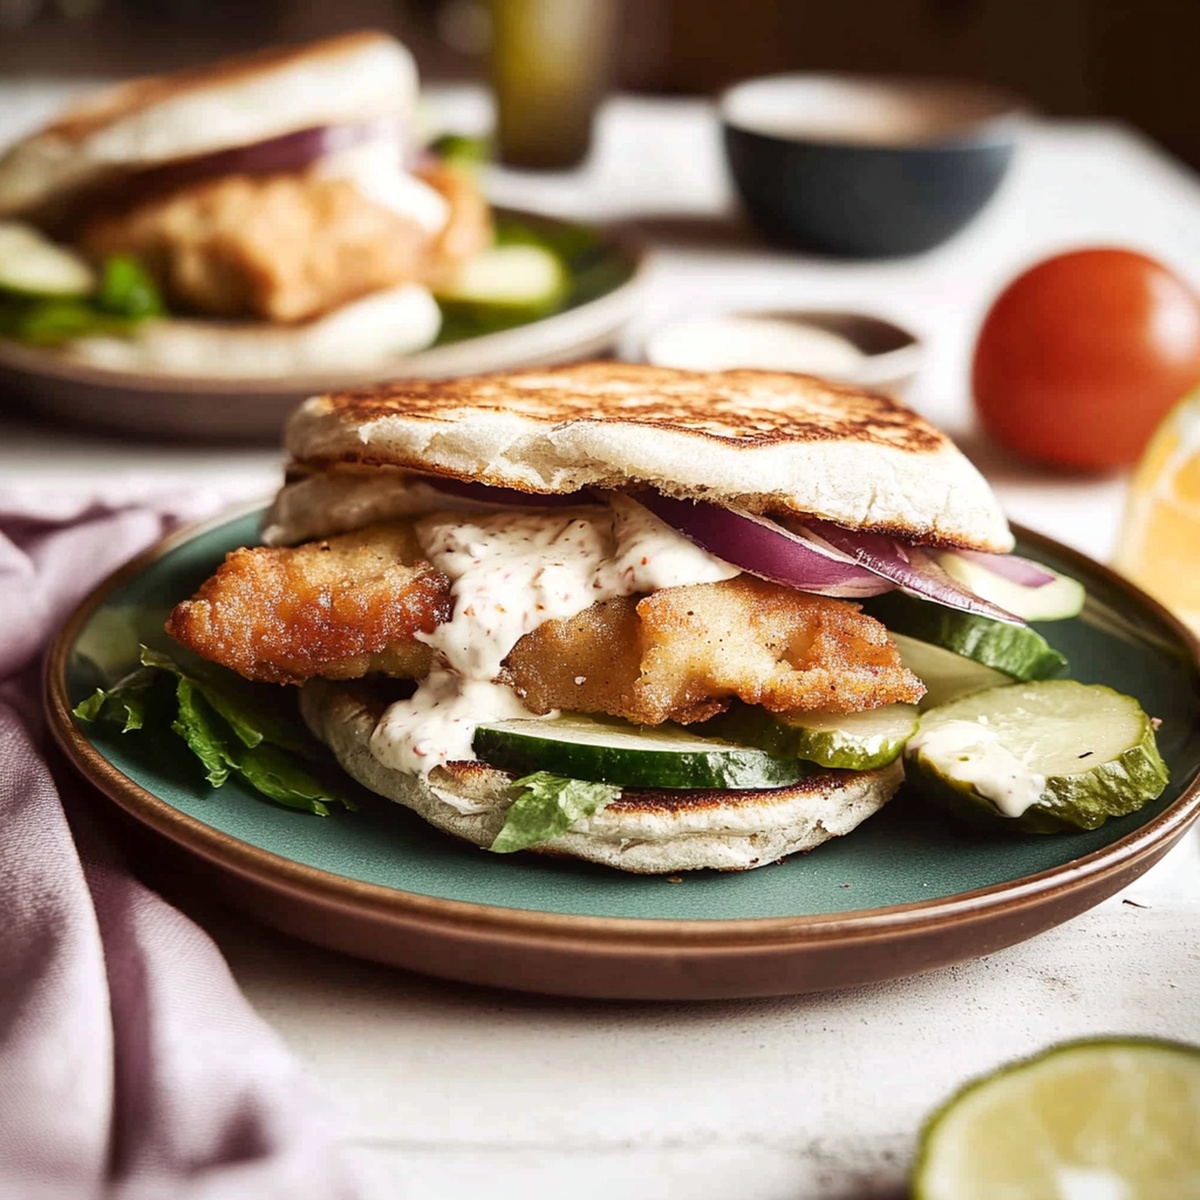
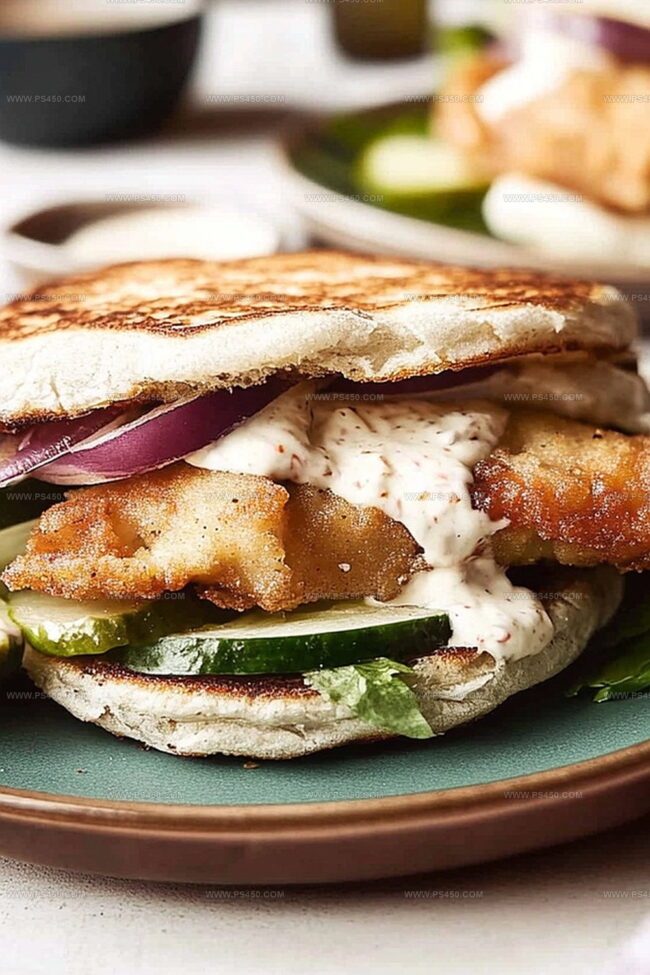
Crispy golden battered fish nestled between soft bread makes this fried fish sandwich a culinary adventure waiting to happen.

Weekend cookouts suddenly become more exciting with this classic comfort meal.

Seafood enthusiasts will appreciate the perfect balance of crunchy exterior and tender fish inside.

Each bite promises a delightful combination of textures and flavors that dance across your palate.

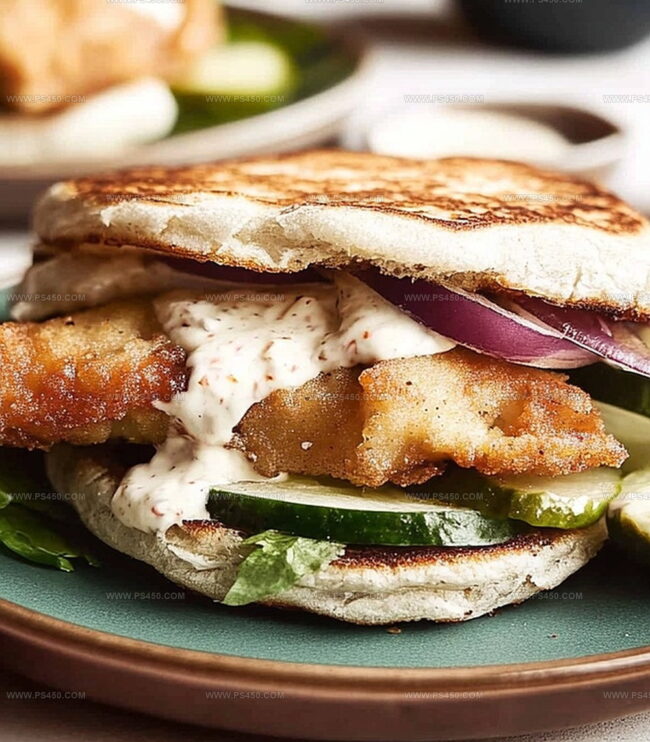
Tangy condiments and fresh toppings can elevate this simple sandwich into something extraordinary.

Simple ingredients come together to create a memorable lunch that satisfies deep hunger.

Grab some fresh fish and let’s craft a sandwich that will become your new favorite go-to meal.

Top Pairings For Fried Fish Sandwich

  • Pair with Crisp White Wine: A chilled sauvignon blanc or pinot grigio cuts through the richness of the fried fish, offering a refreshing contrast with its bright, zesty notes.
  • Serve with Tangy Coleslaw: A creamy, vinegar-based coleslaw complements the crunchy fish sandwich, adding a cool, crunchy texture and balancing the deep-fried flavors.
  • Match with Craft Beer: A light, hoppy pale ale or wheat beer provides a crisp, effervescent companion that enhances the sandwich's golden, crispy exterior and helps cleanse the palate.
  • Add Zesty Lemon Aioli: A homemade lemon aioli brings citrusy brightness and creamy richness, perfectly accentuating the seasoned, crispy fish and adding a gourmet touch to the classic sandwich.

Fun Variations For Fried Fish Sandwich

  • Spicy Cajun Fish Sandwich: Replace Old Bay seasoning with Cajun seasoning for a bold, peppery kick. Add cayenne pepper to the flour mixture for extra heat. Serve with a zesty remoulade sauce to complement the spicy breading.
  • Herb-Crusted Fish Sandwich: Mix dried herbs like thyme, rosemary, and parsley into the panko breadcrumbs. Replace garlic powder with fresh minced garlic for a more vibrant flavor profile. Top with a light dill aioli for freshness.
  • Gluten-Free Crispy Fish Sandwich: Swap wheat flour with rice flour or gluten-free all-purpose flour blend. Use gluten-free panko or crushed gluten-free crackers for coating. Ensure all seasonings are certified gluten-free for a safe alternative.
  • Coconut Crusted Fish Sandwich: Combine shredded coconut with panko breadcrumbs for a tropical crunch. Add a pinch of ground ginger to the flour mixture. Serve with a tangy mango salsa for a Caribbean-inspired meal.

Fried Fish Sandwich FAQ Guide

  • Why use buttermilk in the breading process?

Buttermilk helps tenderize the fish and creates a tangy, rich coating that makes the breading stick better. The acidity breaks down proteins, ensuring a more flavorful and crispy result.

  • Can I use regular milk instead of buttermilk?

While you can substitute regular milk, buttermilk provides a unique tang and helps create a crispier texture. If you don’t have buttermilk, add a tablespoon of lemon juice or vinegar to regular milk and let it sit for 5 minutes.

  • What type of fish works best for this sandwich?

White, mild fish like cod, halibut, or tilapia are ideal. They have a light flavor that absorbs seasoning well and maintain a flaky texture when fried. Avoid oily fish like salmon, which might become too heavy.

  • How do I know the oil is at the right temperature for frying?

Use a thermometer to check that the oil is around 350F/175C. If you don’t have one, drop a breadcrumb into the oil – it should sizzle and float immediately without burning, indicating the perfect frying temperature.

Why Fried Fish Sandwich Tastes So Classic

  • Crisp Up Flavor Explosion: This fried fish sandwich packs a punch with its perfectly seasoned breading, combining Old Bay, garlic powder, and paprika for a mouthwatering taste that'll make your taste buds dance.
  • Quick Weeknight Warrior: Whipping up this sandwich takes just 15-20 minutes from start to finish, making it an ideal meal for busy families or anyone craving a fast, delicious dinner without spending hours in the kitchen.
  • Crowd-Pleasing Comfort Classic: The crispy fish, golden-brown exterior, and simple ingredients create a universally loved dish that appeals to both kids and adults, perfect for casual dinners, game nights, or weekend lunches.
  • Easy Customization Power: Swap out seasonings, try different types of fish, or add your favorite toppings to make this recipe uniquely yours, giving you tons of flexibility to match your mood and taste preferences.

Ingredients Needed For Fried Fish Sandwich

Main Ingredients:

Protein:
  • Fish Fillet: White fish with mild flavor, perfect for crispy coating and sandwich base.
  • Egg: Helps breading stick to fish and adds richness to the coating.
Breading Components:
  • Flour, Panko Breadcrumbs: Creates crispy, golden exterior with light and crunchy texture.
  • Buttermilk: Provides tangy flavor and helps breading adhere to fish.
Seasoning Blend:
  • Salt, Black Pepper, Garlic Powder, Paprika, Old Bay Seasoning: Adds complex, savory flavor profile to fish coating.
Cooking Medium:
  • Vegetable Oil: Neutral oil for deep frying, ensures even and crisp cooking of fish.

Steps To Make Fried Fish Sandwich Crispy And Golden

Step 1: Create Flavor-Packed Breading Stations

Grab three separate bowls for your breading adventure:

First Bowl (Seasoned Flour):
  • All-purpose flour
  • Salt
  • Black pepper
  • Garlic powder
  • Paprika
  • Old Bay seasoning
Second Bowl (Wet Mixture):
  • Buttermilk
  • Egg
Third Bowl:
  • Panko breadcrumbs

Step 2: Transform Fish into Crispy Delights

Start your fish transformation by:
  • Generously coating each fillet in the seasoned flour mixture
  • Dunking the floured fish into the buttermilk-egg blend
  • Rolling the wet fish in panko breadcrumbs, pressing gently to ensure a perfect crispy coating

Step 3: Fry to Golden Perfection

Heat up your cooking magic:
  • Pour vegetable oil into a skillet, creating about half an inch of liquid gold
  • Warm the oil to a sizzling 350°F
  • Carefully lower the breaded fish into the hot oil
  • Cook each side for 3-4 minutes until it turns a gorgeous golden brown
  • Remove fish and let excess oil drip onto a paper towel-lined plate

Step 4: Assemble Your Sandwich

  • Choose a soft, fresh sandwich roll
  • Layer with crisp lettuce
  • Place your perfectly fried fish on top
  • Add a dollop of tangy tartar sauce
  • Optional: Slice of cheese or pickles for extra excitement

Tips For A Perfect Fried Fish Sandwich

  • Customize Seasoning Blend: Experiment with different spice combinations in the flour mixture to match your taste preferences, like adding cayenne for heat or dried herbs for extra flavor complexity.
  • Prevent Soggy Breading: Pat fish fillets dry before breading to ensure maximum crispiness and help the coating stick better, avoiding moisture that can make the breading fall off.
  • Oil Temperature Control: Use a cooking thermometer to maintain consistent oil temperature, which guarantees evenly cooked fish with a perfectly crispy exterior and tender interior.
  • Gluten-Free Adaptation: Swap wheat flour for gluten-free flour and use gluten-free panko breadcrumbs to make this recipe suitable for those with gluten sensitivities.
  • Healthier Cooking Alternative: Replace deep-frying with oven-baking at 425F, lightly spraying breaded fish with cooking spray to achieve a similar crispy texture with less oil.

How To Store Fried Fish Sandwich The Right Way

  • Refrigerate leftover fried fish sandwiches in an airtight container for up to 2 days.
  • Keep them wrapped separately to maintain crispiness and prevent sogginess.
  • Reheat carefully in a preheated oven at 350F for 8-10 minutes to restore some of the original crunch.
  • Avoid microwaving, which can make the breading soft and soggy.
  • For best quality, consume the sandwich fresh on the day of preparation to enjoy the optimal texture and flavor.
Print
clock clock iconcutlery cutlery iconflag flag iconfolder folder iconinstagram instagram iconpinterest pinterest iconfacebook facebook iconprint print iconsquares squares iconheart heart iconheart solid heart solid icon
Fried Fish Sandwich Recipe

Fried Fish Sandwich Recipe


5 Stars 4 Stars 3 Stars 2 Stars 1 Star

4.8 from 37 reviews

  • Total Time: 20 minutes
  • Yield: 4 1x

Description

Crave-worthy “Fried Fish Sandwich” delivers crispy golden perfection between soft brioche buns. Homemade tartar sauce and flaky fish create a delightful symphony of flavors you’ll savor with each satisfying bite.


Ingredients

Scale

Fish:

  • 4 white fish fillets (cod, haddock, or tilapia)

Coating and Seasoning:

  • 1 cup (240 milliliters) all-purpose flour
  • 1 teaspoon (5 grams) salt
  • ½ teaspoon (2.5 grams) black pepper
  • 1 teaspoon (5 grams) garlic powder
  • 1 teaspoon (5 grams) paprika
  • 1 teaspoon (5 grams) Old Bay seasoning (optional)
  • 1 cup (240 milliliters) buttermilk (or milk with 1 teaspoon vinegar)
  • 1 large egg
  • 1 cup (100 grams) panko breadcrumbs (or cornmeal for extra crunch)

Additional Components:

  • Vegetable oil, for frying
  • 4 brioche or sandwich buns, toasted
  • ½ cup (120 milliliters) tartar sauce (or mayonnaise)
  • 1 cup (50 grams) shredded lettuce
  • 1 tomato, sliced
  • ½ cup (50 grams) pickles or sliced onions (optional)

Instructions

  1. Craft a seasoned flour blend by combining dry ingredients, creating a flavor-packed coating that will elevate the fish’s taste profile.
  2. Whisk buttermilk and egg together in a separate vessel, forming a smooth, adhesive base that helps breadcrumbs cling perfectly to the fish.
  3. Systematically transform each fish fillet into a crispy masterpiece by first dredging through the seasoned flour, ensuring complete coverage.
  4. Immerse the floured fillet into the buttermilk mixture, allowing excess liquid to drip off before transitioning to the final breading stage.
  5. Gently press panko breadcrumbs onto the fillet, creating a textured exterior that will deliver a satisfying crunch when fried.
  6. Prepare the skillet by heating vegetable oil to an optimal temperature, creating a golden-brown cooking environment for the delicate fish.
  7. Carefully lower the breaded fillets into the shimmering oil, monitoring their transformation into a crisp, amber-hued delicacy.
  8. Fry each side until achieving a rich, golden color and ensuring the fish is thoroughly cooked, typically 3-4 minutes per side.
  9. Transfer the fried fillets to a paper towel-lined plate, allowing excess oil to drain and maintaining the crispy texture.

Notes

  • Choose fish with firm texture like cod, halibut, or tilapia to ensure the best crispy coating and prevent breaking during frying.
  • Maintain consistent oil temperature around 350F to achieve golden-brown, evenly cooked fish without absorbing excess oil.
  • Pat fish fillets completely dry before breading to help breadcrumbs adhere better and create a crunchier exterior.
  • For gluten-free option, swap wheat flour with cornstarch or rice flour, and use gluten-free panko breadcrumbs to maintain crispy texture.
  • Prep Time: 10 minutes
  • Cook Time: 10 minutes
  • Category: Lunch, Dinner, Snacks
  • Method: Frying
  • Cuisine: American

Nutrition

  • Serving Size: 4
  • Calories: 550
  • Sugar: 3 g
  • Sodium: 800 mg
  • Fat: 25 g
  • Saturated Fat: 4 g
  • Unsaturated Fat: 20 g
  • Trans Fat: 0 g
  • Carbohydrates: 60 g
  • Fiber: 2 g
  • Protein: 25 g
  • Cholesterol: 90 mg
Emily Morgan

Emily Morgan

Food Critic & Kitchen Tips Specialist

Expertise

Global Food Exploration & Critique, Simple Kitchen Hacks & Time-Saving Tips, Presentation & Plating Techniques, Culinary Research & Storytelling.

Education

New York University

  • Program: Bachelor’s in Journalism
  • Focus: Combined foundational journalism training with deep dives into global food traditions, restaurant criticism, and the cultural role of cuisine.

Emily Morgan has journeyed across the globe, collecting culinary secrets that turn everyday ingredients into impressive meals.

Based in Seattle and armed with a Journalism degree from NYU, she blends thorough research with a flair for presentation, ensuring every dish looks just as good as it tastes.

Focusing on fresh flavors, simple methods, and a bit of fun, Emily shows home cooks how to elevate their daily cooking without fancy gadgets or complex steps.

Leave a Reply

Your email address will not be published. Required fields are marked *

Recipe rating 5 Stars 4 Stars 3 Stars 2 Stars 1 Star