Quick Golden Gooey Caramel Apple Cinnamon Rolls Recipe
Sweet aromas of cinnamon and caramel apple fill kitchens during autumn weekends.
These decadent caramel apple cinnamon rolls blend classic pastry comfort with seasonal warmth.
Soft, pillowy dough wraps around rich, spiced apple filling that melts in your mouth.
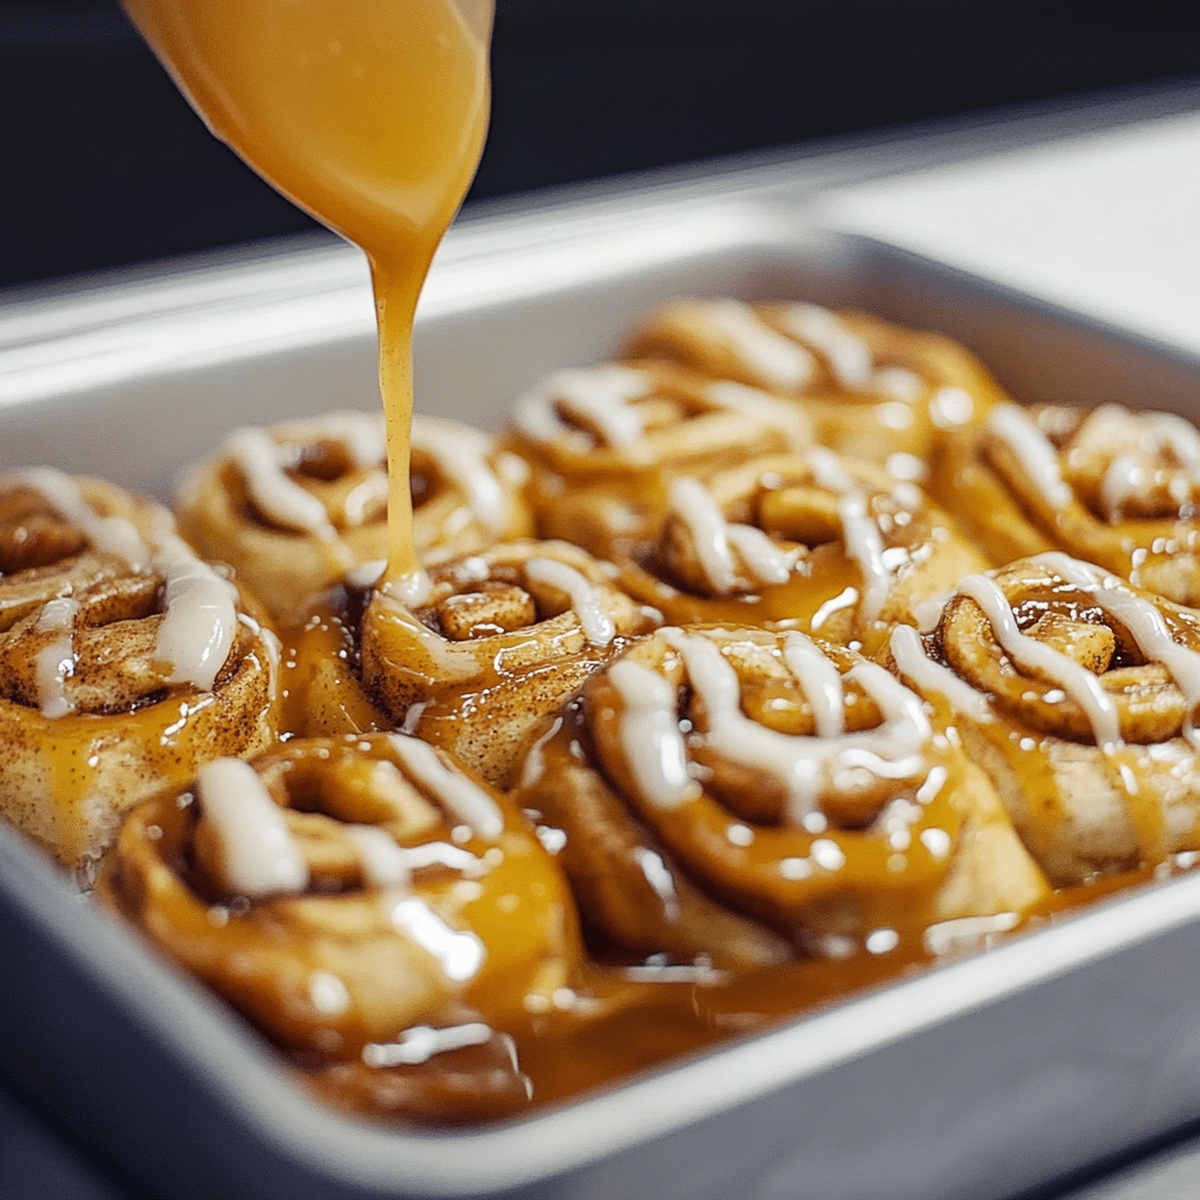
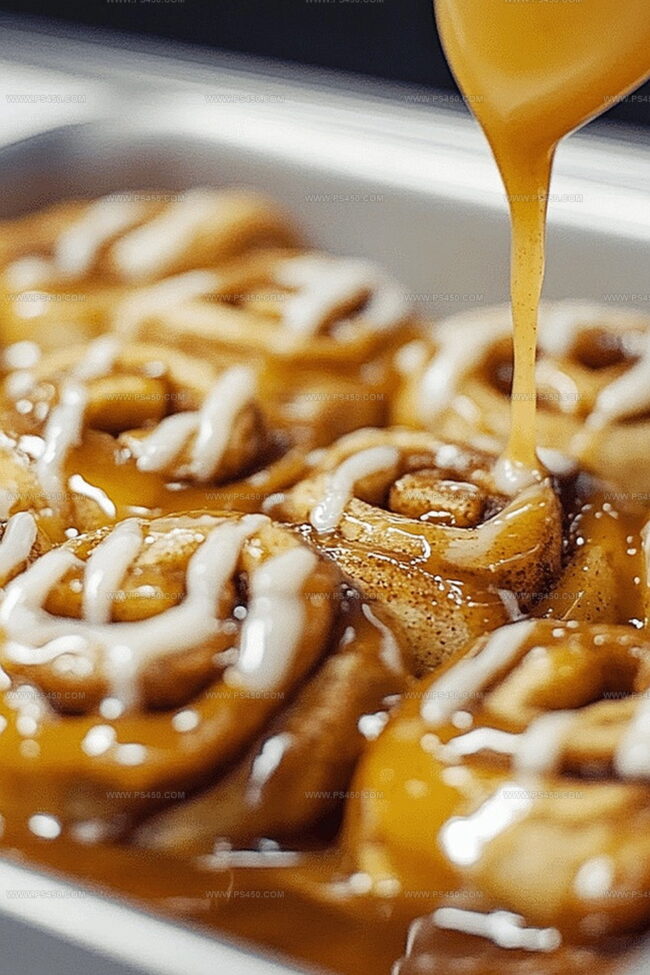
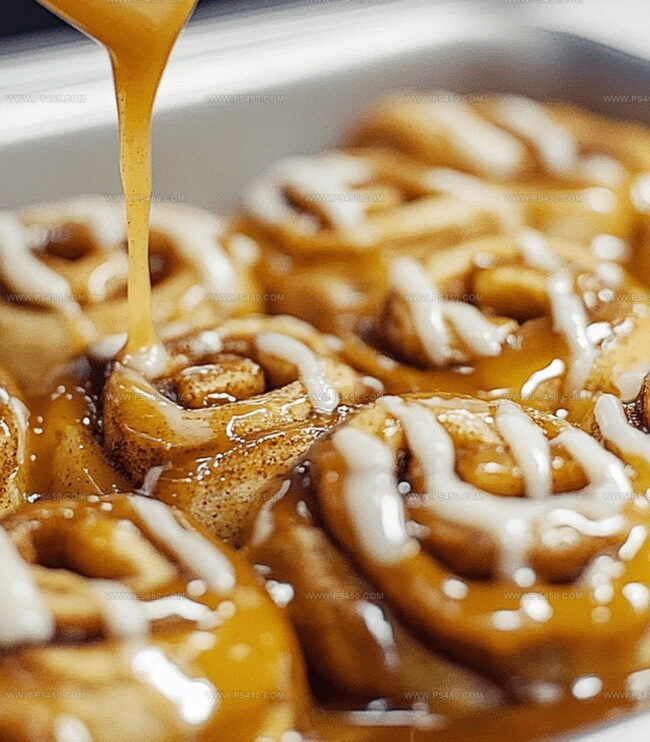
Generous drizzles of golden caramel cascade over each perfectly swirled roll, creating an irresistible treat.
Warm spices dance with sweet fruit, transforming a simple breakfast pastry into a memorable indulgence.
Every bite promises a delightful balance of tender dough, fragrant cinnamon, and luscious caramel.
Prepare to fall in love with this ultimate weekend morning companion that will have everyone asking for seconds.
Quick Recipe Overview
Caramel Apple Cinnamon Rolls: Ingredients Breakdown
For Dough Ingredients:For Filling Ingredients:For Glaze Ingredients:Tools for Making Caramel Apple Cinnamon Rolls
Making Caramel Apple Cinnamon Rolls: Full Directions
Mix warm milk with a touch of sugar and yeast. Let it bubble and foam for a few minutes until it looks alive and ready to work its.
Blend the frothy yeast with melted butter, sugar, vanilla, salt, and egg. Gradually fold in flour, kneading until you have a smooth, elastic dough that feels like a soft pillow. Let it rest and rise in a cozy spot until it doubles in size.
Melt butter in a pan and tumble in chopped apples. Sprinkle brown sugar and warming spices, stirring until apples turn tender and glossy. Pull off heat and splash in vanilla for extra depth.
Roll out the puffy dough into a wide rectangle. Brush with butter, then spread the apple mixture generously. Carefully roll the dough into a beautiful log, slicing into even spirals. Nestle these into a baking dish, giving them room to expand.
Slide the rolls into a preheated oven. Watch them transform into golden, puffy treasures in about 25-30 minutes. The kitchen will smell absolutely incredible.
Whip up a silky caramel sauce by melting butter, brown sugar, and cream. Let it bubble and thicken, then stir in vanilla. Pour this liquid gold over the warm rolls, letting it seep into every delicious crevice.
Pro Tips for Caramel Apple Cinnamon Rolls
Creative Ways to Serve Caramel Apple Cinnamon Rolls
Storing & Meal Planning for Caramel Apple Cinnamon Rolls
FAQs
Fresh diced apples are cooked with brown sugar, butter, cinnamon, and nutmeg, creating a rich, warm filling that infuses each roll with deep autumn flavors.
Yes! Granny Smith apples provide tartness, while Honeycrisp or Gala apples offer sweetness. Choose firm apples that hold their shape during cooking for the best texture.
Your yeast mixture should become frothy and bubbly within 5 minutes after mixing with warm milk. If it doesn’t foam, the yeast might be old or the liquid was too hot or cold, and you’ll need to start over.
Absolutely. Kneading develops gluten, which gives the cinnamon rolls their soft, tender texture. Knead for 5-7 minutes until the dough is smooth and elastic for the best results.
Print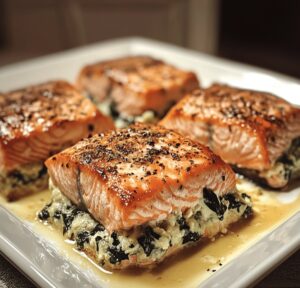
Stuffed Salmon Recipe
- Total Time: 35 minutes
- Yield: 4 1x
Description
Delightful Stuffed Salmon recipe brings Mediterranean flavors to your dinner table with creamy feta and spinach nestled inside perfectly baked fish. Fresh ingredients and simple techniques deliver an elegant meal you’ll savor from first bite to last.
Ingredients
Main Protein:
- 4 salmon fillets (6.8 ounces or 193 grams each), skinless and boneless
Stuffing Ingredients:
- 1 cup fresh spinach, chopped
- ⅓ cup cream cheese, softened
- ¼ cup grated Parmesan cheese
- ¼ cup shredded mozzarella cheese
- 1 clove garlic, minced
- ½ teaspoon onion powder
- Salt, to taste
- Black pepper, to taste
Seasoning and Cooking Ingredients:
- 1 tablespoon olive oil
- 1 teaspoon paprika
- 1 teaspoon garlic powder
- ½ teaspoon salt
- ¼ teaspoon black pepper
Instructions
- Meticulously prepare the culinary workspace by heating the oven to a precise 375F (190C), ensuring an even warming environment for the upcoming salmon transformation.
- Gently create a delicate pocket within each salmon fillet using a razor-sharp knife, taking care to maintain the structural integrity of the fish while allowing space for the luxurious filling.
- Massage the salmon exterior with fragrant olive oil, then lovingly dust with paprika, garlic powder, salt, and freshly ground black pepper to enhance its natural flavor profile.
- Craft a decadent filling by thoroughly blending spinach, velvety cream cheese, sharp Parmesan, melty mozzarella, aromatic minced garlic, subtle onion powder, and a whisper of seasoning until the mixture achieves a harmonious consistency.
- Carefully distribute the prepared filling into each salmon pocket, gently pressing to seal the delectable treasure within, ensuring an even distribution of ingredients.
- Nestle the stuffed fillets into a prepared baking vessel, allowing them to cuddle closely but not overlap.
- Slide the baking dish into the preheated oven, allowing the salmon to cook for approximately 18-22 minutes until it reaches a perfect flaky texture and achieves an internal temperature of 145F (63C).
- Once removed from the oven, permit the salmon to rest momentarily, allowing the flavors to settle and intensify.
- Present the golden-hued, cheese-laden salmon alongside complementary accompaniments such as vibrant roasted vegetables, fluffy rice, or a crisp, refreshing salad.
Notes
- Slice salmon pockets carefully to maintain fish integrity, preventing filling from leaking during cooking.
- Use room temperature cream cheese for smoother, easier mixing when preparing stuffing.
- Consider substituting dairy cheeses with plant-based alternatives for lactose-intolerant or vegan diets, using cashew or almond-based cream cheese.
- Pat salmon fillets dry before seasoning to enhance crispy exterior and better spice adherence during baking.
- Prep Time: 15 minutes
- Cook Time: 20 minutes
- Category: Dinner
- Method: Baking
- Cuisine: American
Nutrition
- Serving Size: 4
- Calories: 410
- Sugar: 2 g
- Sodium: 600 mg
- Fat: 28 g
- Saturated Fat: 10 g
- Unsaturated Fat: 18 g
- Trans Fat: 0 g
- Carbohydrates: 5 g
- Fiber: 1 g
- Protein: 34 g
- Cholesterol: 90 mg
John Nicholson
Lead Writer & Recipe Developer
Expertise
Recipe Testing and Development, Kitchen Hacks and Time-Saving Tips, Flavor Pairing and Ingredient Selection, Engaging Food Writing and Storytelling
Education
Johnson & Wales University
John Nicholson honed his skills at Johnson & Wales University, learning how to use fresh, local ingredients and down-to-earth techniques to make cooking simple and satisfying.
His recipes blend Southern comfort flavors with a modern touch, inviting everyone to cook with ease and confidence.
Living in Charleston, John takes cues from the city’s lively food scene, local markets, and seasonal produce. He’s all about making meals stress-free through easy tips, flavor pairings, and fun experiments in the kitchen