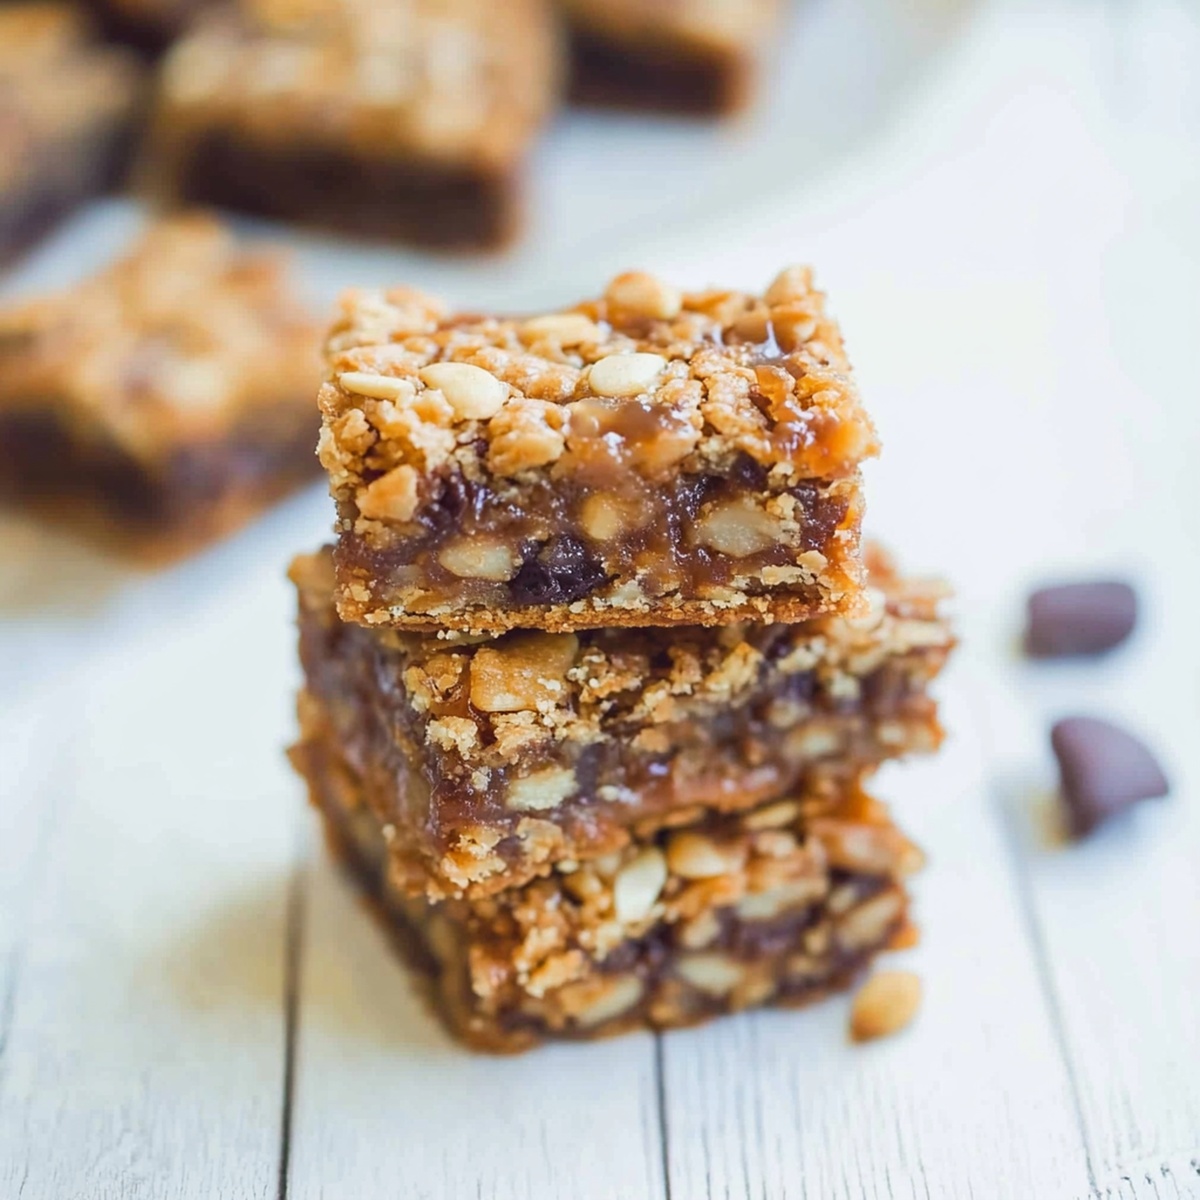
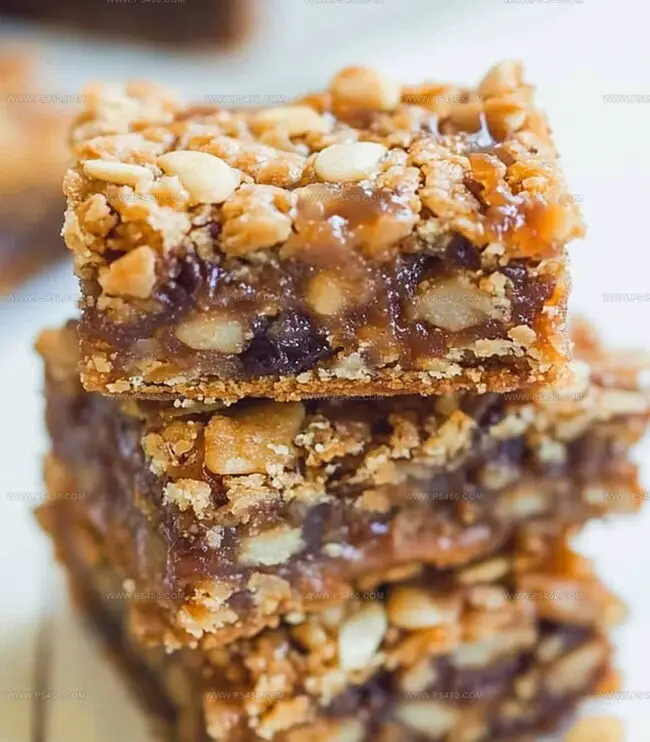
Sweet and Gooey Carmelitas Recipe for Cozy Nights
Chocolate and caramel dance together in this irresistible gooey carmelitas recipe that promises pure dessert bliss.
Layers of buttery oats, rich chocolate chips, and silky caramel create a decadent treat that melts in your mouth.
These bars deliver a symphonic experience of sweet and sticky textures that tantalize every taste bud.
Each bite combines the crunch of oatmeal with smooth chocolate and golden caramel swirls.
The recipe transforms simple ingredients into an indulgent dessert that feels like a warm hug.
Warm from the oven, these carmelitas beckon with their golden edges and gooey center.
Prepare to fall in love with the most addictive bar cookie you’ll ever taste.
Quick Recipe Overview

Carmelitas Ingredient Checklist
For Base Layer:For Filling Layer:For Topping Layer:Baking Tools For Carmelitas
How To Bake Carmelitas
Get your oven warmed up to 350F and grab an 8-inch baking dish. Line it with parchment paper or give it a quick spray of cooking oil.
Mash together melted butter, brown sugar, and vanilla until they become best friends. Toss in flour, oats, baking soda, and salt, mixing until you’ve got a deliciously thick and crumbly mixture.
Press half of your crumbly mixture into the bottom of the pan, creating a solid base for your treat. Pop it in the oven and bake for 10 minutes.
While the base is baking, create a silky caramel sauce by melting caramels with heavy cream in the microwave. Stir until smooth and dreamy.
Once the base comes out, sprinkle chocolate chips across the hot surface. Drizzle your luscious caramel sauce over the chips, spreading it gently.
Scatter the remaining crumbly mixture across the caramel layer, creating a rustic, tempting top.
Return the dish to the oven and bake for 15-18 minutes. You’re looking for a golden top with bubbly edges.
Let your creation cool completely for at least 2 hours. This helps the caramel set and makes cutting into bars a breeze.
Tips For Better Carmelitas
Creative Ways To Serve Carmelitas
Store & Save Carmelitas Right
Print
Gooey Carmelitas Recipe
- Total Time: 40 minutes
- Yield: 17 1x
Description
Irresistible caramelitas reveal layers of chocolate and caramel nestled between buttery oat crumbles. Midwest bakers cherish this sweet bar as a crowd-pleasing dessert you’ll crave again and again.
Ingredients
- 1 cup (227 g) unsalted butter, melted
- 1 cup (220 g) brown sugar, packed
- 1 ¼ cups (156 g) all-purpose flour
- 1 cup (90 g) old-fashioned oats
- 1 cup (170 g) semisweet chocolate chips
- 1 bag (11 oz/312 g) caramel bits or 30 soft caramels, unwrapped
- ¼ cup (60 ml) heavy cream
- 1 tsp vanilla extract
- ½ tsp baking soda
- ¼ tsp salt
Instructions
- Prep Station: Preheat oven to 350F and line a square baking pan with parchment paper, ensuring complete coverage for effortless removal.
- Base Construction: Combine melted butter, brown sugar, and vanilla into a smooth mixture, then fold in flour, oats, baking soda, and salt to create a crumbly texture.
- Initial Baking: Press half the oat mixture firmly into the prepared pan, creating an even foundation. Bake for 10 minutes until edges turn a light golden brown.
- Caramel Infusion: While crust bakes, melt caramels with heavy cream in a saucepan, stirring continuously until achieving a silky, uniform sauce.
- Layering Technique: Sprinkle chocolate chips across the warm crust, then pour the molten caramel evenly over the surface, ensuring complete coverage.
- Final Assembly: Gently distribute remaining oat mixture across the caramel layer, creating a rustic, textured topping.
- Final Bake: Return to oven and bake 15-18 minutes until the surface reaches a deep golden color and edges bubble with intensity.
- Cooling Ritual: Remove from oven and allow to cool completely for approximately two hours, enabling caramel to set and flavors to meld perfectly before cutting into indulgent squares.
Notes
- Prevent Sticky Situation: Generously grease or line the baking pan with parchment paper to ensure easy removal and prevent the caramel from clinging to the sides.
- Control Caramel Consistency: Melt caramels slowly and stir continuously to avoid burning, creating a smooth, glossy sauce that perfectly coats the layers.
- Manage Moisture Balance: Allow the base to cool completely before adding caramel and chocolate to prevent soggy layers and maintain a crisp, textured foundation.
- Customize Dietary Needs: Swap regular flour with gluten-free alternatives, use dairy-free chocolate chips, and substitute vegan caramel sauce to accommodate different dietary restrictions while preserving the dessert’s rich, indulgent character.
- Prep Time: 15 minutes
- Cook Time: 25 minutes
- Category: Desserts, Snacks
- Method: Baking
- Cuisine: American
Nutrition
- Serving Size: 17
- Calories: 290
- Sugar: 22 g
- Sodium: 90 mg
- Fat: 14 g
- Saturated Fat: 8 g
- Unsaturated Fat: 6 g
- Trans Fat: 0 g
- Carbohydrates: 36 g
- Fiber: 1 g
- Protein: 2 g
- Cholesterol: 30 mg
John Nicholson
Lead Writer & Recipe Developer
Expertise
Recipe Testing and Development, Kitchen Hacks and Time-Saving Tips, Flavor Pairing and Ingredient Selection, Engaging Food Writing and Storytelling
Education
Johnson & Wales University
John Nicholson honed his skills at Johnson & Wales University, learning how to use fresh, local ingredients and down-to-earth techniques to make cooking simple and satisfying.
His recipes blend Southern comfort flavors with a modern touch, inviting everyone to cook with ease and confidence.
Living in Charleston, John takes cues from the city’s lively food scene, local markets, and seasonal produce. He’s all about making meals stress-free through easy tips, flavor pairings, and fun experiments in the kitchen