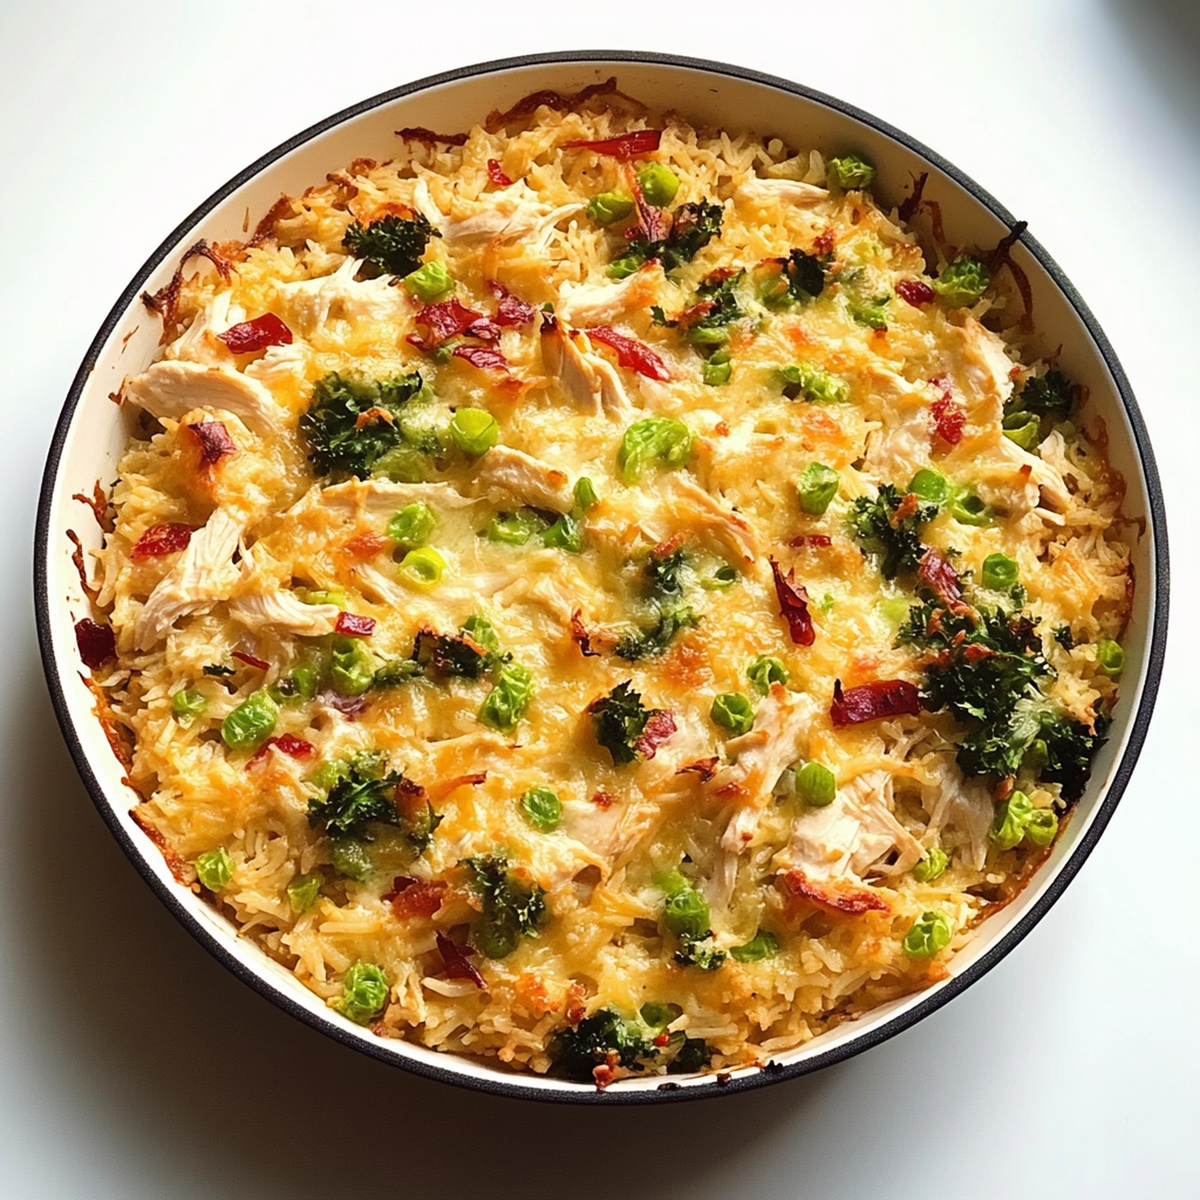
Comforting Chicken and Rice Casserole Recipe For Your Family
Comfort calls with this mouthwatering chicken and rice casserole that promises warmth in every single bite.
Tender chicken pieces nestled perfectly amid fluffy rice create a satisfying meal for any evening.
The aroma wafts through the kitchen, promising pure deliciousness.
Creamy and rich, this casserole combines simple ingredients into something extraordinary.
Weeknight dinners become special with this classic one-dish wonder.
Each forkful brings layers of flavor that speak directly to your soul.
You’ll want seconds before the first plate is even finished.
Quick Recipe Overview

Cozy Ingredients For Chicken And Rice Casserole
For Base Mixture:For Seasoning:For Main Components:For Optional Garnish:Essential Tools For Chicken And Rice Casserole Success
Simple Steps To Cook Chicken And Rice Casserole

Warm up the oven to a cozy 350F and give your baking dish a quick spray of cooking oil to prevent sticking.
Grab a big mixing bowl and whisk together cream of chicken soup, cream of mushroom soup, chicken broth, sour cream, and your favorite seasonings into a smooth, delicious blend.
Stir uncooked rice into your creamy mixture, then pour everything evenly into the prepared baking dish.
Gently place raw chicken pieces on top of the rice mixture, giving them a light sprinkle of salt, pepper, and paprika for extra flavor.
Seal the dish tightly with foil and slide it into the oven. Let it bake for about an hour until the rice turns tender and chicken reaches a safe internal temperature.
Pull back the foil, scatter some cheese on top if you’re feeling indulgent, and bake for another few minutes until the cheese melts into golden goodness.
Allow the casserole to sit for a quick 5 minutes, then dish out this comforting meal. A sprinkle of fresh parsley makes it look extra special.
Easy Tips To Improve Chicken And Rice Casserole
Serving Chicken And Rice Casserole With Comfort
Keep Chicken And Rice Casserole Fresh And Tasty
Print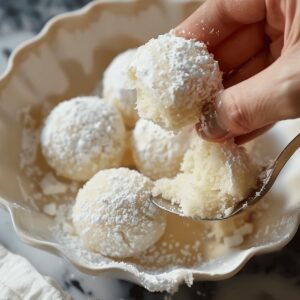
Fluffy Sweetened Condensed Milk Snowball Cookies Recipe
- Total Time: 25 minutes
- Yield: 25 1x
Description
Mexican Wedding Cookies with sweetened condensed milk offer a delightful twist on classic holiday treats. Buttery, nutty, and rolled in powdered sugar, these melt-in-your-mouth morsels will transport you to festive comfort.
Ingredients
- 1 cup (230 g) unsalted butter, softened
- 2 cups (250 g) all-purpose flour
- 1 cup (100 g) finely chopped pecans or walnuts
- ½ cup (120 ml) sweetened condensed milk
- 1 cup (120 g) powdered sugar, for coating
- 1 tsp vanilla extract
- ¼ tsp salt
Instructions
- Prepare Dough: Cream butter until fluffy, then seamlessly blend sweetened condensed milk and vanilla extract to create a silky, uniform mixture.
- Incorporate Dry Ingredients: Gently fold flour, salt, and chopped nuts into the wet ingredients, ensuring a consistent and tender dough texture.
- Chill Mixture: Encase dough in plastic wrap and refrigerate for 30 minutes to firm up and enhance flavor melding.
- Preheat and Prepare: Warm oven to 350F (175C) and line baking sheet with parchment paper, creating an ideal baking surface.
- Shape Cookies: Roll chilled dough into precise one-inch spheres, arranging them with strategic spacing on the prepared baking sheet.
- Bake and Transform: Bake cookies 12-15 minutes until golden underneath while maintaining a pale top, allowing subtle caramelization without overcooking.
- First Sugar Coating: Immediately after removing from oven, delicately roll warm cookies in powdered sugar, creating an initial lustrous layer.
- Final Presentation: Once completely cooled, perform a second powdered sugar dusting, resulting in a ethereal, snow-like finish that elevates both appearance and taste.
Notes
Chill Dough Thoroughly: Refrigerate for at least 30 minutes to prevent spreading and maintain the cookies’ perfect spherical shape during baking.
Control Sugar Coating: Dust cookies while warm for initial light coating, then repeat when completely cooled for a thick, elegant snow-like appearance.
Nut Variation: Substitute pecans, walnuts, or almonds based on preference, ensuring uniform chopping for consistent texture and even distribution.
Storage Strategy: Store in single layers between parchment paper to preserve delicate powdered sugar coating and prevent cookies from sticking together.
- Prep Time: 10 minutes
- Cook Time: 15 minutes
- Category: Desserts, Snacks
- Method: Baking
- Cuisine: American
Nutrition
- Serving Size: 25
- Calories: 178
- Sugar: 8 g
- Sodium: 20 mg
- Fat: 13 g
- Saturated Fat: 8 g
- Unsaturated Fat: 4 g
- Trans Fat: 0 g
- Carbohydrates: 16 g
- Fiber: 1 g
- Protein: 2 g
- Cholesterol: 30 mg
John Nicholson
Lead Writer & Recipe Developer
Expertise
Recipe Testing and Development, Kitchen Hacks and Time-Saving Tips, Flavor Pairing and Ingredient Selection, Engaging Food Writing and Storytelling
Education
Johnson & Wales University
John Nicholson honed his skills at Johnson & Wales University, learning how to use fresh, local ingredients and down-to-earth techniques to make cooking simple and satisfying.
His recipes blend Southern comfort flavors with a modern touch, inviting everyone to cook with ease and confidence.
Living in Charleston, John takes cues from the city’s lively food scene, local markets, and seasonal produce. He’s all about making meals stress-free through easy tips, flavor pairings, and fun experiments in the kitchen