
Impressive Jello Easter Eggs Recipe: A Colorful Spring Treat
Crafting colorful jello easter eggs brings back childhood memories of springtime celebrations.
My grandmother’s creative kitchen always sparkled with festive magic during holiday preparations.
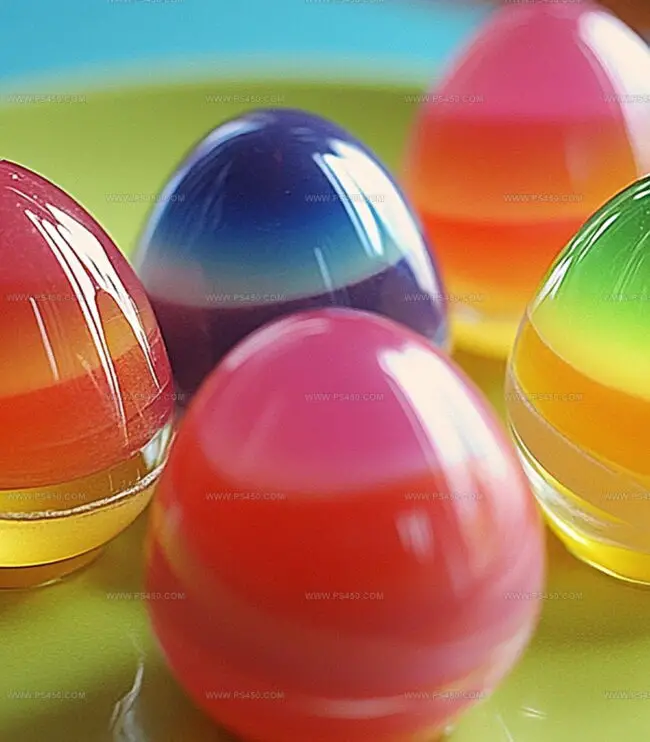
Kids absolutely adore these wiggly, vibrant treats that shimmer like jewels.
Plastic egg molds become the secret weapon for making these delightful desserts.
Each pastel-hued creation looks like a edible work of art waiting to surprise and delight.
Silky smooth and incredibly fun, these jello eggs will become your new favorite seasonal treat.
You can easily master this playful recipe with just a few simple ingredients and some imagination.
Let’s transform ordinary jello into extraordinary Easter magic that will make everyone smile.
Why Jello Easter Eggs Are A Colorful Treat Kids Love

Ingredients You’ll Need For Jello Easter Eggs
Mold Preparation:Main Ingredients:Optional Flavor Enhancers:How To Make Jello Easter Eggs Step By Step
Step 1: Prepare Mold Magic
Grab your special egg molds – whether they’re official Jello molds or playful plastic Easter eggs. Generously spray the inside surfaces with cooking spray. This secret trick helps the Jello slide out smoothly later. For plastic eggs, make sure there’s a decent-sized hole for filling. Place the molds standing upright on a sturdy tray to prevent any accidental spills.
Step 2: Mix Vibrant Gelatin
Boil some water and grab your favorite Jello flavor. Pour boiling water into a mixing bowl:Whisk like a pro for about three minutes. You want every single crystal to dissolve completely, creating a silky smooth liquid that’s bursting with color and flavor.
Step 3: Fill With Precision
Grab a measuring cup or food syringe for super clean pouring. Carefully fill each egg mold:Avoid overflow to keep your eggs looking perfect!
Step 4: Chill and Transform
Slide your mold tray into the refrigerator. Let the Jello set for a minimum of three hours. The waiting is the hardest part, but patience rewards you with beautiful, jiggly Easter eggs that’ll make everyone smile.
Step 5: Reveal Your Masterpiece
Once fully set, gently open the molds. If using plastic eggs, carefully separate the halves. Your colorful Jello eggs are ready to delight and surprise!
Tips For Firm, Bright Jello Easter Eggs
Here are the Helpful Tips for Jello Easter Eggs:How To Store Jello Easter Eggs Without Breaking Them
What To Serve With Jello Easter Eggs
Creative Variations For Jello Easter Eggs
FAQs About Jello Easter Eggs
Here are the FAQs for Jello Easter Eggs:
Absolutely! Kids can help mix the gelatin, pour the mixture, and watch the eggs set. Just supervise them around boiling water and ensure they handle the molds carefully.
Pour the gelatin slowly and at an angle, tapping the mold gently to release any trapped air. Using a small spoon or syringe can help control the pouring and minimize bubbles.
Ensure you use the exact amount of boiling water specified in the recipe. Cold water or incorrect measurements can prevent the Jello from setting correctly. Always stir until the powder completely dissolves.
Yes! They’re made with standard food-safe ingredients. Just clean your molds thoroughly before use and handle them with clean hands to maintain food safety standards.
Print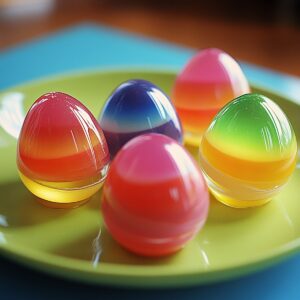
Jello Easter Eggs Recipe
- Total Time: 3 hours 10 minutes
- Yield: 12 1x
Description
Colorful Jello Easter Eggs bring springtime cheer to family gatherings with their playful, whimsical design. Smooth gelatin molds create delightful pastel treats that delight kids and adults alike during holiday celebrations.
Ingredients
Main Ingredients:
- 1 (6 ounces / 170 grams) package of JELL-O gelatin, any flavor
- 1.5 cups (360 milliliters) boiling water
Preparation Ingredients:
- Cooking spray
Instructions
- Prepare the egg-shaped containers by lightly coating the interior surfaces with a thin layer of non-stick cooking spray, ensuring smooth release after setting. Select either specialized gelatin molds or clean plastic egg shells with sufficiently wide openings for filling.
- Heat water to a rolling boil, then carefully measure the precise amount required for complete gelatin dissolution. Pour the hot liquid directly over the powdered gelatin, whisking consistently until no granular remnants remain and a smooth, translucent mixture emerges.
- Utilize a precision pouring tool like a measuring cup with a narrow spout or a sterile culinary syringe to transfer the liquid gelatin into each mold cavity. Fill each container to the brim, maintaining a steady hand to prevent spillage and ensure uniform egg shapes.
- Transfer the filled molds to the refrigerator’s coldest section, positioning them upright to maintain structural integrity. Allow the gelatin to solidify completely, which typically requires approximately three hours of uninterrupted chilling time.
- Once fully set, gently separate the mold halves or carefully extract the gelatin eggs from plastic shells. Inspect each egg for smooth surfaces and intact form before presenting or serving these festive, vibrant treats.
Notes
- Prevent Sticky Situations by generously coating molds with cooking spray, ensuring a smooth and easy egg release without tearing.
- Create Vibrant Color Variations by mixing different JELL-O flavors or adding a few drops of food coloring to customize your Easter eggs for a more personalized treat.
- Experiment with Filling Techniques using a small squeeze bottle or medicine dropper for precise and mess-free gelatin pouring, especially when working with intricate molds.
- Transform Into Dietary-Friendly Treats by substituting regular JELL-O with sugar-free options or using agar-agar for a vegetarian-friendly version that still delivers fun and festive results.
- Prep Time: 10 minutes
- Cook Time: 3 hours
- Category: Desserts, Snacks
- Method: Mixing
- Cuisine: American
Nutrition
- Serving Size: 12
- Calories: 60
- Sugar: 14 g
- Sodium: 0 mg
- Fat: 0 g
- Saturated Fat: 0 g
- Unsaturated Fat: 0 g
- Trans Fat: 0 g
- Carbohydrates: 15 g
- Fiber: 0 g
- Protein: 1 g
- Cholesterol: 0 mg
Emily Morgan
Food Critic & Kitchen Tips Specialist
Expertise
Global Food Exploration & Critique, Simple Kitchen Hacks & Time-Saving Tips, Presentation & Plating Techniques, Culinary Research & Storytelling.
Education
New York University
Emily Morgan has journeyed across the globe, collecting culinary secrets that turn everyday ingredients into impressive meals.
Based in Seattle and armed with a Journalism degree from NYU, she blends thorough research with a flair for presentation, ensuring every dish looks just as good as it tastes.
Focusing on fresh flavors, simple methods, and a bit of fun, Emily shows home cooks how to elevate their daily cooking without fancy gadgets or complex steps.