Spooky Midnight Black Velvet Halloween Cake Recipe for Fun
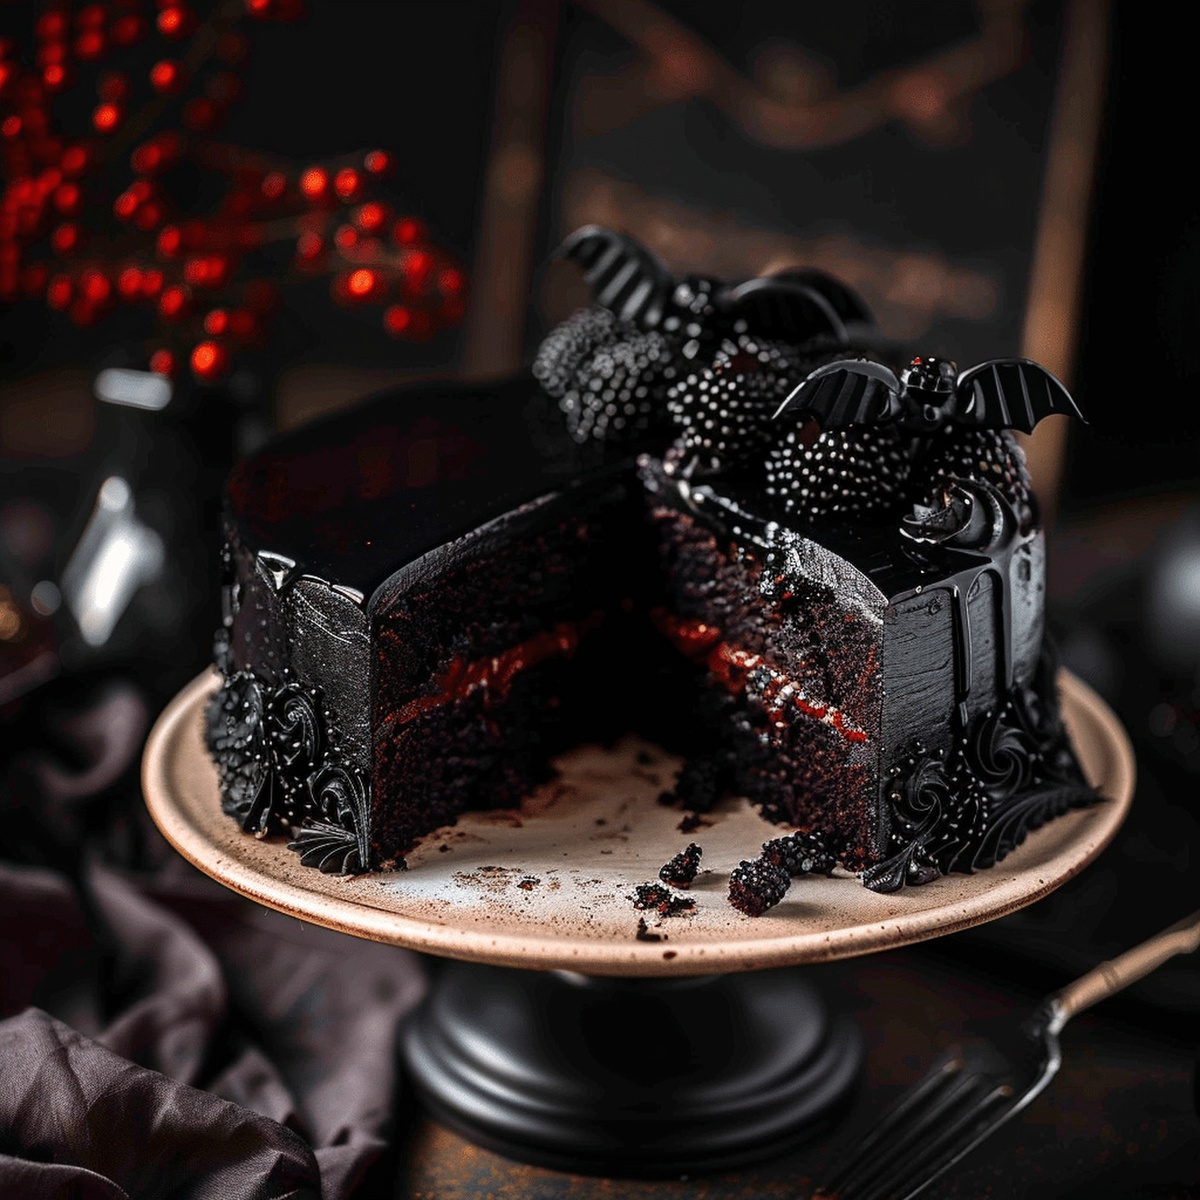
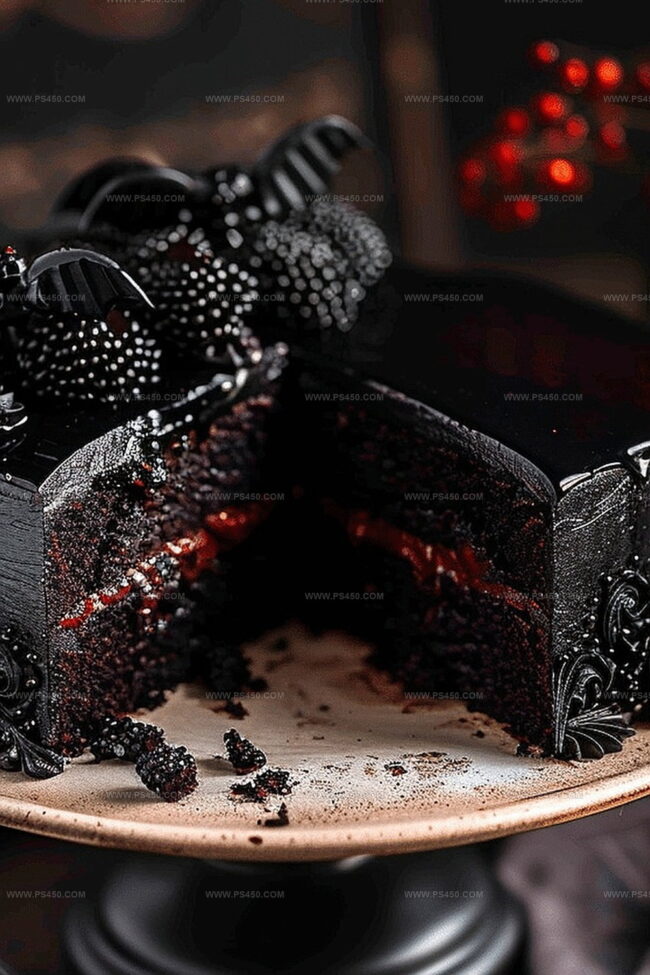
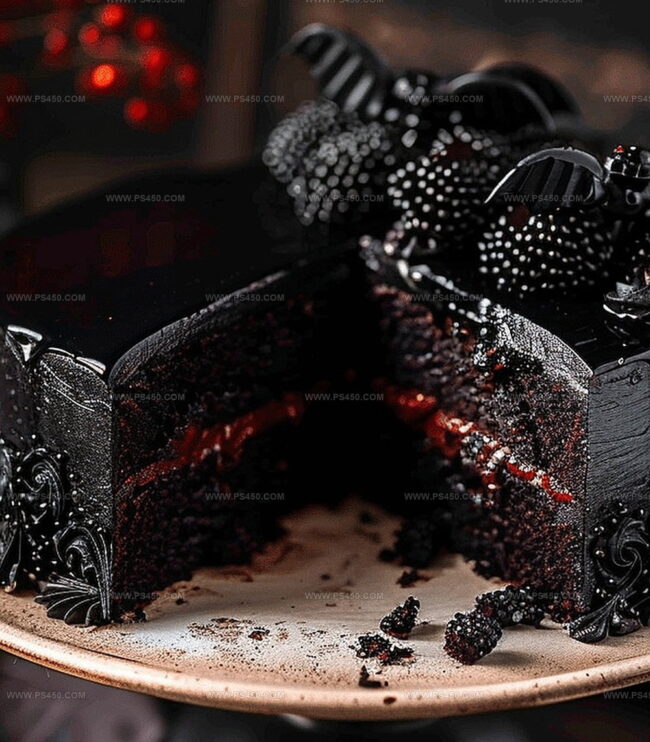
Darkness falls, and a decadent midnight black velvet Halloween cake emerges as the ultimate showstopper for your spooky celebration.
Deep, rich cocoa blends with mysterious midnight-black coloring to create a haunting dessert that captivates every eye.
Rich buttercream frosting swirls across the dark canvas like ghostly whispers.
Layers of intense chocolate flavor complement the dramatic presentation.
Each slice promises a delightful balance between sweet indulgence and Halloween drama.
Bold bakers will love how this stunning cake transforms an ordinary dessert into an extraordinary centerpiece.
Prepare to bewitch your guests with this sinfully delicious Halloween treat.
Quick Recipe Overview
Halloween Cake Ingredients for That Velvet Look
For Dry Ingredients:For Wet Ingredients:For Decorative and Frosting Ingredients:Kitchen Tools for Spooky Cake Layers
How to Make a Black Velvet Halloween Cake
Get your oven hot and ready at 350F. Grab your cake pans and coat them with a quick spray of cooking oil and line with parchment paper.
Toss all dry ingredients into a big bowl and give them a good stir. In another bowl, whisk together the wet ingredients until they’re smooth and silky. Pour the wet mixture into the dry ingredients and blend until everything looks perfectly combined. Add hot water and mix until the batter looks like midnight. Drop in black food coloring until the batter looks seriously dark.
Pour the inky batter evenly into your prepared pans. Slide them into the hot oven and bake for about 25-30 minutes. Check if they’re done by poking a toothpick in the center – it should come out clean. Let the cakes cool down in their pans for a few minutes, then transfer to a cooling rack.
Beat the butter until it’s super creamy. Slowly add powdered sugar and cocoa, mixing thoroughly. Pour in cream and vanilla, then add black food coloring. Whip until the frosting looks thick and fluffy like a Halloween cloud.
Place the first cake layer on your serving plate. Spread a generous layer of frosting. Add the next layers, spreading frosting between each. Cover the entire cake with the remaining dark frosting.
Go wild with Halloween sprinkles, candy eyes, and spooky piping to make your cake look wickedly awesome.
Cut into this sinister sweet and watch everyone’s eyes go wide!
Decorating and Flavor Tips for Halloween Cake
Present Your Cake with Seasonal Fun
How to Store Black Velvet Cake Without Losing Softness
FAQs
No, gel food coloring provides a deeper, more intense black color without changing the cake’s consistency. Regular liquid food coloring might make the batter too runny and won’t achieve the same dark look.
Black cocoa powder isn’t mandatory but helps create a deeper black color and richer chocolate flavor. If unavailable, you can use regular cocoa powder, though the color will be less intense.
Use room temperature ingredients, don’t overmix the batter, and be careful not to overbake. Check the cake at 25 minutes and remove from the oven as soon as a toothpick comes out clean to maintain moisture.
Yes, you can bake the cake layers up to 2 days ahead and store them wrapped in plastic at room temperature. The frosting can be prepared a day before assembling the cake.
Print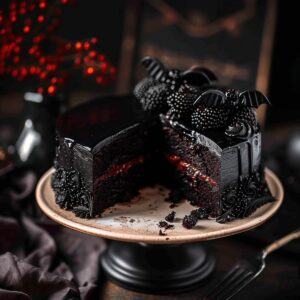
Midnight Black Velvet Halloween Cake Recipe
- Total Time: 50 minutes
- Yield: 13 1x
Description
Black velvet cake celebrates Halloween’s mysterious spirit with dark chocolate and deep cocoa layers. Creamy cream cheese frosting and eerie garnishes complete this spellbinding dessert you’ll want to share with fellow Halloween enthusiasts.
Ingredients
- 1 ½ cups (300 g) granulated sugar
- 2 ½ cups (310 g) all-purpose flour
- ½ cup (50 g) unsweetened cocoa powder
- 1 tsp baking soda
- 1 tsp baking powder
- ½ tsp salt
- 2 large eggs, room temperature
- 1 cup (240 ml / 8 fl oz) buttermilk, room temperature
- 1 cup (240 ml / 8 fl oz) vegetable oil
- 1 cup (240 ml / 8 fl oz) hot water
- 2 tsps vanilla extract
- Black gel food coloring
- 1 ½ cups (340 g) unsalted butter, softened
- 5 cups (600 g) powdered sugar
- ½ cup (50 g) unsweetened cocoa powder
- ½ cup (120 ml / 4 fl oz) heavy cream or milk
- 2 tsps vanilla extract
- Black gel food coloring
- Halloween sprinkles
- Candy eyes
- Black food coloring gel for piping
- Orange food coloring gel for piping
Instructions
- Preparation Ritual: Ignite the oven to 350F (175C). Meticulously line three 8-inch round cake pans with grease and parchment paper for effortless cake extraction.
- Dry Ingredient Symphony: Sift flour, cocoa powder, sugar, baking soda, baking powder, and salt into a spacious mixing bowl, ensuring uniform distribution.
- Liquid Fusion: Whisk buttermilk, vegetable oil, eggs, and vanilla extract in a separate container until seamlessly blended.
- BatterAlchemy: Gradually unite wet and dry mixtures, stirring until a silky consistency emerges. Introduce hot water, continuing to mix until the batter transforms into a smooth elixir.
- Spectral Coloration: Infuse black gel food coloring, transforming the batter into a profound, midnight-like hue.
- Pan Deployment: Evenly distribute the mysterious batter across prepared cake pans, ensuring balanced volume and mystical potential.
- Baking Incantation: Bake layers for 25-30 minutes, verifying doneness through a clean toothpick test. Allow cakes to rest in pans for 10 minutes before transferring to wire cooling racks.
- Buttercream Conjuring: Whip softened butter until creamy, gradually incorporating powdered sugar and cocoa powder to create a velvety frosting foundation.
- Frosting Enchantment: Enhance buttercream with heavy cream, vanilla extract, and black gel food coloring, beating until achieving a ethereal, fluffy consistency.
- Architectural Assembly: Position first cake layer on serving plate, layering buttercream between each subsequent tier. Enrobe the entire cake in black buttercream, crafting a smooth, dramatic exterior.
- Ghoulish Garnishing: Adorn with Halloween-themed decorations – sprinkles, candy eyes, and intricate piping – to complete this spine-chilling culinary masterpiece.
Notes
- Precise Color Control: Use gel food coloring sparingly to achieve deep black without altering cake texture or taste. Start with small amounts and gradually increase for intense color.
- Temperature Precision: Allow ingredients like eggs and buttermilk to reach room temperature before mixing, ensuring smoother batter and more consistent cake texture.
- Moisture Management: Do not overmix batter, which can lead to dense, tough cake. Stir just until ingredients combine to maintain light, tender crumb.
- Decoration Flexibility: For gluten-free version, substitute all-purpose flour with gluten-free blend and add xanthan gum for proper structural integrity.
- Prep Time: 20 minutes
- Cook Time: 30 minutes
- Category: Desserts, Snacks
- Method: Baking
- Cuisine: American
Nutrition
- Serving Size: 13
- Calories: 500
- Sugar: 60 g
- Sodium: 300 mg
- Fat: 28 g
- Saturated Fat: 10 g
- Unsaturated Fat: 18 g
- Trans Fat: 0 g
- Carbohydrates: 63 g
- Fiber: 2 g
- Protein: 5 g
- Cholesterol: 50 mg
John Nicholson
Lead Writer & Recipe Developer
Expertise
Recipe Testing and Development, Kitchen Hacks and Time-Saving Tips, Flavor Pairing and Ingredient Selection, Engaging Food Writing and Storytelling
Education
Johnson & Wales University
John Nicholson honed his skills at Johnson & Wales University, learning how to use fresh, local ingredients and down-to-earth techniques to make cooking simple and satisfying.
His recipes blend Southern comfort flavors with a modern touch, inviting everyone to cook with ease and confidence.
Living in Charleston, John takes cues from the city’s lively food scene, local markets, and seasonal produce. He’s all about making meals stress-free through easy tips, flavor pairings, and fun experiments in the kitchen