
Mini Cherry Pies Recipe That’s Quick and Easy
Sweet memories often bloom around these delightful mini cherry pies that capture childhood nostalgia in every adorable bite.
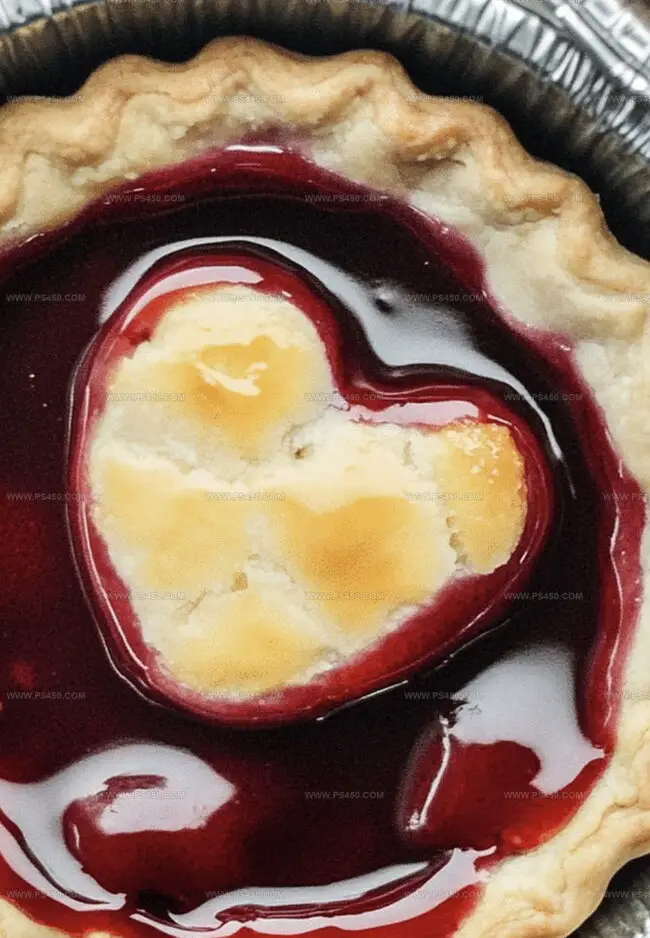
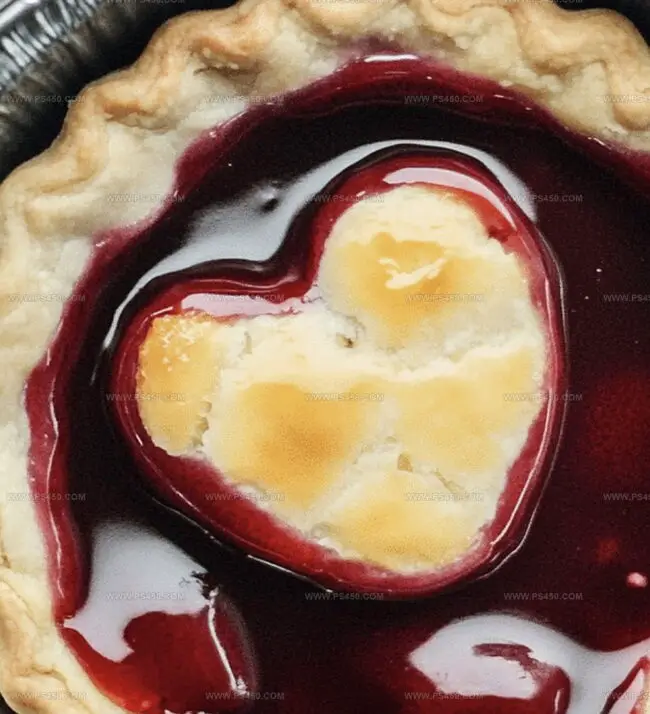
Tiny pastry shells cradle rich crimson fruit with delicate precision.
Baking these miniature treats feels like crafting edible art that fits perfectly in your palm.
Homemade desserts always carry a special magic that store-bought versions simply cannot match.
Each compact pie promises intense cherry flavor and buttery, flaky crust that melts effortlessly on your tongue.
Careful ingredients and simple techniques transform basic components into something truly spectacular.
Let these charming mini pies become the star of your next gathering.
Why Mini Cherry Pie Is Always A Treat
Things You’ll Need For Mini Cherry Pie
Pie Crust Ingredients:Butter and Fat:Liquid Ingredient:Steps To Bake Mini Cherry Pie
Step 1: Craft the Buttery Pie Crust
In a spacious mixing bowl, combine flour and salt, whisking them together until well blended. Introduce cold, diced butter to the flour mixture. Using a pastry cutter or nimble fingers, work the butter into the dry ingredients. Continue blending until the mixture transforms into a texture resembling rough, coarse crumbs. Slowly drizzle in ice-cold water, adding one tablespoon at a time. Gently mix and press the dough until it starts to stick together and form a cohesive mass. Shape the dough into a smooth, round disk. Wrap the disk snugly in plastic wrap and tuck it into the refrigerator. Let the dough chill and rest for a minimum of 30 minutes, allowing the ingredients to meld and the butter to firm up.
Step 2: Prepare the Fruity Filling
Gather your cherry ingredients:Wash the cherries thoroughly. Pit each cherry, removing the stems and seeds. Slice the cherries into delicate, bite-sized pieces. In a mixing bowl, combine the cherry pieces with sugar, cornstarch, a splash of lemon juice, and a hint of vanilla extract. Stir gently to ensure every cherry is coated with the sweet, thickening mixture.
Step 3: Shape the Mini Pies
Preheat the oven to a toasty 375°F. Remove the chilled dough from the refrigerator. On a lightly floured surface, roll out the dough to a smooth, even thickness. Use a round cookie cutter or glass to cut perfect circles for your mini pie crusts. Carefully transfer the dough circles to a muffin tin, gently pressing them into the cups. Spoon the cherry filling into each pie crust, leaving a small space at the top to prevent overflow.
Step 4: Bake to Golden Perfection
Place the muffin tin in the preheated oven. Bake the mini cherry pies for approximately 20-25 minutes. Watch for the crust to turn a beautiful golden brown and the cherry filling to bubble with delicious intensity. Once baked, remove from the oven and let the pies cool in the tin for a few minutes. Carefully transfer to a wire rack to cool completely. Serve warm or at room temperature, perhaps with a scoop of vanilla ice cream for an extra treat.
Helpful Hints For Mini Cherry Pie
How To Store Mini Cherry Pie The Simple Way
Best Matches With Mini Cherry Pie
Mini Cherry Pie Variations You’ll Enjoy
Mini Cherry Pie Questions Answered Simply
The key is keeping your butter cold and handling the dough minimally. Cold butter creates steam pockets during baking, which results in those delicate, tender layers we all love in a perfect pie crust.
Absolutely! You can prepare the dough and refrigerate it up to 2 days in advance. This actually helps the gluten relax and makes the crust more tender. Just wrap it tightly in plastic wrap to prevent drying out.
Cold water helps keep the butter from melting, which is crucial for creating a flaky texture. The chilled water ensures your butter stays solid and creates those beautiful, delicate layers when baked.
Add ice water very gradually, just one tablespoon at a time. Mix gently after each addition. The dough should just come together without being wet or sticky. Overworking can make the crust tough, so stop mixing as soon as it forms a cohesive disk.
Print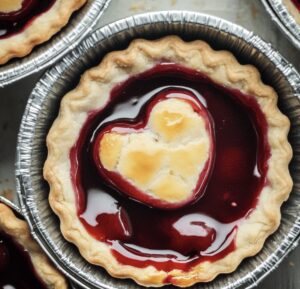
Mini Cherry Pie Recipe
- Total Time: 1 hour 5 minutes
- Yield: 8 1x
Description
Sweet cherry goodness nestles perfectly inside delicate mini cherry pie pastry, promising a delightful dessert that captures homemade comfort. Buttery crust and luscious filling make these individual treats irresistible for weekend baking or special gatherings.
Ingredients
Main Ingredients (Pie Filling):
- 2 cups (300g) pitted cherries
- ¼ cup (50g) granulated sugar
- 1 tablespoon cornstarch
Pie Crust Ingredients:
- 1 ¼ cups (155g) all-purpose flour
- ½ cup (115g) unsalted butter, cold and diced
- ½ teaspoon salt
- 34 tablespoons ice water
Flavor Enhancers and Finishing Ingredients:
- ½ teaspoon vanilla extract
- ¼ teaspoon almond extract
- 1 egg, beaten
- Coarse sugar
Instructions
- Combine flour and salt in a spacious mixing vessel, creating a foundation for the delicate pastry crust.
- Incorporate chilled butter into the dry ingredients, methodically working it through with fingertips or a specialized pastry tool until the mixture transforms into a texture reminiscent of rough, uneven sand.
- Introduce icy water incrementally, gently folding and pressing the ingredients until a cohesive dough emerges, avoiding overworking the delicate mixture.
- Shape the pastry into a compact disk, ensuring smooth edges and an even thickness.
- Encase the dough completely in transparent film, creating a protective barrier that prevents moisture loss.
- Allow the wrapped pastry to rest and chill in the refrigerator, permitting the gluten to relax and butter to solidify, which will ultimately result in a more tender and flaky crust.
Notes
- Chill butter thoroughly before cutting to ensure the flakiest, most tender pie crust possible.
- Use a light touch when mixing the dough to prevent developing gluten, which can make the crust tough and chewy.
- Keep ingredients and work surface cold to maintain the butter’s integrity, creating those coveted delicate, layered textures in the crust.
- For a vegan version, swap butter with cold coconut oil or plant-based shortening, maintaining the same cutting and mixing technique.
- Prep Time: 25 minutes
- Cook Time: 40 minutes
- Category: Desserts, Snacks
- Method: Mixing
- Cuisine: American
Nutrition
- Serving Size: 8
- Calories: 211
- Sugar: 8 g
- Sodium: 73 mg
- Fat: 10 g
- Saturated Fat: 6 g
- Unsaturated Fat: 4 g
- Trans Fat: 0 g
- Carbohydrates: 29 g
- Fiber: 1 g
- Protein: 2 g
- Cholesterol: 31 mg
Emily Morgan
Food Critic & Kitchen Tips Specialist
Expertise
Global Food Exploration & Critique, Simple Kitchen Hacks & Time-Saving Tips, Presentation & Plating Techniques, Culinary Research & Storytelling.
Education
New York University
Emily Morgan has journeyed across the globe, collecting culinary secrets that turn everyday ingredients into impressive meals.
Based in Seattle and armed with a Journalism degree from NYU, she blends thorough research with a flair for presentation, ensuring every dish looks just as good as it tastes.
Focusing on fresh flavors, simple methods, and a bit of fun, Emily shows home cooks how to elevate their daily cooking without fancy gadgets or complex steps.