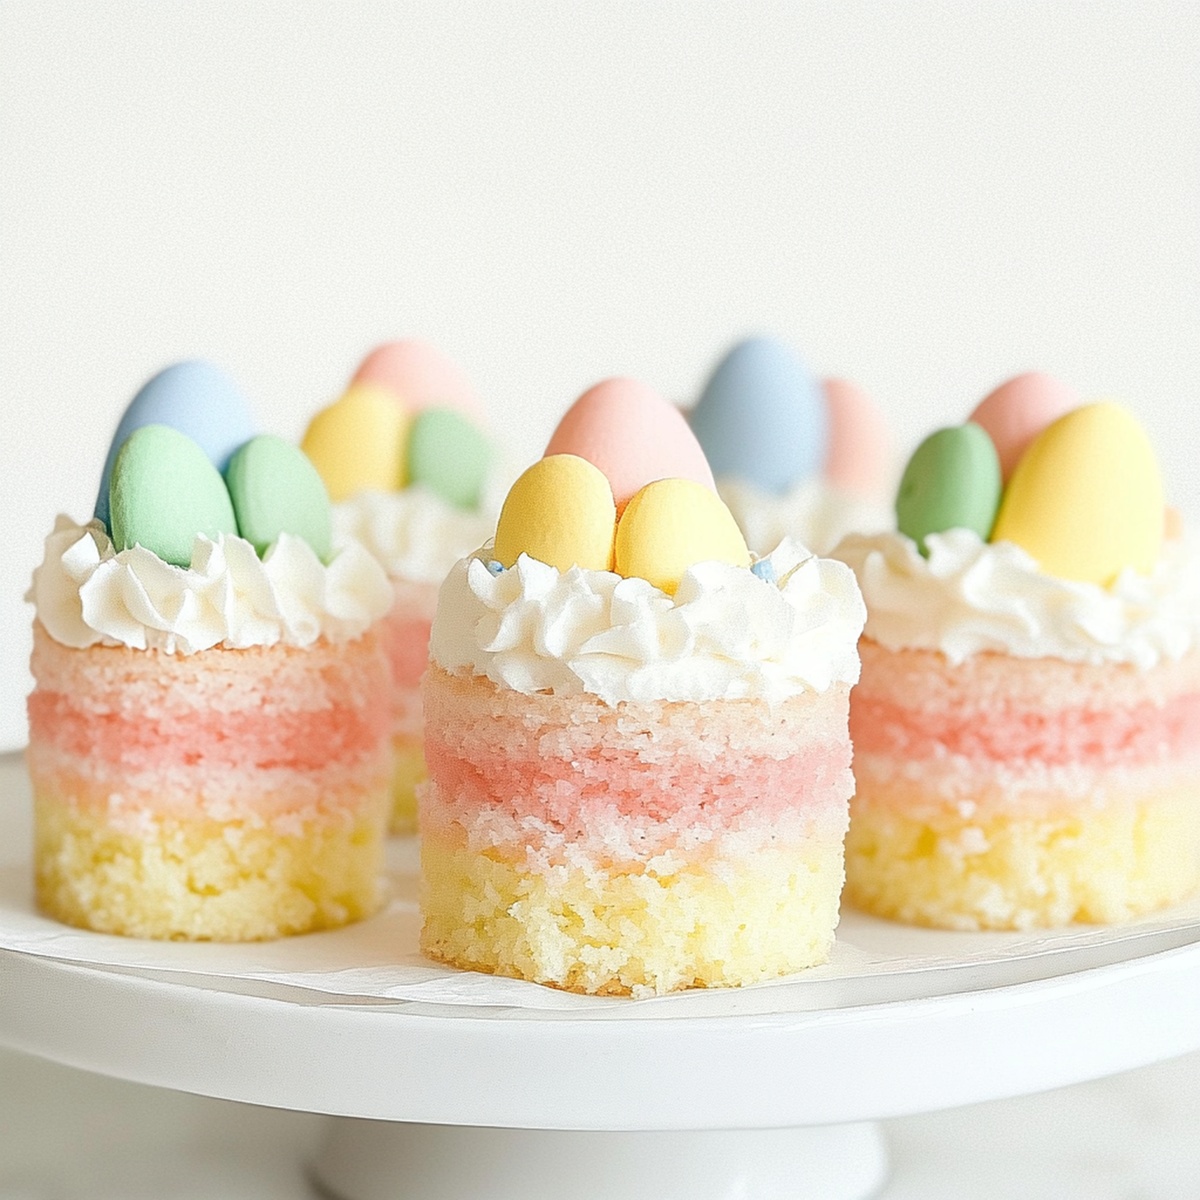
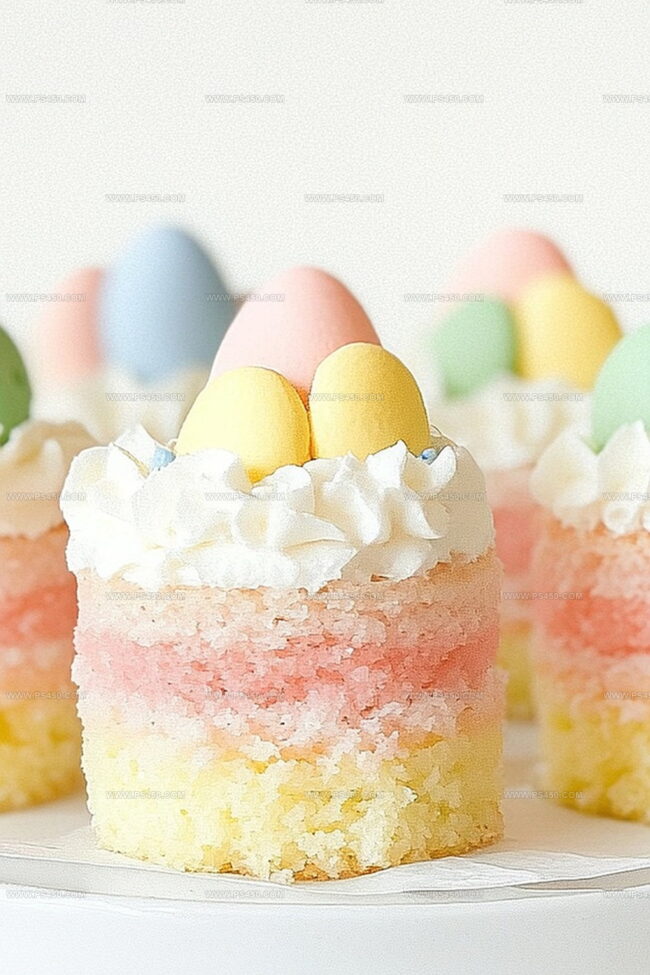
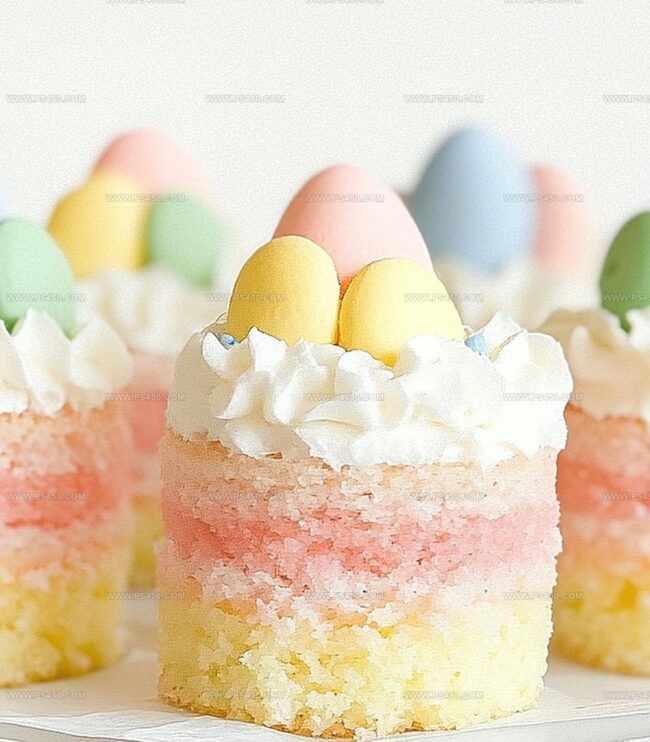
Adorable Mini Easter Cakes Recipe: Springtime Joy in Every Bite
Crafting delightful mini easter cakes brings pure joy to springtime celebrations.
These adorable bite-sized treats capture the essence of seasonal sweetness with unexpected charm.
Pastel colors and delicate decorations make each miniature cake a true work of art.
Bunny-shaped sprinkles and soft frosting create whimsical little masterpieces that sparkle with festive spirit.
Small enough to be utterly irresistible, these mini cakes promise to be conversation starters at any gathering.
Guests will marvel at your baking skills and creativity.
Grab your apron and let’s turn these mini easter cakes into edible magic that everyone will adore.
Why Mini Easter Cakes Are So Adorable
Everything You Need For Mini Easter Cakes
Dry Ingredients:Wet Ingredients:Decorative Ingredients:Baking Instructions For Mini Easter Cakes
Step 1: Prepare Cake Base
In a large mixing bowl, combine:In a separate bowl, cream together:Beat until the mixture becomes light and airy. Add eggs one by one, ensuring each is fully incorporated. Splash in vanilla extract for extra flavor. Gently fold in flour mixture and milk, alternating between the two. For a festive touch, divide batter and add pastel gel food coloring to create spring-inspired hues.
Step 2: Bake Adorable Treats
Carefully spoon batter into mini cake molds or cupcake liners, filling each about three-quarters full. Slide the pan into a preheated oven. Bake until a toothpick inserted comes out perfectly clean. Allow cakes to rest in the pan for a few minutes before transferring to a cooling rack.
Step 3: Craft Colorful Glaze
Whisk together:Create a silky smooth mixture. Separate into different bowls and add soft pastel food coloring for a playful spring palette.
Step 4: Embellish With Festive Flair
Drizzle or spread the vibrant glaze over cooled cakes. Sprinkle with:Arrange on a beautiful serving platter for a delightful Easter celebration.
Helpful Tricks For Mini Easter Cakes
Best Ways To Store Mini Easter Cakes
Toppings That Work With Mini Easter Cakes
Try These Fun Twists On Mini Easter Cakes
FAQs For Mini Easter Cakes
These adorable mini cakes are perfect for Easter celebrations, featuring cute pastel colors and easy decorations that make them both delicious and festive. They’re bite-sized treats that capture the spirit of spring and can be customized with fun toppings.
Absolutely! You can skip the food coloring and keep the cakes classic white, or use natural coloring options like beetroot powder or matcha for a more subtle colored effect. The recipe works perfectly without artificial colors.
This recipe is beginner-friendly! It uses basic baking techniques like mixing, whisking, and simple decorating. Even if you’re new to baking, you can create these cute mini cakes with basic kitchen tools and a little patience.
Whole milk is recommended for the richest flavor and texture, but you can also use 2% milk or even non-dairy alternatives like almond or oat milk. The recipe is quite forgiving with milk choices.
Print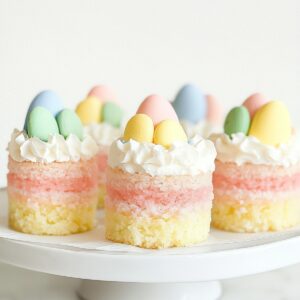
Mini Easter Cakes Recipe
- Total Time: 30 minutes
- Yield: 12 1x
Description
Delightful Mini Easter Cakes blend pastel charm with springtime sweetness, creating adorable bite-sized treats perfect for festive gatherings. Each miniature confection promises a delectable journey of flavor and whimsy you’ll savor with pure joy.
Ingredients
Main Ingredients:
- 1 ½ cups all-purpose flour
- 1 ½ teaspoons baking powder
- ½ teaspoon salt
- ½ cup unsalted butter, softened
- ¾ cup granulated sugar
- 2 large eggs
- ½ cup whole milk
Flavor and Coloring Ingredients:
- 1 teaspoon vanilla extract
- Gel food coloring (optional for pastel-colored cakes)
Frosting and Decoration Ingredients:
- 1 ½ cups powdered sugar
- 2–3 tablespoons milk or heavy cream
- ½ teaspoon vanilla or almond extract
- Gel food coloring (pastel pink, yellow, blue, green)
- Easter sprinkles
- Mini chocolate eggs or jellybeans
- Shredded coconut (optional, for a grass effect)
Instructions
- Prepare the foundational cake mixture by meticulously combining dry ingredients like flour, baking powder, and salt in a pristine mixing vessel. Ensure thorough blending without creating lumps.
- In a separate large mixing bowl, cream butter and sugar until the texture transforms into a light, airy consistency, achieving a pale and fluffy appearance.
- Gradually incorporate eggs, one at a time, gently folding each into the butter mixture. Add vanilla extract to enhance the aromatic profile of the batter.
- Progressively integrate the dry ingredient mixture with milk, alternating between the two components. Stir until a silky, uniform batter emerges without overmixing.
- For pastel-tinted variations, partition the batter into distinct bowls and delicately introduce gel food coloring, creating soft, muted hues.
- Preheat the oven to 350F (175C) and prepare mini cake or cupcake pan with a light coating of grease to prevent potential sticking.
- Carefully distribute the batter into individual molds, filling approximately three-quarters of each cavity to allow proper rising during baking.
- Place the pan in the preheated oven and bake for 12-15 minutes, monitoring until a toothpick inserted centrally emerges clean and dry.
- Remove from oven and allow cakes to rest in the pan for five minutes, facilitating gentle cooling and easy removal.
- Transfer mini cakes onto a wire cooling rack, permitting complete temperature equilibration.
- Craft a smooth glaze by whisking powdered sugar with milk and vanilla extract until achieving a luxurious, glossy consistency.
- Optionally divide the glaze into separate bowls and introduce delicate pastel food coloring for visual intrigue.
- Once cakes have cooled completely, embellish with drizzled glaze or spread frosting across the surface.
- Finalize the decorative process by adorning with festive Easter sprinkles, miniature chocolate eggs, or delicate coconut shavings.
Notes
- Customize colors by using gel food coloring for vibrant, soft pastel shades that make these mini cakes visually stunning and perfect for Easter celebrations.
- Prevent dry cakes by carefully measuring ingredients and not overmixing the batter, which can develop tough gluten and result in dense textures.
- Experiment with flavor variations by adding almond, lemon, or orange extract to complement the vanilla base and create unique taste profiles.
- Use silicone mini cake molds for easy release and consistent cake shapes, ensuring each mini cake looks professionally crafted and uniformly sized.
- Prep Time: 15 minutes
- Cook Time: 15 minutes
- Category: Desserts, Snacks
- Method: Baking
- Cuisine: British
Nutrition
- Serving Size: 12
- Calories: 250
- Sugar: 15 g
- Sodium: 150 mg
- Fat: 10 g
- Saturated Fat: 6 g
- Unsaturated Fat: 3 g
- Trans Fat: 0 g
- Carbohydrates: 35 g
- Fiber: 1 g
- Protein: 3 g
- Cholesterol: 40 mg
Emily Morgan
Food Critic & Kitchen Tips Specialist
Expertise
Global Food Exploration & Critique, Simple Kitchen Hacks & Time-Saving Tips, Presentation & Plating Techniques, Culinary Research & Storytelling.
Education
New York University
Emily Morgan has journeyed across the globe, collecting culinary secrets that turn everyday ingredients into impressive meals.
Based in Seattle and armed with a Journalism degree from NYU, she blends thorough research with a flair for presentation, ensuring every dish looks just as good as it tastes.
Focusing on fresh flavors, simple methods, and a bit of fun, Emily shows home cooks how to elevate their daily cooking without fancy gadgets or complex steps.