Fall’s Coziest Moist Pumpkin Bread Recipe to Warm Your Soul
Autumn’s crisp breeze signals the perfect moment to bake this irresistible pumpkin bread recipe that promises warmth in every slice.
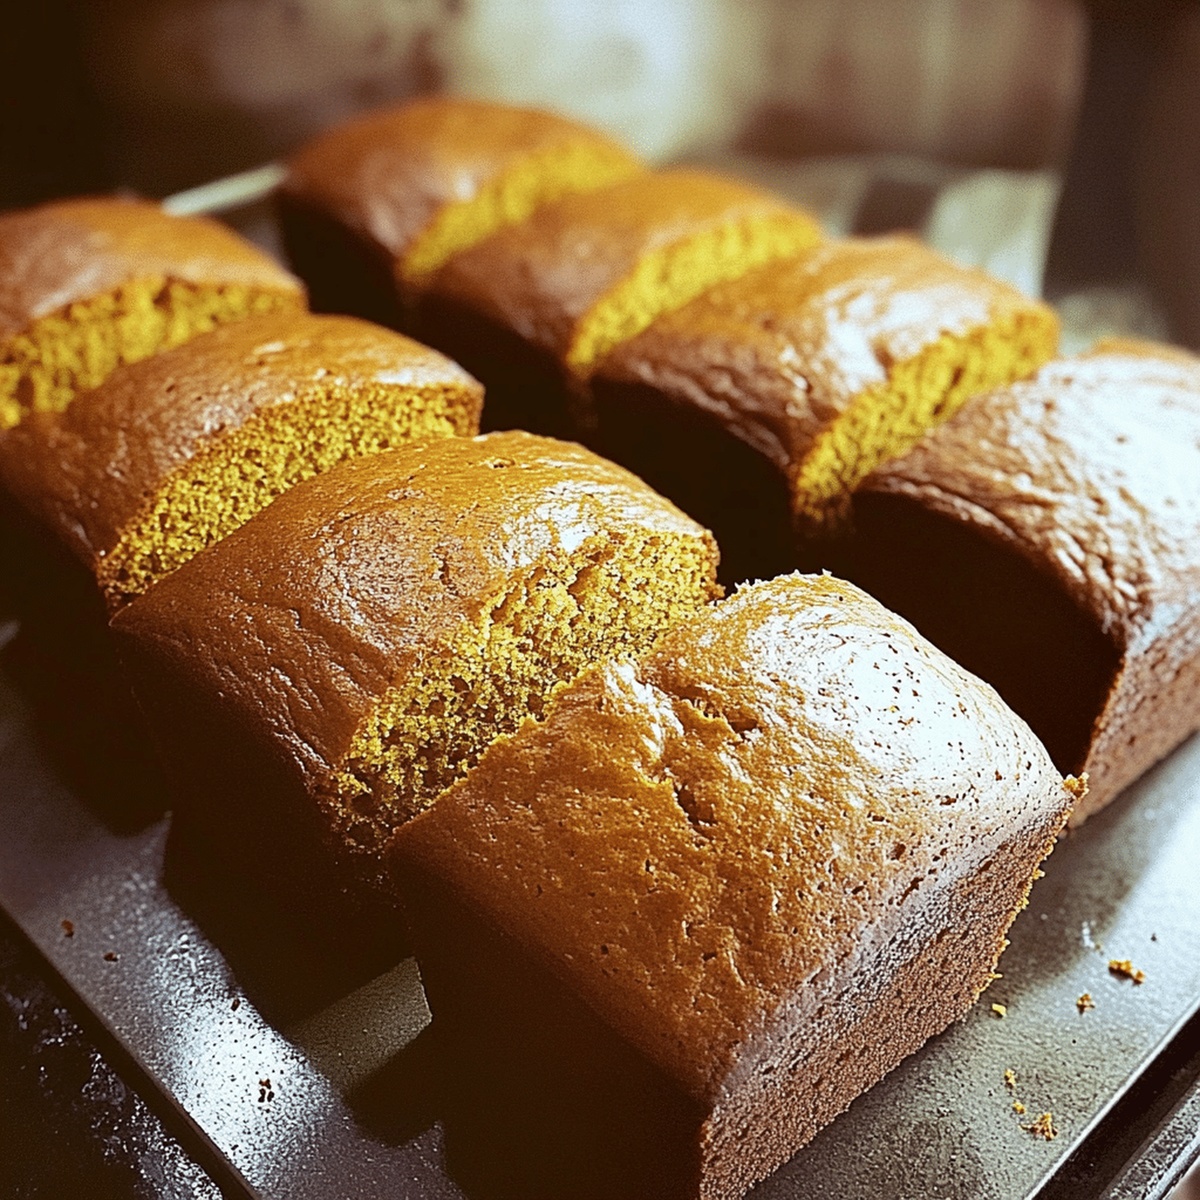
Loaded with rich spices and a deep pumpkin flavor, this bread delivers comfort straight from your kitchen.
The aroma of cinnamon and nutmeg will dance through your home, beckoning everyone near.
Each carefully measured ingredient blends into a tender, moist loaf that speaks of cozy afternoons and sweet indulgence.
Packed with seasonal charm, this recipe transforms simple pantry staples into a delectable treat.
Served warm with a dollop of butter, this pumpkin bread becomes an instant favorite that you’ll want to share with loved ones.
Prepare to fall in love with a recipe that captures the essence of fall in one delightful bite.
Quick Recipe Overview

What You Need for pumpkin bread
For Wet Ingredients:For Dry Ingredients:For Spices and Flavoring:What You’ll Use for pumpkin bread
How to Make pumpkin bread

Keep your delicious pumpkin bread in a sealed container on your kitchen counter. It’ll stay moist and yummy for about 3 days at room temperature.
Want to keep your bread a bit longer? Wrap it snugly in plastic or place in an airtight container. Your pumpkin bread will remain delectable for up to a week when chilled.
Craving pumpkin bread later? No problem! Wrap the loaf tightly in plastic wrap, then slide it into a freezer bag. Your bread will stay perfect for 3 months. When you’re ready to eat, just let it thaw naturally on the counter.
Tips to Upgrade pumpkin bread
Plating Tips for pumpkin bread
Store pumpkin bread Like a Pro
FAQs
The vibrant orange color comes from the pureed pumpkin, which not only adds beautiful hue but also provides natural moisture and rich flavor to the bread.
While delicious, pumpkin bread is typically a treat with moderate nutritional value. It contains some nutrients from pumpkin like vitamin A and fiber, but also includes sugar and flour that make it more of a dessert than a health food.
Yes, you can substitute eggs with alternatives like mashed banana, applesauce, or commercial egg replacers. These ingredients help bind the mixture and maintain moisture similar to eggs.
These warm spices complement the pumpkin’s natural flavor, creating a classic fall taste profile that enhances the bread’s overall richness and aroma.
Print
Traeger Smoked Grape Jelly Meatballs Recipe
- Total Time: 1 hour 45 minutes
- Yield: 6 1x
Description
Tangy “Traeger Smoked Grape Jelly Meatballs” blend smoky barbecue charm with sweet and savory notes. Hearty comfort meets grill mastery, promising a crowd-pleasing feast you’ll savor down to the last delicious bite.
Ingredients
Meats:
- 1 pound (1 lb) ground beef
- 1 pound (1 lb) ground pork
Main Binding and Seasoning Ingredients:
- 1 large egg, beaten
- ¾ cup plain breadcrumbs
- ¼ cup whole milk
- 1 tablespoon Worcestershire sauce
- 1 teaspoon kosher salt
- ½ teaspoon black pepper
- 1 teaspoon garlic powder
- 1 teaspoon onion powder
Sauce and Optional Ingredients:
- 12 ounces (12 oz) grape jelly
- 12 ounces (12 oz) chili sauce (such as Heinz)
- 1 tablespoon apple cider vinegar
- 1 teaspoon smoked paprika
- ½ teaspoon red pepper flakes (optional, for heat)
Instructions
- Fire up the Traeger grill, positioning the temperature dial precisely at 225 degrees fahrenheit for optimal smoking conditions.
- Select premium wood pellets like hickory, cherry, or apple to infuse the meatballs with a rich, complex aromatic profile.
- Craft uniform meatballs, ensuring consistent size and shape to promote even smoking and cooking throughout.
- Meticulously arrange the meatballs on a clean grill grate, spacing them to allow uninterrupted smoke circulation.
- Close the Traeger lid, allowing the gentle wood smoke to envelop the meatballs, transforming their texture and developing deep, nuanced flavors.
- Smoke the meatballs for approximately 60-75 minutes, monitoring internal temperature to guarantee thorough cooking without drying.
- While smoking, prepare the grape jelly glaze by whisking together grape jelly, tangy barbecue sauce, and optional complementary spices.
- Once meatballs reach a safe internal temperature, generously brush them with the glossy grape jelly mixture, creating a luscious, caramelized exterior.
- Return the glazed meatballs to the smoker for an additional 10-15 minutes, allowing the sauce to set and intensify the flavor profile.
- Remove the meatballs from the Traeger, letting them rest briefly before serving to allow juices to redistribute and enhance overall succulence.
Notes
- Choose mild wood pellets like hickory or fruit woods to enhance the meatballs’ smoky flavor without overpowering the grape jelly sweetness.
- Prepare meatballs in advance and freeze them for quick smoking, ensuring consistent size and texture for even cooking.
- Use a meat thermometer to check internal temperature, aiming for 160F to guarantee food safety while maintaining juicy, tender meatballs.
- Consider using lean ground beef mixed with ground pork for a more complex flavor profile and improved moisture retention during smoking.
- Prep Time: 15 minutes
- Cook Time: 1 hour 30 minutes
- Category: Appetizer, Dinner, Snacks
- Method: Grilling
- Cuisine: American
Nutrition
- Serving Size: 6
- Calories: 450
- Sugar: 15 g
- Sodium: 800 mg
- Fat: 24 g
- Saturated Fat: 10 g
- Unsaturated Fat: 12 g
- Trans Fat: 0 g
- Carbohydrates: 30 g
- Fiber: 1 g
- Protein: 22 g
- Cholesterol: 80 mg
John Nicholson
Lead Writer & Recipe Developer
Expertise
Recipe Testing and Development, Kitchen Hacks and Time-Saving Tips, Flavor Pairing and Ingredient Selection, Engaging Food Writing and Storytelling
Education
Johnson & Wales University
John Nicholson honed his skills at Johnson & Wales University, learning how to use fresh, local ingredients and down-to-earth techniques to make cooking simple and satisfying.
His recipes blend Southern comfort flavors with a modern touch, inviting everyone to cook with ease and confidence.
Living in Charleston, John takes cues from the city’s lively food scene, local markets, and seasonal produce. He’s all about making meals stress-free through easy tips, flavor pairings, and fun experiments in the kitchen