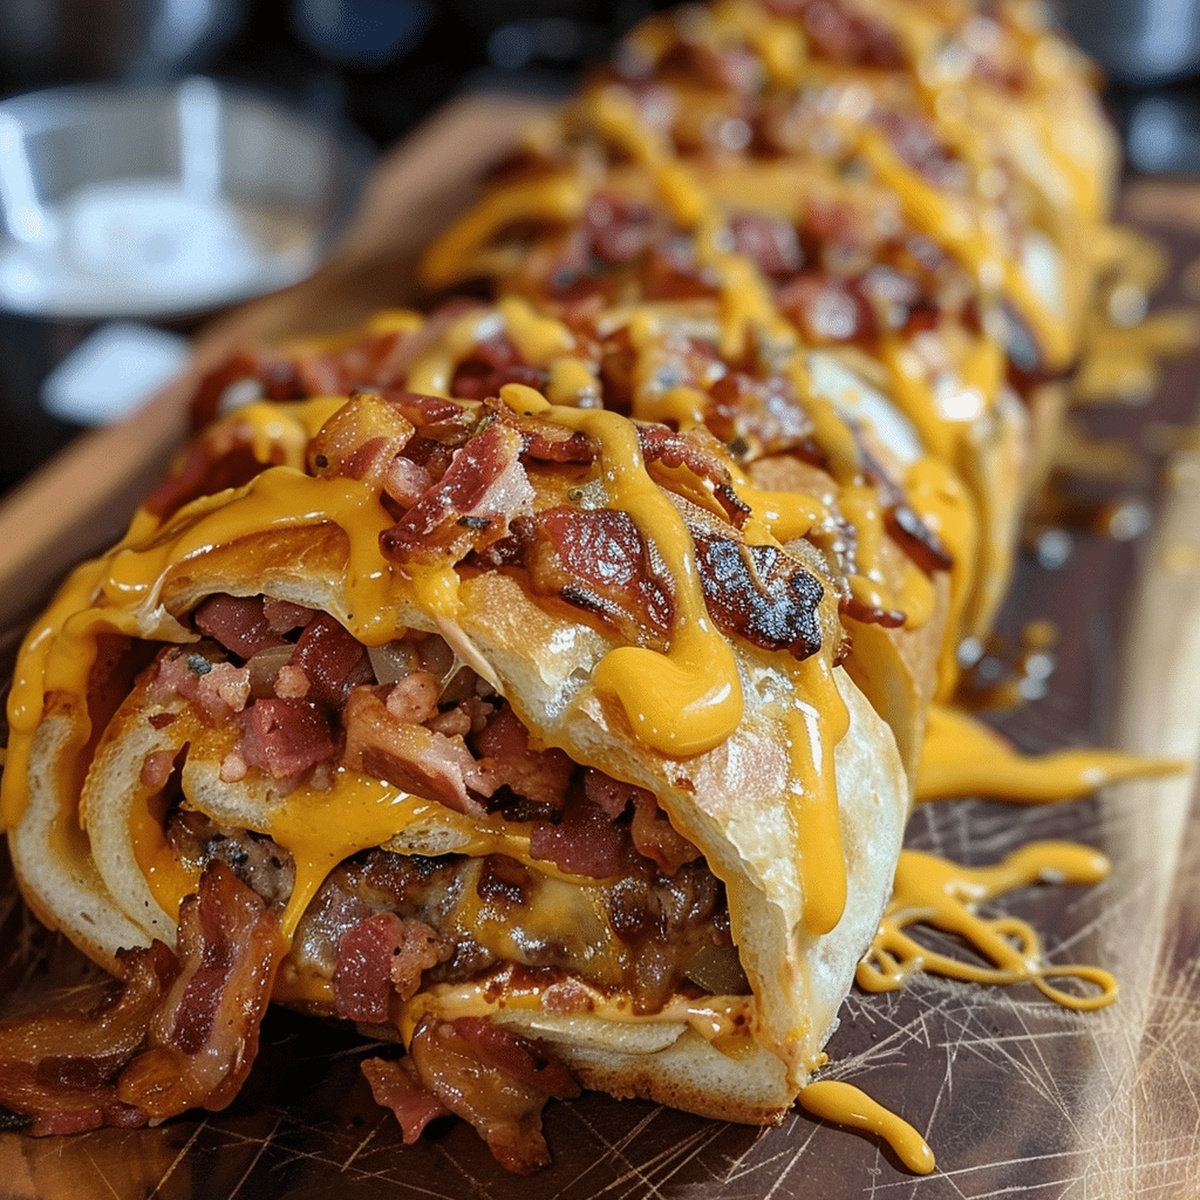
Garlic Butter Bacon Cheeseburger Rollups Recipe
Crispy bacon and melted cheese create magic in these garlic butter bacon cheeseburger rollups that promise a flavor explosion in every bite.
Packed with savory ingredients, these rollups deliver a punch of comfort food goodness.
The classic burger elements fold perfectly into a compact, irresistible package.
Crisp edges and gooey centers make each rollup a handheld delight that screams indulgence.
Weeknight dinners or game day snacks suddenly become extraordinary with this simple yet impressive recipe.
These rollups transform ordinary ingredients into something spectacular that will have everyone asking for seconds.
Prepare to savor a dish that combines all the best elements of a cheeseburger in one epic, easy-to-eat roll.
Quick Recipe Overview
Cheeseburger Rollup Ingredient Checklist
For Meat Base:For Dough and Binder:For Flavor Enhancers:Dipping Sauce Options:Tools for Rolling Bacon Cheeseburger Bites
How to Prepare Garlic Butter Bacon Rollups
Sizzle ground beef in a skillet until fully cooked and crumbly. Drain away extra grease. Sprinkle in zesty seasoning and a splash of water, letting it simmer until the mixture thickens and becomes super flavorful.
Warm up the oven and grab your pizza dough. Stretch it into a beautiful rectangular canvas on a lightly dusted surface, creating the perfect base for your meaty masterpiece.
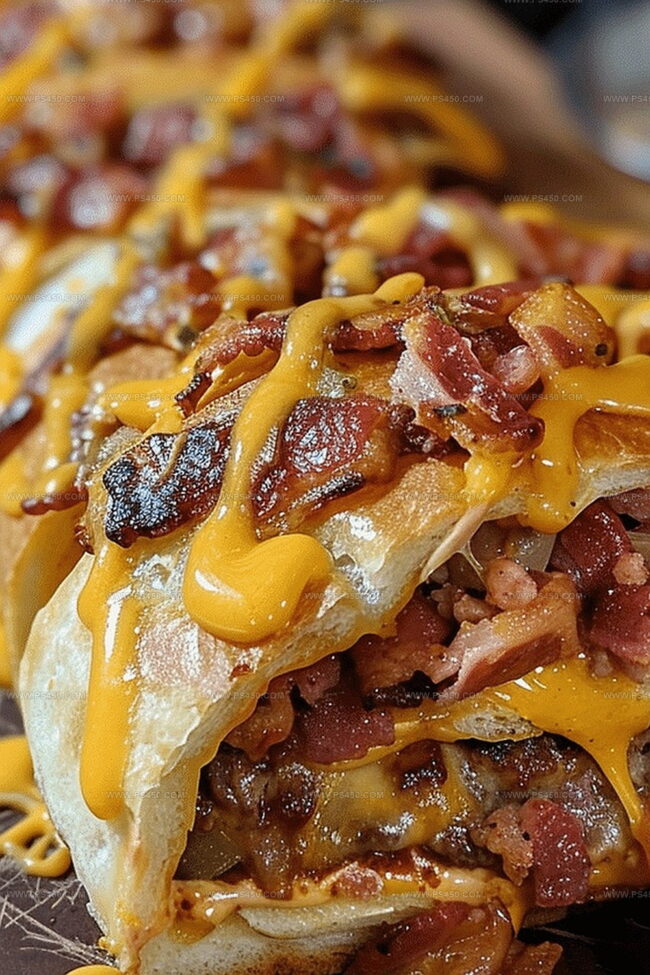
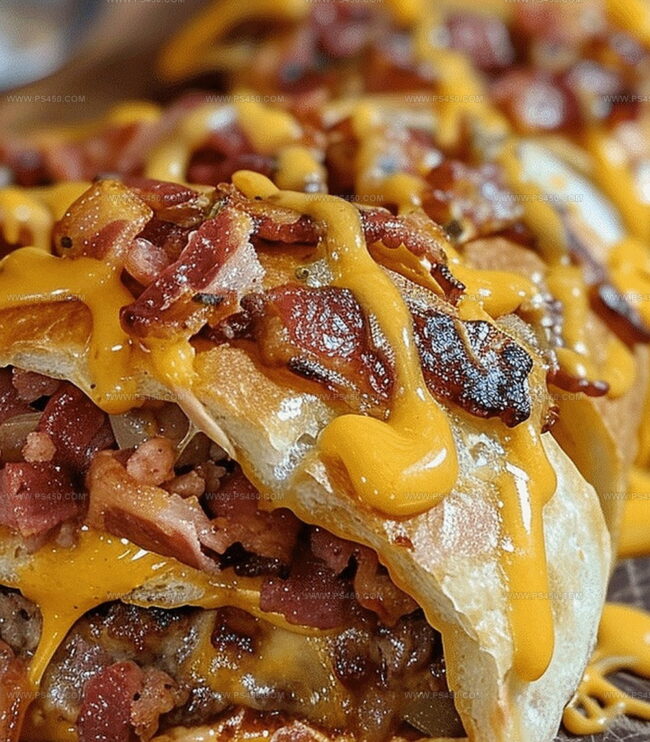
Spread the seasoned beef across the dough, leaving a tiny border. Sprinkle crispy bacon bits and melty cheese over the beef. Carefully roll the dough into a tight, delicious log, pinching the edges to create a seal.
Cut the roll into beautiful rounds and arrange them on a baking sheet. Whip up a quick garlic butter sauce and generously brush the tops of your rollups for extra flavor.
Pop the rollups into the oven and bake until they turn a gorgeous golden brown and the cheese becomes irresistibly melted.
Plate up these mouthwatering rollups. Add a sprinkle of fresh herbs if you’re feeling fancy. Serve alongside your favorite dipping sauces and watch them disappear in minutes.
Customize Cheeseburger Filling for Extra Flavor
How to Serve Cheeseburger Rollups Hot and Tasty
Keep Bacon Rollups Ready to Reheat
FAQs
Yes, ground turkey is a great lean alternative. Just ensure it’s fully cooked and seasoned similarly to maintain the flavor profile.
Absolutely! You can prepare the rollups, cover them, and refrigerate for up to 24 hours before baking. Just add a few extra minutes to the baking time.
Cheddar or a blend of cheddar and mozzarella are ideal. They melt well and provide a delicious, gooey texture that complements the beef and bacon.
Yes, you can freeze them before baking. Prepare the rollups, place them on a baking sheet, and freeze until solid. Then transfer to a freezer bag. Bake directly from frozen, adding 5-10 minutes to the cooking time.
Print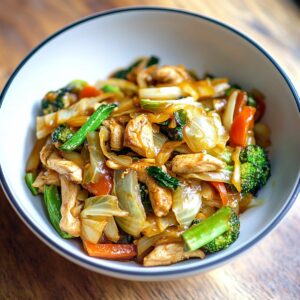
Chicken Cabbage Stir-Fry Recipe
- Total Time: 20 minutes
- Yield: 4 1x
Description
Sizzling Chicken Cabbage Stir-Fry brings Asian-inspired flavors to your dinner table with quick, zesty ingredients. Crisp vegetables and tender chicken create a perfectly balanced meal that will delight your taste buds and satisfy hunger in minutes.
Ingredients
Protein:
- 1 lb (454 grams) boneless, skinless chicken breast (or thighs), sliced thin
Vegetables:
- 4 cups green cabbage, shredded
- ½ medium onion, sliced
- 1 medium carrot, julienned
- 3 cloves garlic, minced
- 1 teaspoon fresh ginger, grated
- 2 green onions, chopped (for garnish)
Sauce and Seasonings:
- 2 tablespoons olive oil (or avocado oil)
- 3 tablespoons low-sodium soy sauce (or coconut aminos for gluten-free)
- 1 tablespoon rice vinegar
- 1 teaspoon sesame oil
- 1 teaspoon honey (or sugar-free sweetener for keto)
- ½ teaspoon red pepper flakes (optional, for spice)
- ½ teaspoon sriracha (optional for spice)
- 1 teaspoon sesame seeds (for garnish)
- 1 teaspoon cornstarch (to thicken, optional)
Instructions
- Craft a vibrant sauce by whisking soy sauce, rice vinegar, sesame oil, honey, sriracha, and cornstarch in a small bowl until smooth and well-incorporated.
- Heat oil in a spacious skillet, searing chicken pieces until golden brown and thoroughly cooked, ensuring each morsel develops a rich caramelized exterior. Transfer the chicken to a separate plate.
- Utilize the same skillet, introducing additional oil to sauté aromatics. Tumble minced onion, crushed garlic, and grated ginger into the pan, releasing their fragrant essence for approximately one minute.
- Introduce shredded cabbage, julienned carrots, and red pepper flakes, stirring rapidly to maintain crisp texture and prevent burning. Cook until vegetables soften slightly while retaining their vibrant crunch.
- Reintegrate the cooked chicken into the vegetable medley, pouring the prepared sauce over the entire mixture. Toss energetically, allowing each ingredient to become thoroughly coated and heated through.
- Elevate the dish with a sprinkle of freshly chopped green onions and toasted sesame seeds. Serve immediately atop steamed rice, cauliflower rice, or your preferred noodle base for a complete, satisfying meal.
Notes
- Customize the heat level by adjusting red pepper flakes or sriracha to match your spice tolerance.
- Slice chicken against the grain for maximum tenderness and easier chewing during cooking.
- Use low-sodium soy sauce to control salt content and create a healthier version of the stir-fry.
- Choose napa or savoy cabbage for a more delicate texture compared to traditional green cabbage.
- Prep all ingredients before starting to cook, ensuring a smooth and quick stir-fry process.
- Replace honey with maple syrup or agave for a vegan-friendly alternative that maintains sweetness.
- Swap chicken with tofu or tempeh for a plant-based protein option that absorbs similar flavors.
- Quick-freeze chicken for 15 minutes before slicing to achieve more precise and uniform cuts.
- Prep Time: 10 minutes
- Cook Time: 10 minutes
- Category: Lunch, Dinner
- Method: Stir-Frying
- Cuisine: Chinese
Nutrition
- Serving Size: 4
- Calories: 320
- Sugar: 6 g
- Sodium: 450 mg
- Fat: 10 g
- Saturated Fat: 1.5 g
- Unsaturated Fat: 7 g
- Trans Fat: 0 g
- Carbohydrates: 27 g
- Fiber: 4 g
- Protein: 30 g
- Cholesterol: 75 mg
John Nicholson
Lead Writer & Recipe Developer
Expertise
Recipe Testing and Development, Kitchen Hacks and Time-Saving Tips, Flavor Pairing and Ingredient Selection, Engaging Food Writing and Storytelling
Education
Johnson & Wales University
John Nicholson honed his skills at Johnson & Wales University, learning how to use fresh, local ingredients and down-to-earth techniques to make cooking simple and satisfying.
His recipes blend Southern comfort flavors with a modern touch, inviting everyone to cook with ease and confidence.
Living in Charleston, John takes cues from the city’s lively food scene, local markets, and seasonal produce. He’s all about making meals stress-free through easy tips, flavor pairings, and fun experiments in the kitchen