PB&J Poke Cake Recipe for a Sweet Childhood Twist
Memories of childhood lunches dance through my mind whenever peanut butter and jelly surprise me with nostalgic flavors.
Classic combinations never lose their magical appeal in dessert form.
Sweet memories merge with playful cake textures in this delightful recipe.
Soft layers promise comfort and joy with every delectable bite.
Creamy peanut butter mingles with fruity jelly, creating a dessert that feels both familiar and exciting.
Simple ingredients transform into something extraordinary when mixed with love and creativity.
You’ll want to savor each mouthwatering slice and share this delightful treat with everyone around you.
Why Peanut Butter And Jelly Poke Cake Is A Nostalgic Surprise
Everything You Need For Peanut Butter And Jelly Poke Cake
Cake Base:Filling and Flavor:Frosting Components:Optional Topping:How To Bake Peanut Butter And Jelly Poke Cake
Preheat your oven to 350°F. Prepare your boxed cake mix according to the package instructions and pour the batter into a rectangular baking pan. Bake until a toothpick inserted in the center comes out clean. Let the cake cool for about 15 minutes.
Once slightly cooled, use the handle of a wooden spoon or a chopstick to poke holes all over the cake, spacing them about 1 inch apart. Make sure the holes are deep but avoid tearing the cake.
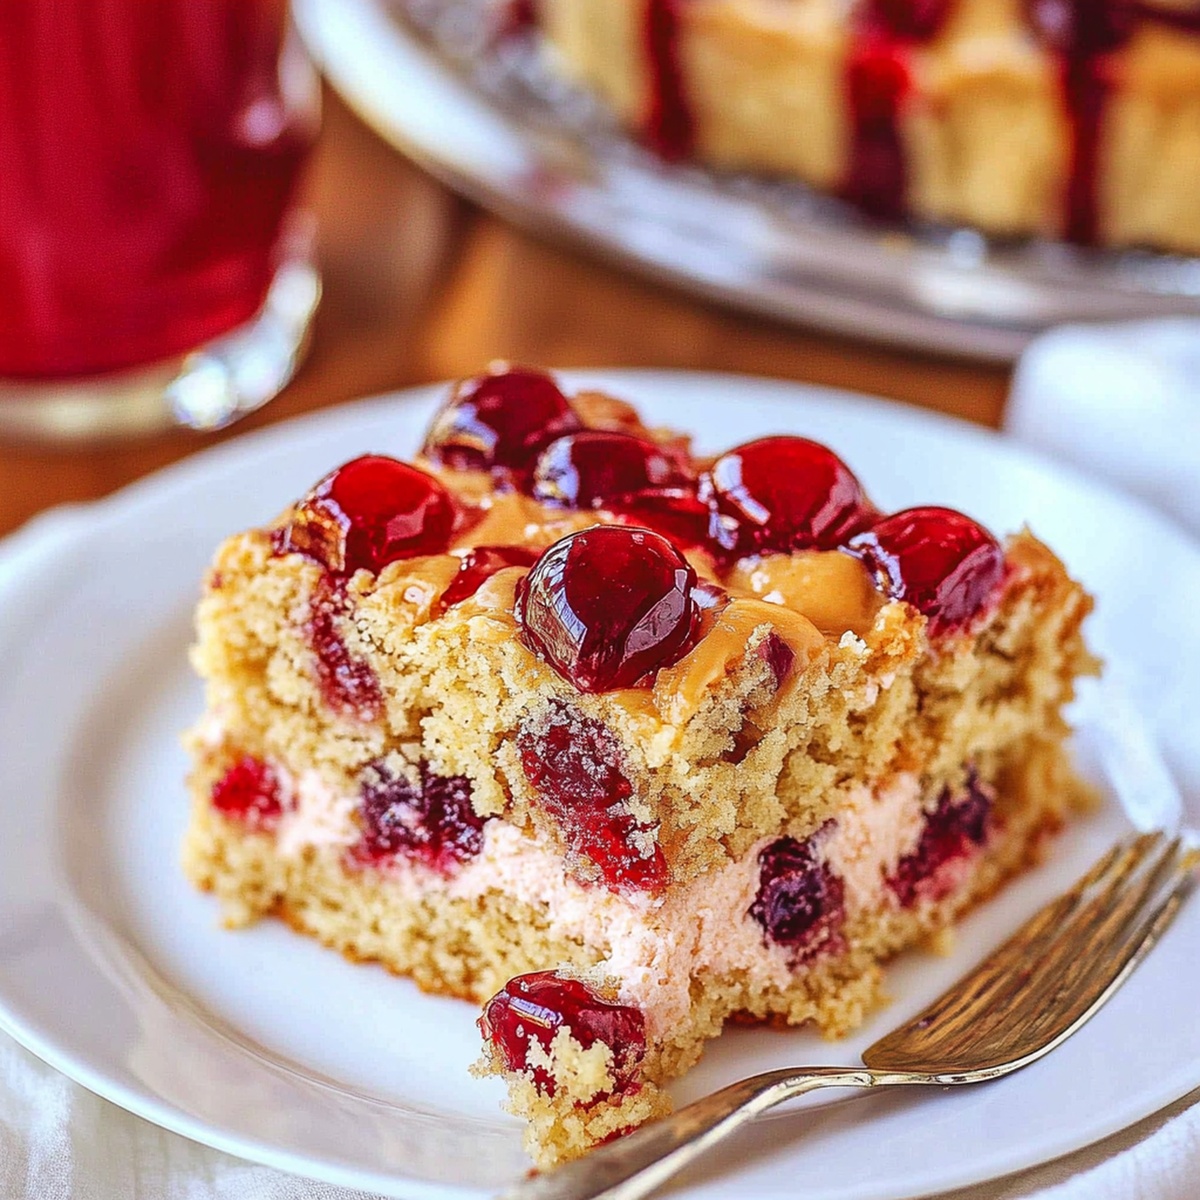
Warm your favorite jelly in the microwave for about 30 seconds until pourable. Slowly spoon the jelly into each hole, letting it soak down into the cake for fruity bursts in every bite.
Let the butter soften to room temperature. Beat the peanut butter and butter together until smooth. Gradually add powdered sugar, followed by vanilla extract and a splash of milk until the frosting reaches a spreadable, creamy texture.
Spread the frosting evenly over the cake. Drizzle some extra jelly on top and swirl it gently into the frosting with a knife. Sprinkle with chopped peanuts for a crunchy finish, if desired.
Cut into squares and serve chilled or at room temperature. This nostalgic treat is sure to bring smiles. Bonus tips: strawberry or grape jelly gives that classic PB&J flavor, and refrigerating helps firm up the frosting. Keeps well in the fridge for 3–4 days.
Tips For A Moist Peanut Butter And Jelly Poke Cake
How To Store Peanut Butter And Jelly Poke Cake Safely
Tasty Pairings For Peanut Butter And Jelly Poke Cake
Ways To Switch Up Peanut Butter And Jelly Poke Cake
Frequently Asked Questions About Peanut Butter And Jelly Poke Cake
This poke cake is special because it’s filled with jelly that seeps into the holes, creating a surprise burst of fruity flavor in every bite. The unique technique ensures that each slice is moist and packed with delicious jelly goodness.
While you can use different jelly flavors, grape or strawberry jelly works best for the classic PB&J taste. Choose a smooth jelly that will easily pour into the cake holes for the best results.
Absolutely! Kids will love helping to poke holes in the cake and watching the jelly fill them. It’s a fun baking activity that creates delicious memories and teaches basic baking skills.
Aim to create holes about 1 inch apart across the entire cake surface. This ensures that every slice gets an even distribution of jelly and maximizes the PB&J flavor throughout the cake.
Print
Peanut Butter And Jelly Poke Cake Recipe
- Total Time: 1 hour 50 minutes
- Yield: 12 1x
Description
Nostalgic American classic “Peanut Butter and Jelly Poke Cake” brings childhood memories to life with creamy layers of comfort. Sweet and tangy flavors combine in this delightful dessert you’ll crave from first bite to last.
Ingredients
Main Ingredients:
- 1 box (15.25 ounces / 432 grams) yellow or white cake mix (plus ingredients needed per package)
- 1 cup grape or strawberry jelly
- 1 cup (250 grams) creamy peanut butter
Frosting Ingredients:
- ½ cup (115 grams) unsalted butter, softened
- 2 cups (250 grams) powdered sugar
- ¼ cup (60 milliliters) milk (more as needed)
- 1 teaspoon vanilla extract
Topping Ingredients:
- ¼ cup grape or strawberry jelly (warmed slightly for drizzling)
- ¼ cup chopped peanuts (optional)
Instructions
- Prepare the cake foundation by heating the oven to 350F (175C) and baking the cake mix according to package directions in a rectangular baking dish.
- Allow the freshly baked cake to cool for approximately 10 minutes, creating a stable surface for further preparation.
- Transform the cake’s surface by systematically creating small channels using a wooden spoon handle or straw, ensuring uniform spacing of roughly one inch between each perforation.
- Gently warm the jelly in a microwave-safe container for 30 seconds to enhance its fluidity, then carefully pour the liquid jelly into the strategically placed holes, enabling complete absorption throughout the cake’s interior.
- Craft the creamy peanut butter frosting by vigorously blending softened peanut butter and butter until achieving a smooth consistency.
- Gradually incorporate powdered sugar, vanilla extract, and milk into the mixture, whipping until the frosting reaches a light, spreadable texture, adjusting liquid quantities as needed.
- Confirm the cake has completely cooled before applying an even layer of the peanut butter frosting across the entire surface.
- Create visual interest by reheating the remaining jelly and delicately drizzling it over the frosted cake, then using a knife to generate elegant marbled patterns.
- Enhance the cake’s texture and flavor by optionally sprinkling chopped peanuts across the top for an additional crunch.
- Slice the cake into neat squares, presenting a delightful dessert that celebrates the classic peanut butter and jelly combination.
Notes
- Choose a high-quality cake mix for a more flavorful base that enhances the overall taste of the dessert.
- Ensure the cake is completely cooled before adding jelly and frosting to prevent melting and maintain structural integrity.
- Experiment with different jelly flavors like strawberry, grape, or raspberry to create unique variations of this classic combination.
- Soften butter and peanut butter at room temperature for smoother, easier mixing and a more consistent frosting texture.
- For a gluten-free option, use a gluten-free cake mix and check that all other ingredients are celiac-friendly.
- Chill the cake for 30 minutes after frosting to help the layers set and make cutting cleaner, more precise slices.
- Opt for natural peanut butter with no added sugar for a less sweet, more authentic peanut flavor in the frosting.
- Store leftover cake in an airtight container in the refrigerator for up to 4 days to maintain freshness and prevent spoilage.
- Prep Time: 20 minutes
- Cook Time: 30 minutes
- Category: Desserts, Snacks
- Method: Baking
- Cuisine: American
Nutrition
- Serving Size: 12
- Calories: 366
- Sugar: 30 g
- Sodium: 300 mg
- Fat: 20 g
- Saturated Fat: 6 g
- Unsaturated Fat: 14 g
- Trans Fat: 0 g
- Carbohydrates: 38 g
- Fiber: 1 g
- Protein: 7 g
- Cholesterol: 18 mg
Emily Morgan
Food Critic & Kitchen Tips Specialist
Expertise
Global Food Exploration & Critique, Simple Kitchen Hacks & Time-Saving Tips, Presentation & Plating Techniques, Culinary Research & Storytelling.
Education
New York University
Emily Morgan has journeyed across the globe, collecting culinary secrets that turn everyday ingredients into impressive meals.
Based in Seattle and armed with a Journalism degree from NYU, she blends thorough research with a flair for presentation, ensuring every dish looks just as good as it tastes.
Focusing on fresh flavors, simple methods, and a bit of fun, Emily shows home cooks how to elevate their daily cooking without fancy gadgets or complex steps.