Homemade Peanut Clusters Recipe for Sweet Snacking
Crafting delectable peanut clusters sparks joy in every home baker’s kitchen.
Sweet memories flood back with each chocolatey bite.
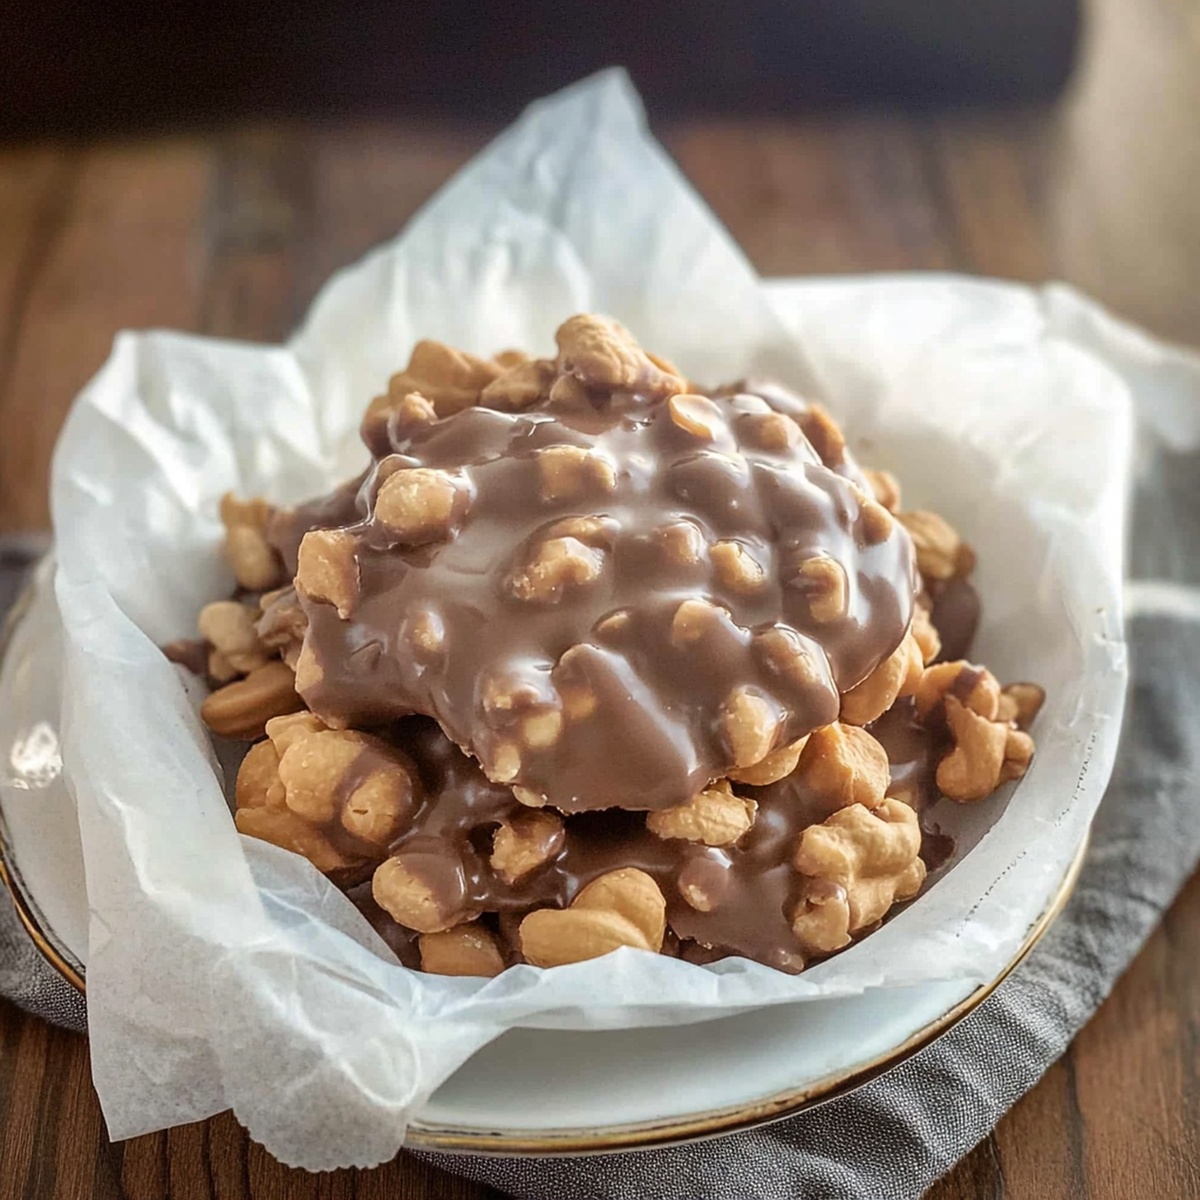
Crunchy roasted peanuts nestled in rich melted chocolate create an irresistible treat.
Small batches mean big smiles when you break these clusters into delightful pieces.
Homemade confections often surprise people with their simplicity and incredible flavor.
Chocolate and peanuts dance together in a perfect harmony of textures and tastes.
These clusters promise to become your new favorite quick dessert that impresses without complicated techniques.
Whip up a batch and watch everyone’s eyes light up with delicious anticipation.
Why Peanut Clusters Are A Crunchy, Chocolatey Treat
Everything You Need For Peanut Clusters
Chocolate Base:Nuts and Toppings:Preparation Surface:How To Make Peanut Clusters The Easy Way
Step 1: Melt Chocolate Magic
In a microwave-safe bowl, gather these ingredients:Microwave the chocolate and coconut oil in short 30-second bursts, stirring gently between each interval until the mixture transforms into a silky smooth liquid. For those preferring a traditional approach, a double boiler works wonderfully. Once melted, whisk in the vanilla extract to enhance the flavor profile.
Step 2: Fold in Crunchy Companions
Introduce the peanuts to the warm chocolate mixture. Gently stir and fold until every single peanut gets a luxurious chocolate coating. Ensure each nut is completely embraced by the chocolate’s richness.
Step 3: Create Cluster Masterpieces
Line a baking sheet with parchment paper. Using a spoon, carefully drop small mounds of the chocolate-peanut mixture onto the sheet. For an extra touch of elegance, drizzle white chocolate over the clusters. Sprinkle a pinch of sea salt on top for a delightful flavor contrast if you’re feeling adventurous.
Step 4: Chill and Solidify
Place the baking sheet in the refrigerator. Allow the clusters to set and become firm, which typically takes about 30 minutes. The cooling process transforms the mixture into delectable treats with a satisfying snap.
Step 5: Preserve and Enjoy
Transfer the finished clusters to an airtight container. These delightful treats can be stored at room temperature for one week or refrigerated for up to three weeks – though they rarely last that long! Share with friends or savor as a personal indulgence.
Pro Tip: For variety, experiment with different types of nuts or chocolate varieties to create your unique cluster experience.
Tips For Smooth And Sweet Peanut Clusters
How To Store Peanut Clusters Without Melting
Snack Pairings With Peanut Clusters
Twists To Try With Peanut Clusters
Questions About Peanut Clusters
Coconut oil helps create a smoother, shinier chocolate coating and prevents the chocolate from becoming too hard when chilled. It also adds a subtle tropical flavor that complements the rich chocolate and peanuts.
Absolutely! You can experiment with milk chocolate, dark chocolate, or even white chocolate to create different flavor profiles. Just make sure to use good-quality chocolate chips that melt smoothly.
Stir the peanuts gently but thoroughly to ensure even chocolate coverage. Use a fork or spoon to lift and drop the mixture, allowing excess chocolate to drip off for a neat cluster shape.
Try drizzling contrasting chocolate (like white over dark), sprinkle some sea salt for a gourmet touch, or add a few colorful sprinkles for extra visual appeal.
Print
Peanut Clusters Recipe
- Total Time: 35 minutes
- Yield: 12 1x
Description
Sweet chocolate and crunchy peanuts combine in these irresistible Peanut Clusters, a classic treat perfect for holiday gifting or satisfying midnight cravings. Melted chocolate and roasted peanuts create a simple yet delightful confection you’ll want to share with friends and family.
Ingredients
Main Ingredients:
- 2 cups roasted peanuts (salted or unsalted)
- 1.5 cups semi-sweet chocolate chips (or milk/dark chocolate)
Binding/Melting Ingredients:
- 0.5 cup white chocolate chips (optional, for a swirl effect)
- 1 teaspoon coconut oil or vegetable shortening (for smooth melting)
Flavoring Ingredients:
- 0.5 teaspoon vanilla extract
- 0.25 teaspoon sea salt (optional, for garnish)
Instructions
- Create a smooth chocolate base by gently melting semi-sweet chocolate chips with coconut oil in a microwave-safe bowl, stirring between 30-second intervals until completely liquid and glossy. Incorporate vanilla extract for enhanced flavor depth.
- Fold roasted peanuts into the molten chocolate mixture, ensuring each nut becomes thoroughly enrobed in the rich, silky coating.
- Using a spoon, carefully deposit generous dollops of the chocolate-peanut blend onto a parchment-lined baking sheet, allowing each cluster to form a rustic, organic shape.
- For an elegant finish, delicately drizzle white chocolate over the clusters, creating intricate patterns that add visual appeal and complementary sweetness.
- Enhance the flavor profile by sprinkling a light dusting of flaky sea salt across the clusters, which will balance the chocolate’s richness and provide a subtle crunch.
- Transfer the baking sheet to the refrigerator and allow the clusters to set completely, approximately 30 minutes, until they become firm and maintain their distinctive shape.
- Once solidified, transfer the peanut clusters to an airtight container, where they can be stored at room temperature for one week or refrigerated for up to three weeks, preserving their delectable texture and flavor.
Notes
- Choose high-quality chocolate for a richer, more luxurious flavor that elevates the entire dessert.
- Use roasted peanuts with no added salt to control the seasoning and prevent overwhelming saltiness.
- Experiment with different chocolate varieties like dark, milk, or white to create unique flavor profiles and customize the clusters.
- Line the baking sheet with a silicone mat for easier removal and a smoother bottom surface on the clusters.
- Prep Time: 5 minutes
- Cook Time: 30 minutes
- Category: Snacks, Desserts
- Method: Mixing
- Cuisine: American
Nutrition
- Serving Size: 12
- Calories: 170
- Sugar: 10 g
- Sodium: 75 mg
- Fat: 12 g
- Saturated Fat: 4 g
- Unsaturated Fat: 8 g
- Trans Fat: 0 g
- Carbohydrates: 14 g
- Fiber: 2 g
- Protein: 5 g
- Cholesterol: 0 mg


Emily Morgan
Food Critic & Kitchen Tips Specialist
Expertise
Global Food Exploration & Critique, Simple Kitchen Hacks & Time-Saving Tips, Presentation & Plating Techniques, Culinary Research & Storytelling.
Education
New York University
Emily Morgan has journeyed across the globe, collecting culinary secrets that turn everyday ingredients into impressive meals.
Based in Seattle and armed with a Journalism degree from NYU, she blends thorough research with a flair for presentation, ensuring every dish looks just as good as it tastes.
Focusing on fresh flavors, simple methods, and a bit of fun, Emily shows home cooks how to elevate their daily cooking without fancy gadgets or complex steps.