
Scrumptious Raspberry Bars Recipe for Sweet Summer Treats
Raspberry magic happens right in your kitchen with these delectable bars that promise pure delight.
Sweet and tangy flavors dance together in every single bite.
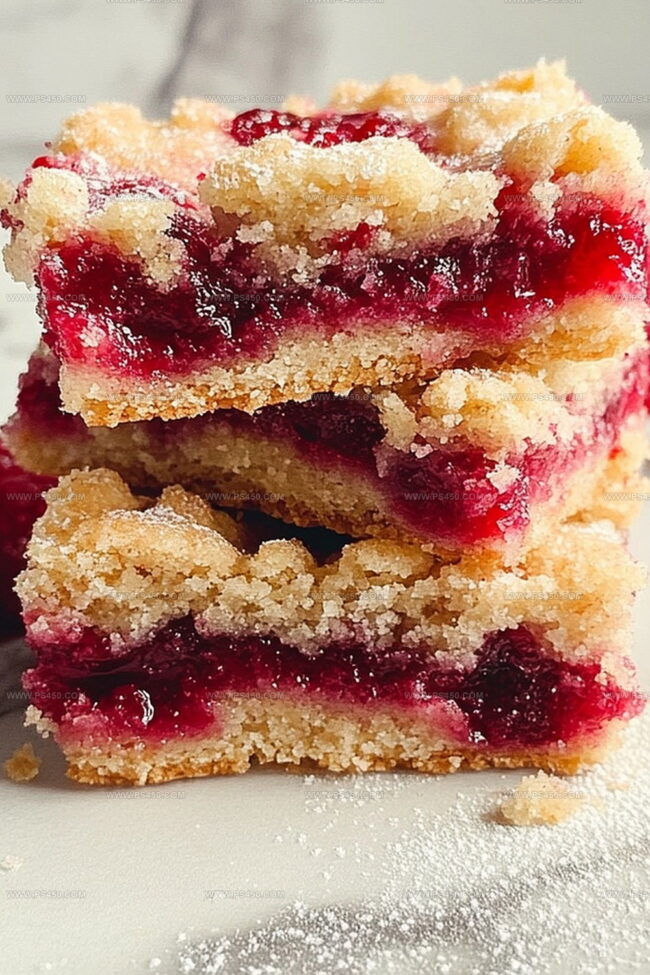
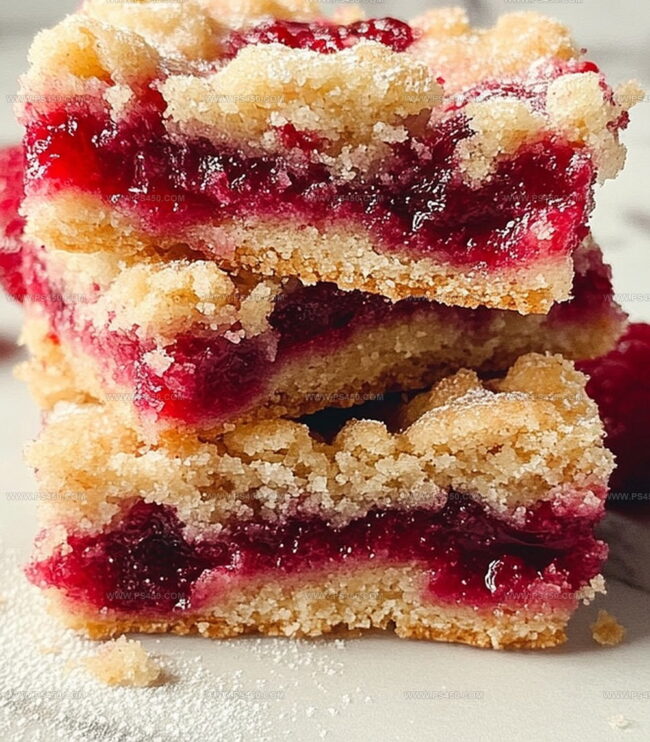
Crumbly edges meet jammy centers, creating a dessert that feels like a warm hug.
Home bakers will adore how simple yet impressive these treats can be.
Each square tells a story of summer’s most vibrant fruit, carefully nestled between buttery layers.
Crisp textures and rich fruity notes blend seamlessly to make an irresistible treat.
Grab a fork and get ready to experience a dessert that will become your new favorite weekend indulgence.
Why Everyone Loves Raspberry Bars
What Goes In Raspberry Bars
Base Ingredients:Sweeteners:Binding Ingredients:Flavor Enhancers:Filling:Optional Bright Note:Steps To Make Raspberry Bars
Step 1: Warm Up the Oven
Crank your oven to a cozy 350°F (175°C). Grab a 9×13-inch baking pan and line it with parchment paper, letting the edges hang over the sides like a comfy blanket.
Step 2: Craft the Magical Crumb Mixture
In a large mixing bowl, whisk together these delightful ingredients:Now toss in:Mix everything until it looks like delicious, crumbly sand. Don’t worry if it seems a bit loose – that’s exactly how it should be!
Step 3: Create the Scrumptious Foundation
Take about two-thirds of your crumb mixture and press it firmly into the bottom of the prepared pan. Use your fingers to create an even, compact layer that’ll serve as the perfect base for our raspberry magic.
Step 4: Spread the Fruity Goodness
Dollop raspberry jam all over the crumb foundation. For an extra zing, sprinkle some fresh lemon zest into the jam before spreading it around. Make sure it covers the entire surface in a smooth, even layer.
Step 5: Top and Bake to Perfection
Sprinkle the remaining crumb mixture over the jam layer like a delicate, sugary snowfall. Pop the pan into the preheated oven and bake for 30-35 minutes. You’re looking for a golden-brown top and jam that’s bubbling with excitement around the edges.
Step 6: Cool and Slice with Love
Patience is key! Let the bars cool completely in the pan. Once they’ve reached room temperature, use the parchment paper handles to lift the entire creation out. Slice into squares or rectangles – whatever makes your heart happy.
Bonus Tip: These bars are even more delicious the next day, so don’t be afraid to make them in advance. Store in an airtight container at room temperature, and watch them disappear quickly!
Top Tips For Raspberry Bars
How To Keep Raspberry Bars Fresh
Best Pairings For Raspberry Bars
Fun Spins On Raspberry Bars
Raspberry Bars Questions Answered
These bars combine a buttery, crumbly oat crust with sweet-tangy raspberry jam, creating a perfect balance of textures and flavors that’s both comforting and indulgent.
Absolutely! Homemade jam works wonderfully and can add a more intense, fresh raspberry flavor to the bars. Just ensure it’s a smooth, spreadable consistency.
Look for a light golden color on the crumb topping and slight bubbling around the jam edges. This typically happens around 30-35 minutes of baking and indicates the bars are done.
While not absolutely critical, parchment paper makes removing and cutting the bars much easier. It prevents sticking and allows you to lift the entire batch out of the pan cleanly for neat, even slicing.
Print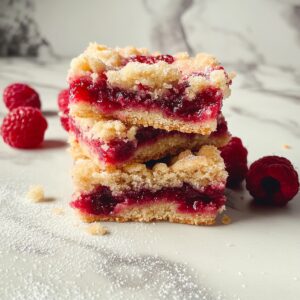
Raspberry Bars Recipe
- Total Time: 50 minutes
- Yield: 12 1x
Description
Sweet raspberry bars blend buttery shortbread with tangy fruit for an irresistible dessert. Layers of crumbly crust and rich raspberry filling promise delightful moments of pure indulgence you’ll savor to the last crumb.
Ingredients
Fruits and Fillings:
- ¾ to 1 cup raspberry jam or preserves
- 1 teaspoon lemon zest (optional)
Dry Ingredients:
- 2 cups all-purpose flour
- 1 cup old-fashioned oats
- ½ cup granulated sugar
- ½ cup packed light brown sugar
- ¼ teaspoon salt
Wet Ingredients:
- 1 cup (2 sticks or 226 grams) unsalted butter, melted
- 1 teaspoon vanilla extract
Instructions
- Prepare the baking vessel by lining a rectangular pan with parchment paper, ensuring excess paper hangs over the edges for effortless extraction of the finished dessert.
- Create a rustic crumb mixture by combining melted butter with granulated and brown sugars, incorporating vanilla and a pinch of salt. Gradually fold in flour and rolled oats until the texture resembles coarse, sandy crumbs.
- Compress approximately two-thirds of the crumbly mixture into the pan’s base, establishing a sturdy, compact foundation for the raspberry confection.
- Distribute raspberry jam uniformly across the preliminary crust, optionally enhancing the fruity layer with delicate lemon zest for an aromatic complexity.
- Scatter the remaining crumb mixture across the jam surface, creating a textured, uneven topping that will transform into a golden, crisp layer during baking.
- Transfer the pan to a preheated oven and bake until the surface achieves a light golden hue and the jam begins to gently bubble and caramelize around the edges.
- Remove from the oven and allow the dessert to cool completely within the pan, permitting the layers to set and stabilize.
- Utilize the parchment paper overhang to carefully extract the entire dessert, then slice into precise, uniform squares or rectangular bars using a sharp knife.
Notes
- Create a stable base by firmly pressing the crumb mixture into the pan, ensuring an even and compact crust that won’t crumble when cutting.
- Keep jam layer thin and consistent to prevent overwhelmingly sweet or soggy bars, using about 1/2 to 2/3 cup of high-quality raspberry preserves.
- Customize the recipe by swapping raspberry jam with other fruit preserves like strawberry, apricot, or blueberry for varied flavor profiles.
- Allow bars to cool completely before slicing to help them set properly and achieve clean, sharp edges without falling apart.
- Prep Time: 15 minutes
- Cook Time: 35 minutes
- Category: Desserts, Snacks
- Method: Baking
- Cuisine: American
Nutrition
- Serving Size: 12
- Calories: 210
- Sugar: 12 g
- Sodium: 70 mg
- Fat: 10 g
- Saturated Fat: 6 g
- Unsaturated Fat: 3 g
- Trans Fat: 0 g
- Carbohydrates: 30 g
- Fiber: 1 g
- Protein: 2 g
- Cholesterol: 30 mg
Emily Morgan
Food Critic & Kitchen Tips Specialist
Expertise
Global Food Exploration & Critique, Simple Kitchen Hacks & Time-Saving Tips, Presentation & Plating Techniques, Culinary Research & Storytelling.
Education
New York University
Emily Morgan has journeyed across the globe, collecting culinary secrets that turn everyday ingredients into impressive meals.
Based in Seattle and armed with a Journalism degree from NYU, she blends thorough research with a flair for presentation, ensuring every dish looks just as good as it tastes.
Focusing on fresh flavors, simple methods, and a bit of fun, Emily shows home cooks how to elevate their daily cooking without fancy gadgets or complex steps.