French Crepe Recipe That’s Light, Foldable, and Easy to Serve
Delicate strands of batter dance across the pan, creating a mouthwatering crepe recipe that whispers elegance.
Thin, translucent layers fold effortlessly into culinary art with minimal effort.
France’s beloved breakfast staple has charmed kitchens worldwide for generations.
Every cook can master these delightful pancakes with simple ingredients and a gentle touch.
Practice brings confidence as you swirl the batter into perfect circles.
Crisp edges and soft centers promise a breakfast experience that delights both novice and experienced cooks.
Grab a skillet and let the magic of homemade crepes unfold on your plate.
Quick Recipe Overview

Ingredients to Get Started on the Crepe Recipe
For Batter Base:For Flavor Enhancers:For Pan Preparation:Tools That Make the Crepe Recipe Smooth and Simple
Flip and Fold Your Crepes Like a Natural
Mix flour, eggs, milk, melted butter, and optional seasonings in a bowl or blender until silky smooth. Blend for 30 seconds to eliminate any lumps.
Cover the batter and let it chill at room temperature for 30 minutes. This helps create delicate, tender crepes by allowing gluten to soften.
Warm a nonstick skillet over medium heat. Lightly brush with butter or oil using a paper towel to create a thin, even coating.
Pour a small amount of batter into the pan’s center, quickly tilting to spread into a thin layer. Cook until edges lift and bottom turns golden, about 1-2 minutes.
Gently turn the crepe with a spatula and cook the opposite side for roughly 30 seconds. Transfer to a plate and repeat with remaining batter.
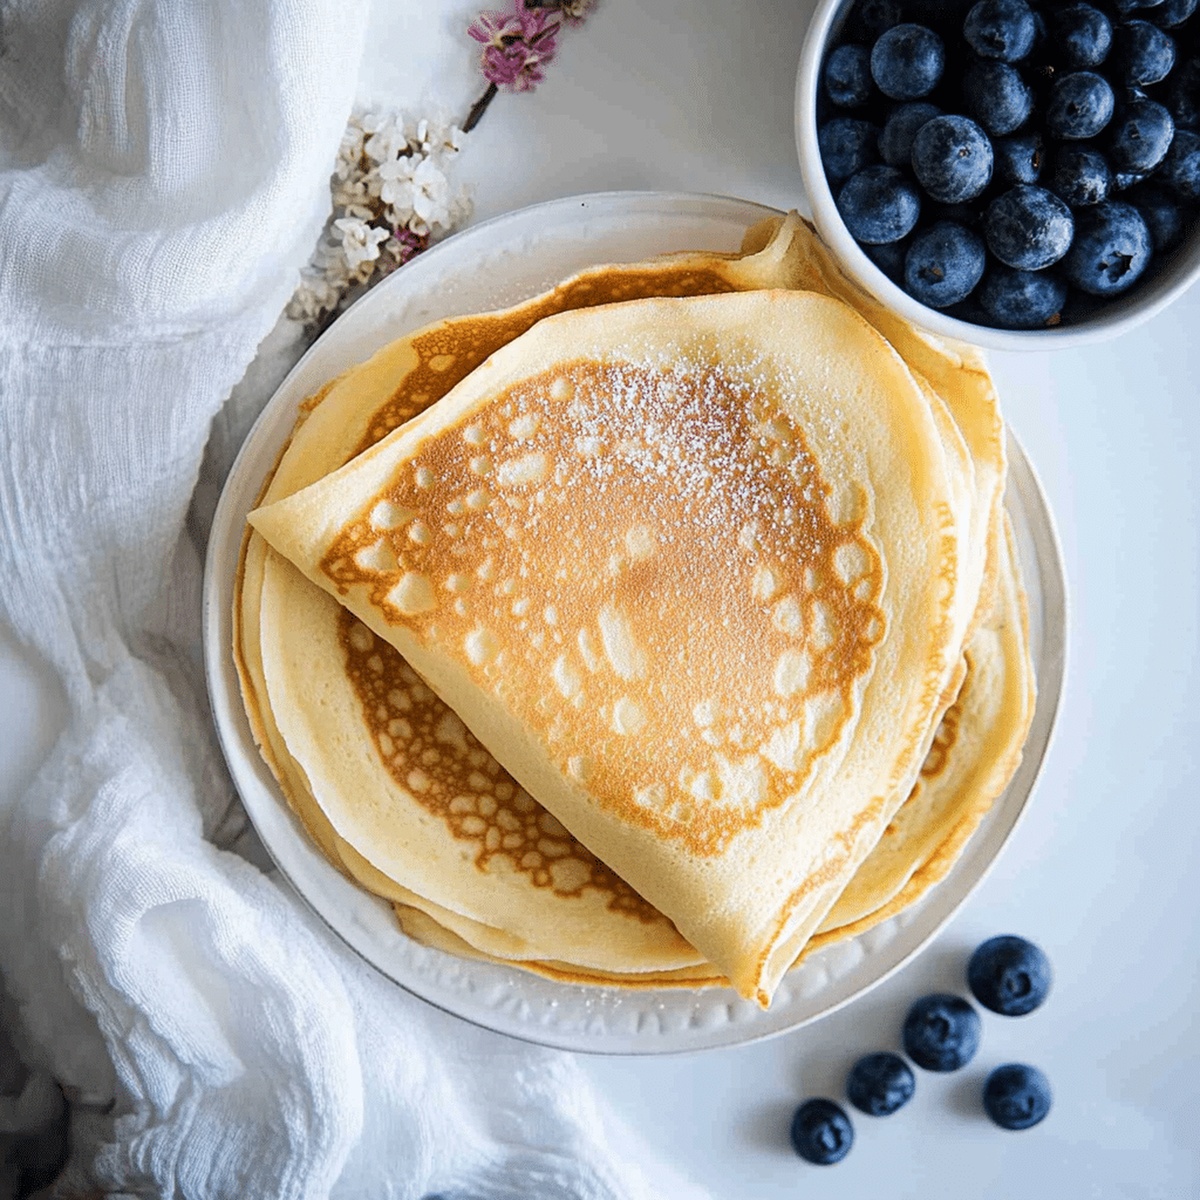
Stack crepes on a plate, covering with a clean towel to keep warm. Add your favorite sweet or savory fillings and indulge in these delightful treats.
Toppings and Fillings for Your Favorite Crepe Recipe
How to Serve Crepes Morning, Noon, or Dessert
Keep Crepes Fresh for the Next Round
FAQs
The batter should be very thin, similar to heavy cream consistency. If it’s too thick, add a little milk to thin it out and ensure smooth, delicate crepes.
Resting allows flour proteins to absorb liquid and relax, which prevents tough crepes and helps create a smoother, more tender texture. The gluten needs time to settle for the best results.
The first crepe is always a test batch – don’t worry! The pan temperature and technique improve with each crepe you make. Discard or eat the first one as a chef’s treat.
Yes, you can prepare the batter up to 24 hours in advance. Cover and refrigerate, then whisk briefly before cooking to reincorporate any separated ingredients.
Print
Silky Crepe Recipe
- Total Time: 30 minutes
- Yield: 5 1x
Description
Delightful French crepe recipes blend delicate wheat flour, eggs, and milk into paper-thin pancakes perfect for sweet or savory fillings. Parisian culinary traditions shine through these elegant, versatile treats that bring continental charm to home kitchens.
Ingredients
- 1 ½ cups (375 ml / 12.7 fl oz) milk
- 2 large eggs
- 1 cup (125 g / 4.4 oz) all-purpose flour
- 2 tablespoons (30 g / 1 oz) melted butter or vegetable oil
- ¼ teaspoon salt
- 1 tablespoon granulated sugar (optional, for sweet crepes)
- 1 teaspoon vanilla extract (optional, for sweet crepes)
- Additional butter or oil for the pan
Instructions
- Batter Preparation: Whisk flour, eggs, milk, melted butter, sugar, salt, and vanilla extract in a mixing bowl until achieving a silky, lump-free mixture. Alternatively, blend ingredients for 30 seconds to ensure complete integration.
- Resting Phase: Allow batter to rest at room temperature for 30 minutes, enabling gluten relaxation and improving crepe texture.
- Pan Preparation: Heat a nonstick skillet over medium temperature, lightly coating the surface with butter or oil using a paper towel to remove excess grease.
- Crepe Crafting: Pour batter into the pan’s center, quickly rotating to create an ultrathin, uniform layer. Cook until edges lift and bottom turns golden (1-2 minutes).
- Flipping Technique: Gently slide a spatula underneath the crepe, flipping to cook the opposite side for 30 seconds. Repeat the process, periodically reapplying a light grease to prevent sticking.
- Serving Strategy: Stack completed crepes and cover with a clean kitchen towel to maintain warmth. Serve with desired fillings, transforming the delicate crepes into a culinary masterpiece.
Notes
- Prevent Lumps: Whisk ingredients thoroughly or use a blender to achieve a smooth, silky batter without any flour clumps for perfect texture.
- Rest the Batter: Allow batter to sit for 30 minutes, enabling gluten to relax and creating more tender, delicate crepes with improved consistency.
- Manage Pan Temperature: Maintain medium heat and use a non-stick skillet to ensure even cooking and prevent burning or sticking of crepes.
- Master Batter Distribution: Quickly rotate the pan immediately after pouring batter to create an ultra-thin, uniform layer that cooks evenly and looks professional.
- Prep Time: 10 minutes
- Cook Time: 20 minutes
- Category: Breakfast, Snacks, Desserts
- Method: Frying
- Cuisine: French
Nutrition
- Serving Size: 5
- Calories: 158
- Sugar: 2 g
- Sodium: 119 mg
- Fat: 6 g
- Saturated Fat: 3 g
- Unsaturated Fat: 2 g
- Trans Fat: 0 g
- Carbohydrates: 20 g
- Fiber: 1 g
- Protein: 5 g
- Cholesterol: 76 mg
John Nicholson
Lead Writer & Recipe Developer
Expertise
Recipe Testing and Development, Kitchen Hacks and Time-Saving Tips, Flavor Pairing and Ingredient Selection, Engaging Food Writing and Storytelling
Education
Johnson & Wales University
John Nicholson honed his skills at Johnson & Wales University, learning how to use fresh, local ingredients and down-to-earth techniques to make cooking simple and satisfying.
His recipes blend Southern comfort flavors with a modern touch, inviting everyone to cook with ease and confidence.
Living in Charleston, John takes cues from the city’s lively food scene, local markets, and seasonal produce. He’s all about making meals stress-free through easy tips, flavor pairings, and fun experiments in the kitchen