Bright Lemon Cheesecake Mousse Recipe To Share
Creamy desserts like this lemon cheesecake mousse blend tangy zest with smooth richness that dance across your palate.
Summer afternoons call for light, refreshing treats that sparkle with citrus brightness.
Every spoonful of this silky dessert promises pure indulgence and delicate flavor layers.
The recipe combines classic cheesecake elements with an airy mousse texture that melts effortlessly.
Soft cream cheese whips into cloud-like peaks, complemented by bright lemon notes that awaken your senses.
A touch of sweetness balances the citrus, creating a dessert both elegant and comforting.
You’ll fall in love with this simple yet sophisticated treat that comes together in minutes.
Prepare to savor a dessert that turns ordinary moments into delightful culinary experiences.
Quick Recipe Overview
Lemon Cheesecake Mousse Ingredient List
For Base Ingredients:For Flavor Enhancers:For Whipping Components:Equipment to Whip Up This Citrus Treat
Instructions for Making Lemon Cheesecake Mousse

Grab your mixing bowl and blend cream cheese until silky smooth. Pour in sweetened condensed milk, zesty lemon juice, fragrant lemon zest, and vanilla extract. Whisk everything until the mixture looks glossy and uniform.
In another bowl, transform cold heavy cream and powdered sugar into a billowy, cloud-like texture with stiff, delightful peaks.
Tenderly fold the whipped cream into the lemony cream cheese mixture. Stir gently to keep the airiness and create a dreamy, light texture.
Transfer the luscious mousse into charming dessert cups. Smooth the tops for a polished look. Pop into the refrigerator and let the mousse set for a couple hours.
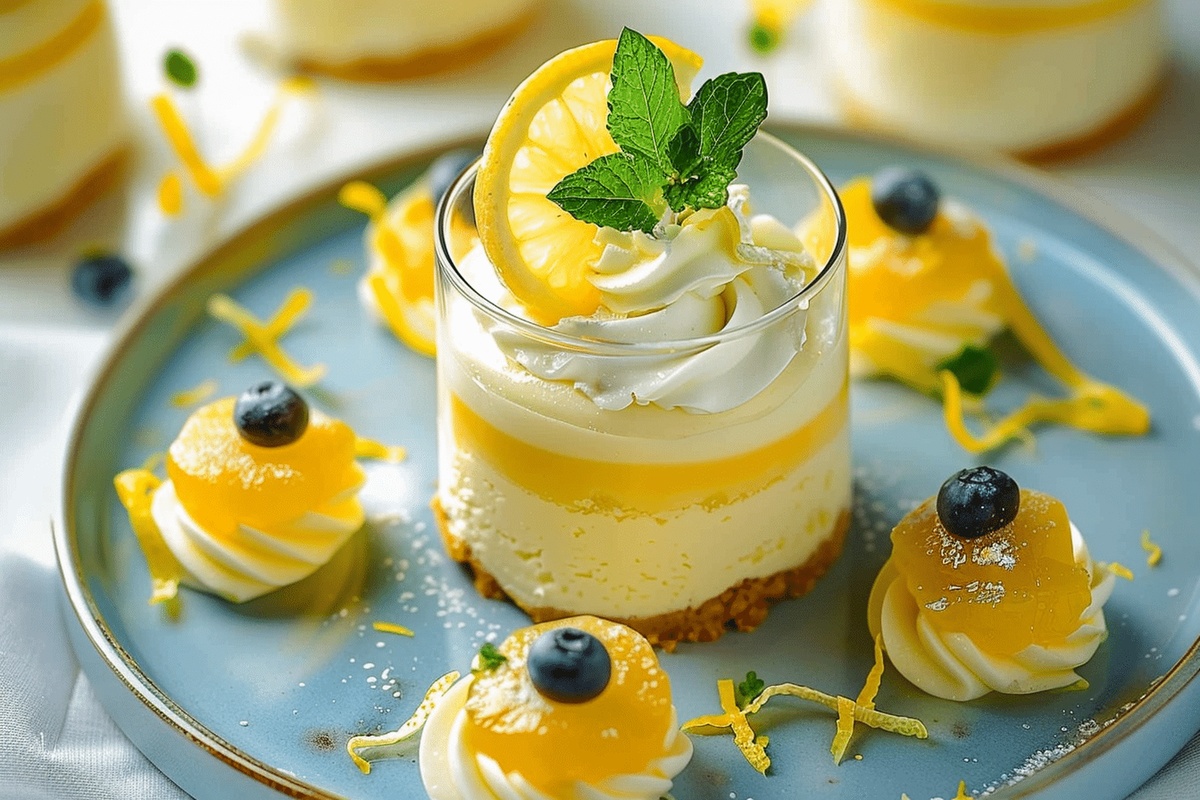
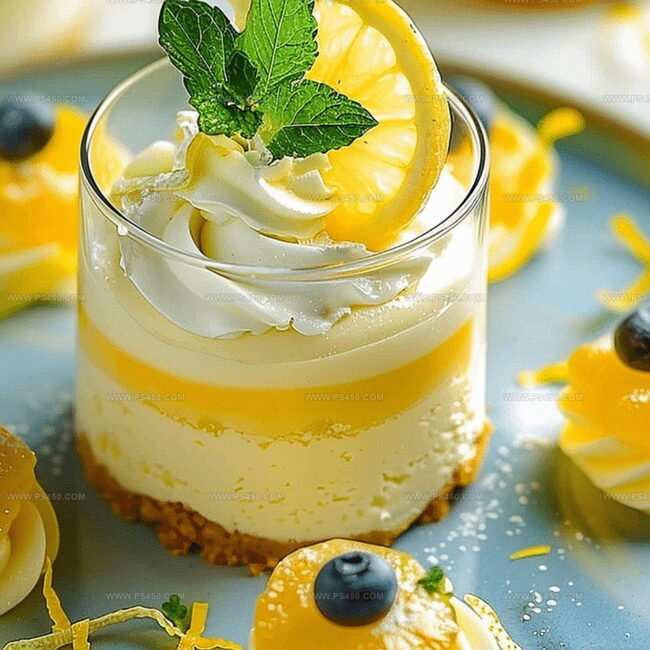
When ready to indulge, pull out your chilled mousse. Dress it up with optional garnishes like bright lemon slices, extra zest, colorful berries, or delicate mint leaves for a stunning presentation.
Zesty Tweaks and Serving Ideas for the Mousse
Serve Mousse Chilled with a Little Garnish
Keep Lemon Mousse Light and Fresh in Storage
FAQs
Yes, you can use low-fat cream cheese, but the texture and richness might be slightly different. Full-fat cream cheese provides the best creamy consistency and flavor for the mousse.
Always start with cold heavy cream and a chilled mixing bowl. Whip at medium-high speed and stop as soon as stiff peaks form. Avoid overbeating, which can cause the cream to become grainy and separate.
Fold the whipped cream very gently into the cream cheese mixture using a spatula with a sweeping motion. This technique helps maintain the air bubbles, creating a lighter, fluffier texture.
Absolutely! You can prepare the mousse up to 2 days in advance. Keep it covered in the refrigerator, and add any fresh garnishes just before serving to maintain their appearance and freshness.
Print
Silky Lemon Cheesecake Mousse Recipe
- Total Time: 2 hours 15 minutes
- Yield: 5 1x
Description
Creamy lemon cheesecake mousse blends zesty citrus with rich cream cheese in a refreshing dessert. Garnished with graham cracker crumbs and mint, this elegant treat will delight your palate with its balanced sweet-tart flavor.
Ingredients
- 1 cup (240 milliliters) heavy whipping cream, cold
- 8 oz (225 grams) cream cheese, softened
- ½ cup (120 milliliters) sweetened condensed milk
- ¼ cup (60 milliliters) fresh lemon juice (about 1–2 lemons)
- ¼ cup (30 grams) powdered sugar
- 1 tbsp lemon zest
- 1 tsp vanilla extract
- fresh lemon slices
- extra lemon zest
- fresh berries
- mint leaves
Instructions
- Cream Preparation: Whip cream cheese in a spacious mixing bowl until velvety and smooth, ensuring no lumps remain.
- Flavor Infusion: Blend sweetened condensed milk, lemon juice, lemon zest, and vanilla extract into the cream cheese, mixing until achieving a uniform, silky consistency.
- Cream Whipping: In a clean bowl, whip chilled heavy cream with powdered sugar until forming sturdy, defined peaks that hold their shape.
- Mousse Integration: Gently fold whipped cream into the lemony cream cheese mixture, maintaining the airy texture and preventing deflation of the mixture.
- Chilling and Setting: Distribute the mousse into serving vessels using a spoon or piping bag, creating smooth surfaces. Refrigerate for a minimum of two hours to solidify and enhance the texture.
- Garnishing: Prior to serving, adorn with optional decorative elements like lemon slices, additional lemon zest, fresh berries, or mint leaves to elevate the dessert’s visual appeal and flavor complexity.
Notes
- Prevent Deflation: Fold whipped cream gently into cream cheese mixture using bottom-to-top circular motions to maintain the mousse’s light, airy texture.
- Temperature Matters: Ensure cream cheese is room temperature for smooth blending and chilled heavy cream for optimal whipping volume.
- Zest Selection: Use fresh, organic lemons for maximum flavor intensity and avoid white pith which can introduce bitterness.
- Storage Strategy: Keep mousse refrigerated and consume within 2-3 days for best taste and texture, covering with plastic wrap to prevent moisture absorption.
- Prep Time: 15 minutes
- Cook Time: 2 hours
- Category: Desserts, Snacks
- Method: Blending
- Cuisine: American
Nutrition
- Serving Size: 5
- Calories: 389
- Sugar: 27 g
- Sodium: 164 mg
- Fat: 34 g
- Saturated Fat: 21 g
- Unsaturated Fat: 10 g
- Trans Fat: 0 g
- Carbohydrates: 30 g
- Fiber: 0 g
- Protein: 4 g
- Cholesterol: 105 mg
John Nicholson
Lead Writer & Recipe Developer
Expertise
Recipe Testing and Development, Kitchen Hacks and Time-Saving Tips, Flavor Pairing and Ingredient Selection, Engaging Food Writing and Storytelling
Education
Johnson & Wales University
John Nicholson honed his skills at Johnson & Wales University, learning how to use fresh, local ingredients and down-to-earth techniques to make cooking simple and satisfying.
His recipes blend Southern comfort flavors with a modern touch, inviting everyone to cook with ease and confidence.
Living in Charleston, John takes cues from the city’s lively food scene, local markets, and seasonal produce. He’s all about making meals stress-free through easy tips, flavor pairings, and fun experiments in the kitchen