
Guilty Pleasure: Chocolate Chip Cookie Dough Brownie Bombs Recipe
Decadent layers of rich, gooey chocolate chip cookie dough nestled within brownie bombs create an irresistible dessert that sends taste buds into pure bliss.
Chocolate chip cookie dough lovers will swoon over this indulgent treat that combines two beloved classics into one extraordinary bite.
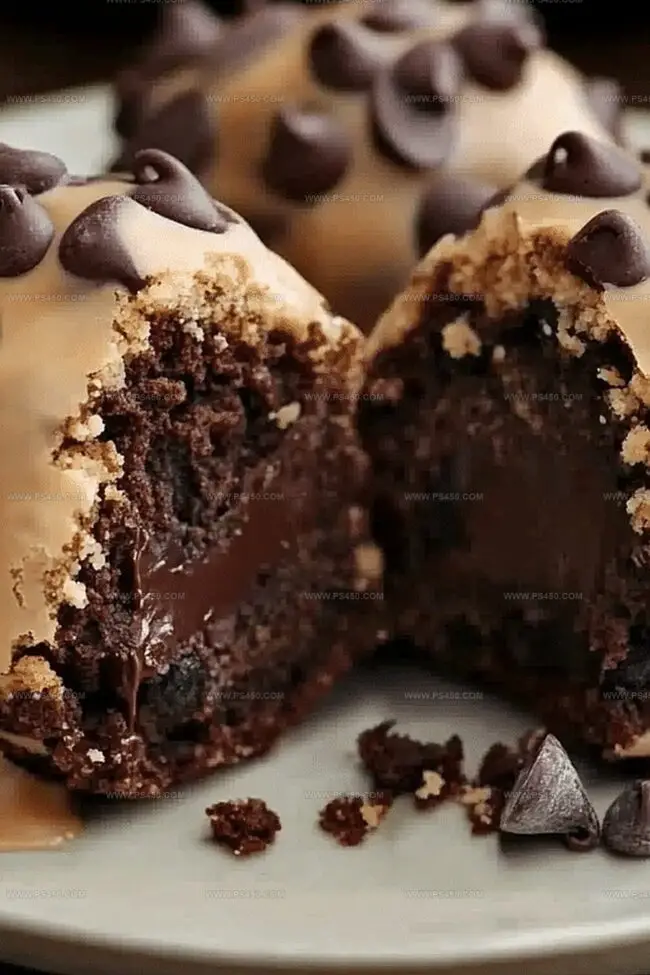
Each bomb promises a surprising center of raw cookie dough, carefully enrobed in dense, fudgy brownie goodness.
The contrast between the soft, creamy interior and the intense chocolate exterior makes these bombs dangerously addictive.
No baking skills required means anyone can craft these heavenly morsels with minimal effort.
A sprinkle of chocolate chips on top adds a delightful crunch that elevates the entire experience.
Prepare to unlock a dessert that will become your new obsession and the star of every gathering.
Quick Recipe Overview
What’s Inside Chocolate Chip Cookie Dough Brownie Bombs
For Brownie Base:For Cookie Dough Filling:For Coating and Decoration:Tools You’ll Need for Brownie Bomb
How to Make Cookie Dough Brownie Bombs

Whip up your favorite brownie mix and bake in a rectangular pan. Let the brownies cool down completely until they’re no longer warm to the touch.
Mix soft butter with sugars until creamy. Add milk and vanilla for extra flavor. Blend in flour and fold in tiny chocolate morsels. Roll the dough into small round balls and chill them in the refrigerator.
Cut cooled brownies into squares slightly larger than your cookie dough balls. Gently wrap each chilled dough ball inside a brownie square, creating smooth chocolate-covered spheres. Press edges together carefully to seal completely.
Melt chocolate chips in the microwave until silky smooth. Dunk each brownie-wrapped ball into the liquid chocolate, ensuring full coverage. Tap off excess chocolate and place on a parchment-lined tray. Sprinkle with extra chocolate chips for a gorgeous finish. Allow chocolate to harden at room temperature.
Refrigerate your bombs for about 15 minutes to set the chocolate coating. Store in an airtight container and enjoy within a few days for maximum deliciousness.
Tips to Elevate These Chocolatey Treats
Serving Brownie Bombs That Wow
How to Store Brownie Bombs the Smart Way
FAQs
The recipe uses heat-treated flour, which is baked or microwaved to kill potential bacteria, making it safe for consumption. Always ensure you follow proper flour preparation techniques.
Absolutely! Homemade brownies work perfectly. Just ensure they are cooled completely and have a similar consistency to boxed mix brownies for easier wrapping.
Freeze the assembled brownie bombs for at least 15 minutes before chocolate coating. This helps seal the cookie dough inside and prevents potential leakage during dipping.
Add a small amount of vegetable oil or coconut oil to the melted chocolate. This helps thin the coating and creates a smoother, easier-to-apply chocolate shell.
Print
Sinful Chocolate Chip Cookie Dough Brownie Bombs Recipe
- Total Time: 1 hour 10 minutes
- Yield: 25 1x
Description
Delectable chocolate chip cookie dough nestled inside Chocolate Chip Cookie Dough Brownie Bombs creates an irresistible dessert fusion. Rich chocolate coating and tender cookie center promise indulgent satisfaction for chocolate enthusiasts.
Ingredients
- 1 cup (160 grams) all-purpose flour
- ½ cup (100 grams) granulated sugar
- ½ cup (110 grams) packed light brown sugar
- ½ cup (113 grams / 4 oz) unsalted butter, softened
- 1 cup (175 grams) mini chocolate chips
- 12 oz (340 grams) semisweet chocolate chips or chocolate melting wafers
- 1 box (18 oz / 510 grams) brownie mix
- 2 tbsps milk
- 1 tsp vanilla extract
- ½ tsp salt
- 1 tbsp vegetable oil (optional, for smoother coating)
- Eggs (as specified on brownie mix package)
- Oil (as specified on brownie mix package)
- Water (as specified on brownie mix package)
Instructions
- Brownie Preparation: Combine brownie mix according to package instructions, spreading evenly in a parchment-lined pan. Bake until set, then cool completely at room temperature.
- Cookie Dough Creation: Cream butter and sugars until light and fluffy. Mix in milk and vanilla until smooth. Incorporate flour and salt, folding gently to create a consistent dough. Fold in mini chocolate chips throughout the mixture.
- Dough Shaping and Brownie Cutting: Form cookie dough into small spheres and chill on parchment paper. Cut cooled brownies into squares slightly larger than the dough balls.
- Assembly and Wrapping: Encase each chilled cookie dough ball within a brownie square, carefully sealing edges. Roll gently to create smooth, uniform orbs.
- Freezing and Chocolate Coating: Briefly freeze assembled bombs to stabilize. Melt chocolate in the microwave, stirring frequently to achieve a smooth consistency. Completely submerge each bomb in melted chocolate, allowing excess to drip off.
- Finishing Touches: Place chocolate-covered bombs on parchment paper. Optionally sprinkle with additional chocolate chips or decorative elements before chocolate sets. Allow to solidify at room temperature or expedite by refrigerating.
Notes
- Chill Cookie Dough: Refrigerate dough for 30 minutes before forming balls to prevent sticking and maintain shape, ensuring easier handling and cleaner spheres.
- Prevent Brownie Cracking: Cool brownies completely at room temperature to avoid structural breaks when wrapping cookie dough, which helps maintain smooth bomb exteriors.
- Smooth Chocolate Coating: Temper chocolate at 50-55°F for glossy, crack-free coverage, using a deep bowl for easier dipping and complete immersion of brownie bombs.
- Dietary Adaptations: Substitute gluten-free flour blend for traditional flour, use dairy-free chocolate and margarine for vegan version, allowing broader dietary accessibility without compromising delectable taste and texture.
- Prep Time: 45 minutes
- Cook Time: 25 minutes
- Category: Desserts, Snacks
- Method: Baking
- Cuisine: American
Nutrition
- Serving Size: 25
- Calories: 200
- Sugar: 12 g
- Sodium: 150 mg
- Fat: 10 g
- Saturated Fat: 5 g
- Unsaturated Fat: 4 g
- Trans Fat: 0 g
- Carbohydrates: 25 g
- Fiber: 1 g
- Protein: 2 g
- Cholesterol: 20 mg
John Nicholson
Lead Writer & Recipe Developer
Expertise
Recipe Testing and Development, Kitchen Hacks and Time-Saving Tips, Flavor Pairing and Ingredient Selection, Engaging Food Writing and Storytelling
Education
Johnson & Wales University
John Nicholson honed his skills at Johnson & Wales University, learning how to use fresh, local ingredients and down-to-earth techniques to make cooking simple and satisfying.
His recipes blend Southern comfort flavors with a modern touch, inviting everyone to cook with ease and confidence.
Living in Charleston, John takes cues from the city’s lively food scene, local markets, and seasonal produce. He’s all about making meals stress-free through easy tips, flavor pairings, and fun experiments in the kitchen