Incredibly Fluffy Homemade Softest Bread Rolls Recipe
Fresh from the oven, these softness-packed bread rolls redefine comfort in every delectable bite.
Bread rolls that melt in your mouth emerge from a simple yet magical combination of ingredients.
Every baker dreams of creating perfect soft bread rolls that surprise and delight.
The secret lies in carefully selecting quality flour and understanding precise mixing techniques.
Warm, pillowy, and irresistibly tender, these rolls complement any meal with their gentle texture.
Soft bread rolls transform ordinary dinners into memorable culinary experiences.
You’ll want to share these golden-brown beauties straight from your kitchen.
Quick Recipe Overview
Ingredients for fluffiest bread rolls
For Yeast Activation:For Dry Ingredients:For Wet Ingredients:Tools to Make fluffiest bread rolls
Steps to Create fluffiest bread rolls
Mix warm water, sugar, and yeast in a big bowl. Let the mixture bubble and become creamy for about 10 minutes. Thisal process brings your yeast to life.
Stir flour, oil, and salt into the yeast mixture. Mix steadily until the dough starts pulling away from the bowl’s edges. Keep mixing until everything combines smoothly.
Transfer dough onto a lightly dusted surface. Knead the dough energetically for 8 minutes, pushing and folding until it becomes silky and stretchy. Your muscles will get a workout!
Slide the dough into an oiled bowl, coating it completely. Cover with a soft cloth and let it rest in a cozy spot. Watch it grow and double in size over about an hour.
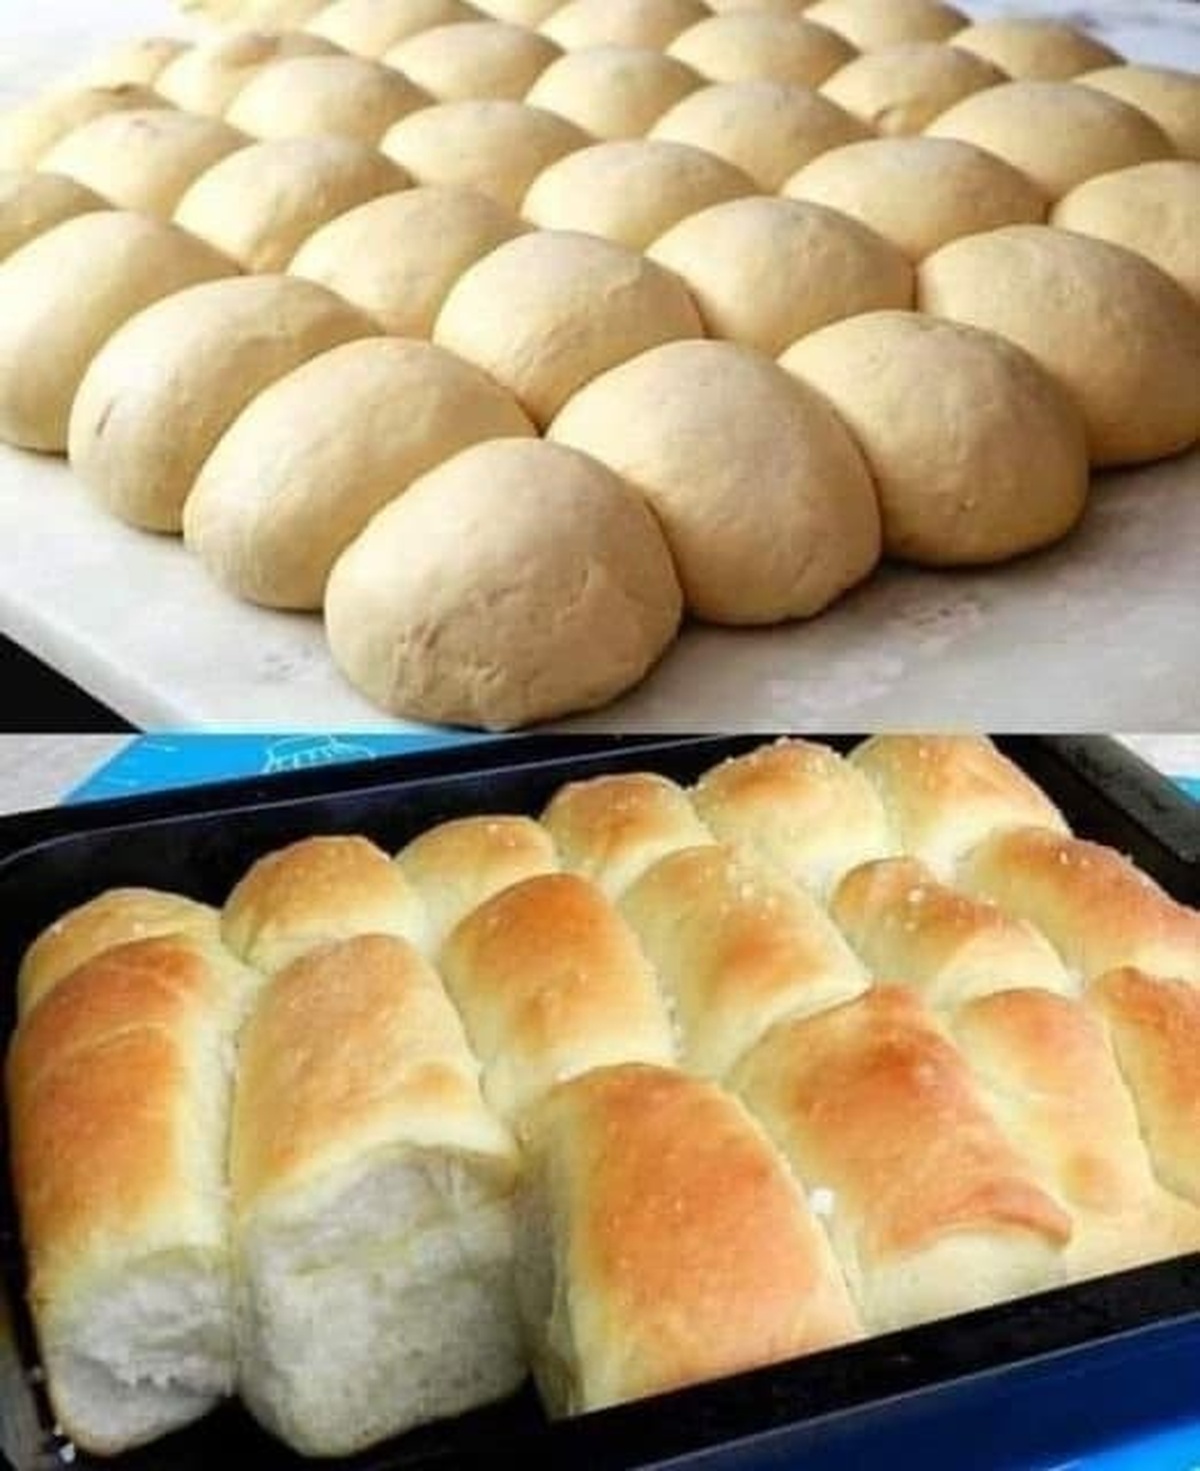
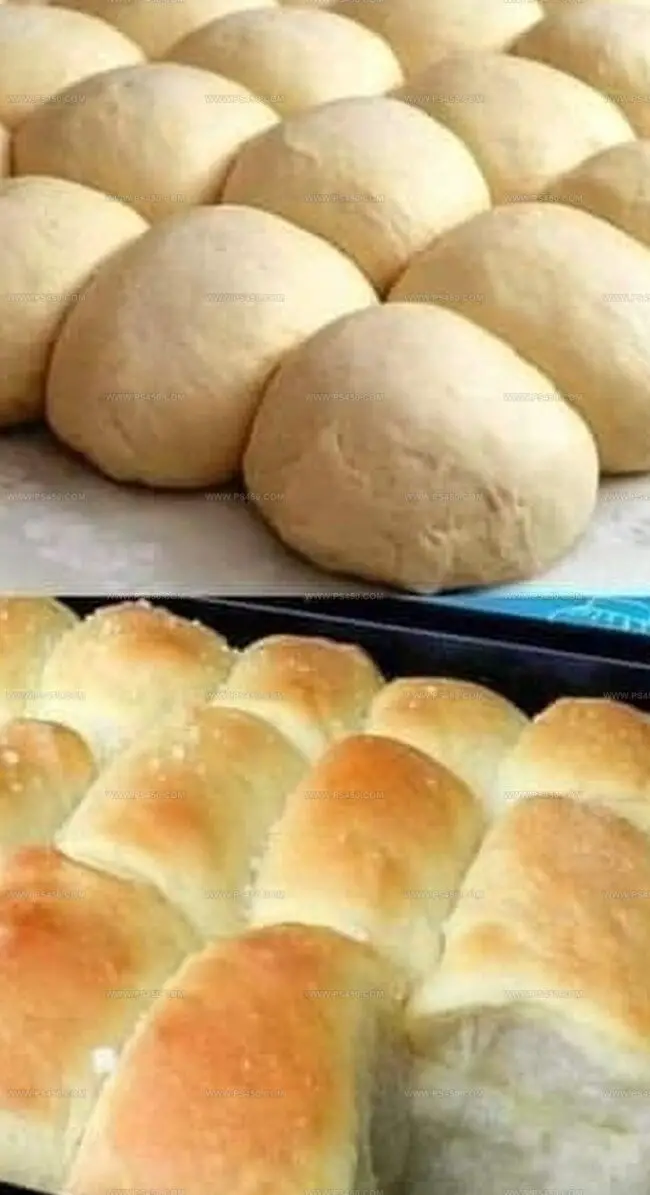
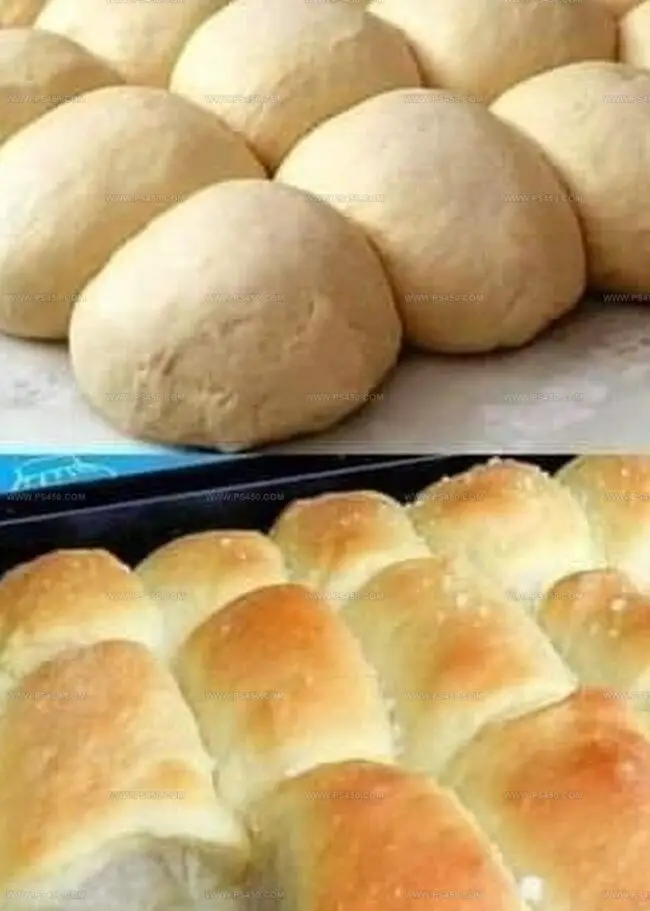
Gently deflate the puffy dough and divide into round balls. Space them generously on a greased baking sheet, giving each roll room to expand and breathe.
Allow rolls to puff up again, becoming beautifully plump. Cover them tenderly and let them grow for around 40 minutes until they look irresistibly fluffy.
Crank the oven to 400F. Slide in your rolls and bake until they turn a gorgeous golden brown. The aroma will make your kitchen smell like heaven.
Smart Twists for fluffiest bread rolls
How to Serve fluffiest bread rolls
Make fluffiest bread rolls Last Longer
FAQs
Kneading develops gluten networks in the dough, which creates the smooth, stretchy texture and helps rolls rise properly. The more you knead, the more elastic and soft your bread rolls will become.
When you mix yeast with warm water and sugar, it should become foamy and creamy within 10 minutes. If the mixture doesn’t bubble or look active, your yeast might be old or expired, and you’ll need to replace it to ensure proper bread rising.
Absolutely! You can mix and knead the dough by hand on a clean surface. The key is to knead consistently for about 8 minutes until the dough becomes smooth and elastic. Hand kneading can be a great workout and helps you feel the dough’s texture.
Use warm water between 100-110°F (37-43°C). Water that’s too hot will kill the yeast, while water that’s too cold won’t activate it properly. If you don’t have a thermometer, water should feel comfortably warm to the touch, like a baby’s bath.
Print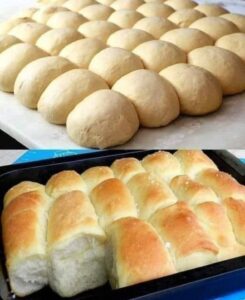
Softest Bread Rolls Recipe
- Total Time: 33 minutes
- Yield: 13 1x
Description
Homemade fluffiest bread rolls bring warmth from traditional German kitchens with simple ingredients. Gentle kneading and patient rising create pillowy textures perfect for family meals and weekend gatherings.
Ingredients
- 1 packet (2 ¼ tsps) active dry yeast
- ¼ cup (50 g) granulated sugar
- 4 cups (480 g) all-purpose flour
- 1 large egg
- 1 cup (240 ml) warm milk
- ¼ cup (57 g) unsalted butter, melted
- 1 tsp salt
- 2 tbsps butter, melted (for brushing on top)
Instructions
- Yeast Activation: Combine warm water, sugar, and active dry yeast in a large mixing bowl. Let the mixture rest until it becomes frothy and bubbly, indicating the yeast is alive and ready.
- Dough Formation: Blend the yeast mixture with flour, vegetable oil, and salt. Knead the ingredients thoroughly until a smooth, elastic dough forms that cleanly pulls away from the bowl’s sides.
- Initial Proofing: Transfer the dough to an oil-coated bowl, ensuring complete coverage. Drape with a damp cloth and place in a warm, undisturbed location to rise until doubled in size, approximately 1 hour.
- Shaping Rolls: Punch down the risen dough and divide into 16 equal portions. Gently roll each segment into smooth, uniform balls, arranging them on a lightly greased baking sheet with adequate spacing between each roll.
- Final Proofing and Baking: Cover the shaped rolls with a damp cloth and allow a second rise. Preheat the oven to 400F (200C). Bake the rolls for 18-20 minutes until they transform into golden-brown, crusty delicacies with a perfectly light interior.
Notes
Activate Yeast Perfectly: Ensure water temperature is between 100-110°F to wake up yeast without killing it; too hot or cold prevents proper activation and rise.
Knead with Confidence: Use the windowpane test to check gluten development – stretch a small piece of dough; if it stretches thin enough to see through without breaking, kneading is complete.
Proofing Environment Matters: Choose a warm, draft-free spot around 80-85°F for optimal dough rising; consider using an oven with the light on or atop a warm appliance to create ideal conditions.
Customize for Dietary Needs: Swap all-purpose flour with gluten-free blend for celiac-friendly version; replace vegetable oil with olive oil for added flavor, or use alternative milk for vegan adaptation.
- Prep Time: 15 minutes
- Cook Time: 18 minutes
- Category: Snacks, Dinner
- Method: Baking
- Cuisine: American
Nutrition
- Serving Size: 13
- Calories: 155
- Sugar: 5 g
- Sodium: 130 mg
- Fat: 6 g
- Saturated Fat: 4 g
- Unsaturated Fat: 2 g
- Trans Fat: 0 g
- Carbohydrates: 22 g
- Fiber: 1 g
- Protein: 3 g
- Cholesterol: 25 mg
John Nicholson
Lead Writer & Recipe Developer
Expertise
Recipe Testing and Development, Kitchen Hacks and Time-Saving Tips, Flavor Pairing and Ingredient Selection, Engaging Food Writing and Storytelling
Education
Johnson & Wales University
John Nicholson honed his skills at Johnson & Wales University, learning how to use fresh, local ingredients and down-to-earth techniques to make cooking simple and satisfying.
His recipes blend Southern comfort flavors with a modern touch, inviting everyone to cook with ease and confidence.
Living in Charleston, John takes cues from the city’s lively food scene, local markets, and seasonal produce. He’s all about making meals stress-free through easy tips, flavor pairings, and fun experiments in the kitchen