Candy Cane Kiss Cookie Recipe with Festive Peppermint Flavor
Festive baking reaches new heights with these delightful candy cane kiss cookies that blend peppermint crunch and chocolate charm.
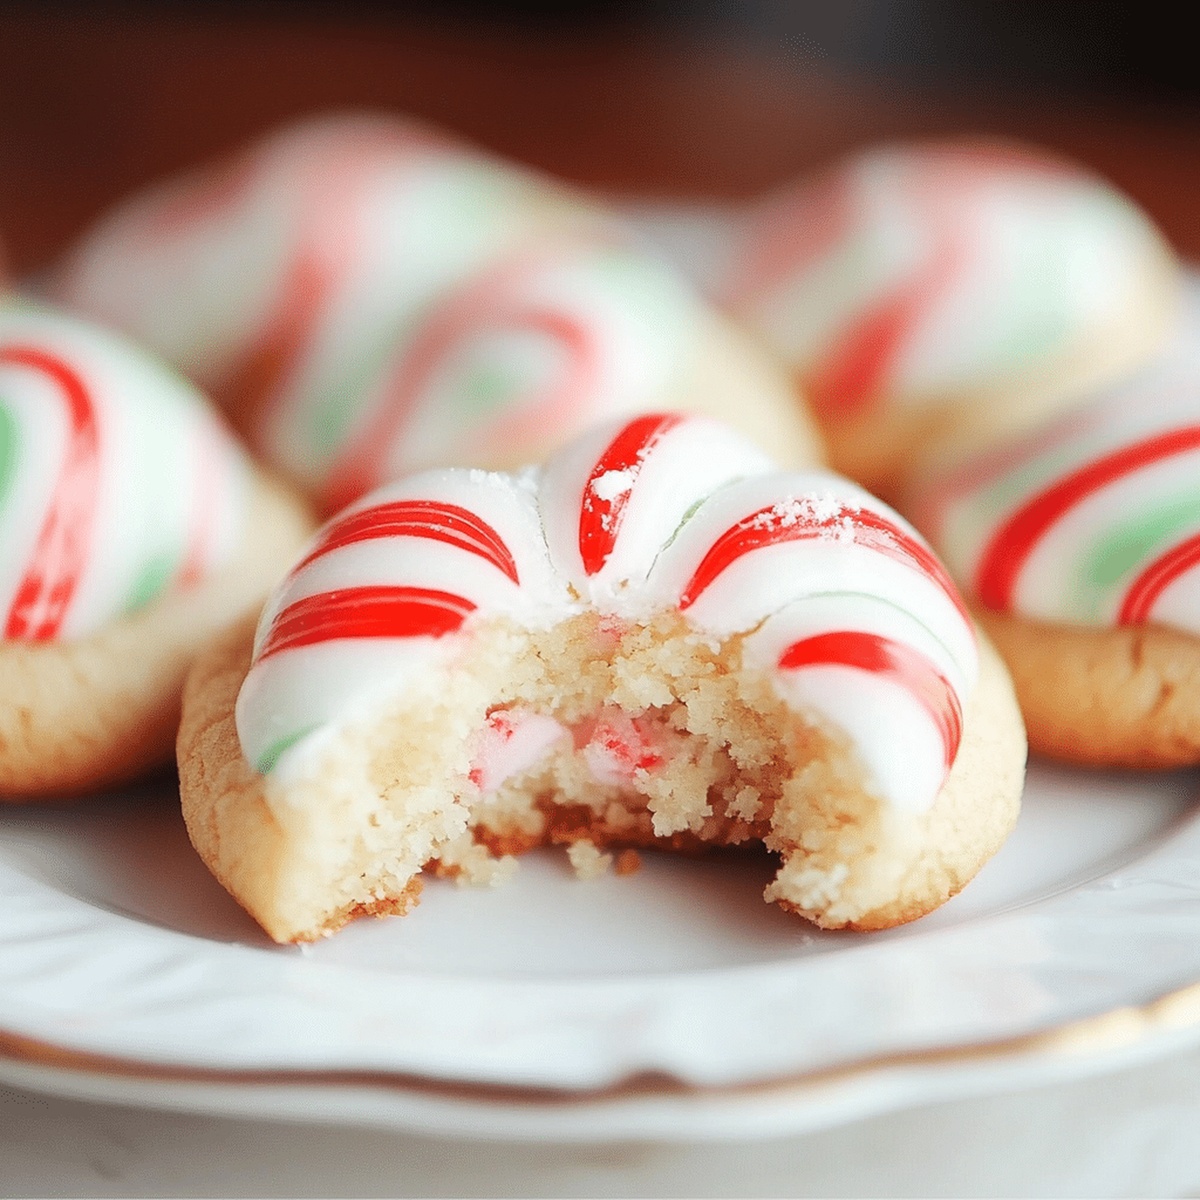
Tender chocolate cookies embrace delicate candy cane kisses in a delectable holiday treat.
The rich cocoa base provides a perfect canvas for these minty medallions.
Guests will adore the elegant swirl of chocolate and peppermint dancing across their taste buds.
Each bite offers a harmonious balance of sweet and cool flavors.
The cookies sparkle with crushed candy cane edges, adding a festive crunch to every mouthwatering morsel.
Bake a batch and watch these seasonal delights disappear in moments.
Quick Recipe Overview

Candy Cane Kiss Cookies: Ingredient Breakdown
For Cookie Base:For Wet Ingredients:For Decorative and Flavor Elements:Bakeware You’ll Need for Candy Cane Kiss Cookies
How to Mix and Bake Candy Cane Kiss Cookies

Crank the oven to a toasty 350F and line a baking sheet with parchment paper for hassle-free cleanup.
Whip softened butter and sugar together until they become light and fluffy, transforming into a dreamy mixture that’ll make your cookies irresistible.
Gently fold in the egg and vanilla, blending until smooth. Gradually mix in dry ingredients, being careful not to overwork the dough.
Roll the dough into small balls, spacing them nicely on the baking sheet. Sprinkle crushed candy canes over each ball, pressing lightly to make them stick.
Pop the cookies in the oven for 8-10 minutes. Watch for golden edges but keep the centers soft and tender.
Right after pulling the cookies from the oven, crown each one with a Candy Cane Kiss. Let them cool slightly on the sheet before moving to a wire rack.
Fun Adjustments for Your Candy Cane Kiss Cookie Batch
Candy Cane Kiss Cookies: Serving Tips for a Festive Touch
Best Ways to Keep Candy Cane Kiss Cookies Ready to Enjoy
FAQs
Candy Cane Kisses are limited-edition Hershey’s chocolates with a white chocolate base and peppermint flavor, typically available during the holiday season. They have a festive red and white striped appearance and a cool mint taste.
Yes, you can substitute with regular Hershey’s Kisses. The cookies will still be delicious, though they’ll lose the peppermint flavor and holiday spirit of the original recipe.
After baking, let the cookies cool for just a minute or two before gently pressing the Kisses into the center. This helps the chocolate maintain its shape while still slightly softening to adhere to the cookie.
You’ll need a mixing bowl, electric mixer, baking sheet, parchment paper or silicone mat, and a rolling pin or something to crush the candy canes. Basic kitchen tools work perfectly for this recipe.
Print
Sweet Candy Cane Kiss Cookies Recipe
- Total Time: 25 minutes
- Yield: 25 1x
Description
Candy Cane Kiss Cookies blend festive peppermint flavors with buttery chocolate chip cookies. Delicate peppermint kisses crown each cookie, creating a delightful holiday treat you’ll savor.
Ingredients
- 1 cup (2 sticks/226 g) unsalted butter, softened
- 1 cup granulated sugar
- 1 large egg
- 2 ½ cups all-purpose flour
- 1 tsp baking powder
- ¼ tsp salt
- 1 tsp vanilla extract
- ½ tsp peppermint extract (optional, for extra mint flavor)
- 24 Candy Cane Hershey’s Kisses, unwrapped
- Granulated sugar (extra for rolling)
Instructions
- Preheat Preparation: Calibrate oven to 350F (175C) and line baking sheet with parchment paper to ensure seamless cookie release.
- Ingredient Fusion: Whisk flour, baking powder, and salt in a mixing bowl until uniformly blended, creating a foundational dry mixture.
- Butter Transformation: Cream softened butter and granulated sugar using an electric mixer until the mixture achieves a light, voluminous texture with pale, airy consistency.
- Wet Element Integration: Incorporate egg and vanilla extract into the butter-sugar blend, mixing until the components merge into a silky, homogeneous batter.
- Dough Development: Gently combine dry ingredients with wet mixture, stirring minimally to form a cohesive dough without compromising its delicate structure.
- Cookie Shaping and Decoration: Roll dough into precise 1-inch spheres, positioning them on the prepared sheet with strategic spacing, then sprinkle crushed candy cane fragments over each ball, pressing lightly to secure.
- Baking Precision: Bake for 8-10 minutes, monitoring for subtle golden edges while maintaining a tender interior, ensuring optimal cookie texture.
- Chocolate Embellishment: Immediately post-baking, crown each warm cookie with a Hersheys Candy Cane Kiss, leveraging residual heat to create a gentle chocolate melt.
- Cooling Protocol: Rest cookies on baking sheet for 5 minutes, then transfer to a wire rack to complete cooling and stabilize their delicate structure.
Notes
- Butter Temperature Matters: Ensure butter is softened but not melted for the perfect creamy texture, which helps create light and fluffy cookies.
- Gentle Mixing Technique: Avoid overmixing the dough to prevent tough, dense cookies; mix until ingredients are just combined for a tender crumb.
- Crush Candy Canes Carefully: Use a rolling pin or meat mallet to create fine, even pieces that distribute evenly and prevent large, hard chunks in the cookies.
- Kiss Placement Timing: Place Hershey’s Kisses immediately after baking while cookies are warm, allowing the chocolate to slightly melt and create a smooth, glossy topping.
- Prep Time: 15 minutes
- Cook Time: 10 minutes
- Category: Desserts, Snacks
- Method: Baking
- Cuisine: American
Nutrition
- Serving Size: 25
- Calories: 150
- Sugar: 12 g
- Sodium: 50 mg
- Fat: 8 g
- Saturated Fat: 5 g
- Unsaturated Fat: 3 g
- Trans Fat: 0 g
- Carbohydrates: 20 g
- Fiber: 0 g
- Protein: 1 g
- Cholesterol: 30 mg
John Nicholson
Lead Writer & Recipe Developer
Expertise
Recipe Testing and Development, Kitchen Hacks and Time-Saving Tips, Flavor Pairing and Ingredient Selection, Engaging Food Writing and Storytelling
Education
Johnson & Wales University
John Nicholson honed his skills at Johnson & Wales University, learning how to use fresh, local ingredients and down-to-earth techniques to make cooking simple and satisfying.
His recipes blend Southern comfort flavors with a modern touch, inviting everyone to cook with ease and confidence.
Living in Charleston, John takes cues from the city’s lively food scene, local markets, and seasonal produce. He’s all about making meals stress-free through easy tips, flavor pairings, and fun experiments in the kitchen