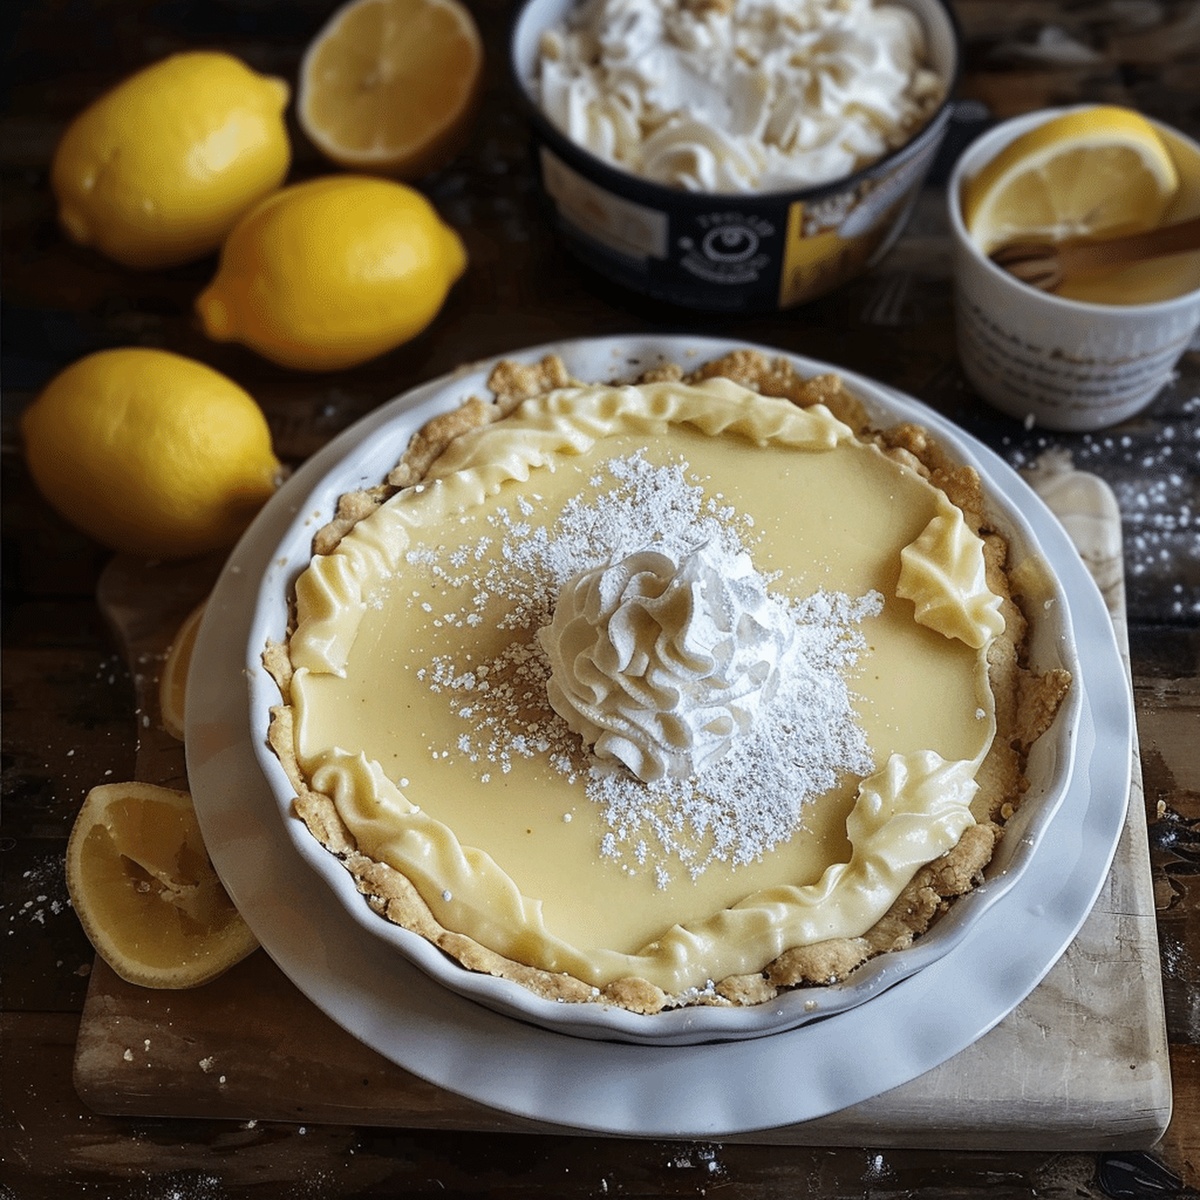
No-Bake Lemon Pie Recipe That Brings a Touch of Fresh Citrus
Dessert lovers can’t resist a classic lemon pie with its zesty lemon pie recipe that dances between sweet and tart.
Each forkful promises a burst of sunshine on your plate.
Creamy, smooth filling nestles perfectly in a buttery crust that crumbles delicately.
Lemons bring a vibrant, refreshing twist to this timeless treat that never fails to impress.
The balance of citrusy brightness and sugary richness makes this dessert a crowd-pleaser at any gathering.
Simple ingredients transform into an extraordinary finale that leaves everyone asking for seconds.
Whip up this delightful pie and watch smiles bloom around the table.
Quick Recipe Overview

Ingredients for No Bake Lemon Pie Success
For Crust:For Filling Base:For Filling Volume and Texture:Tools That Make Lemon Pie Assembly Smooth
How to Make Lemon Pie Without Turning on the Oven
Crush graham crackers and blend with melted butter until perfectly combined. Press mixture firmly into pie dish, creating an even layer that covers bottom and sides. Refrigerate for quick setting.
Blend cream cheese until silky smooth. Add condensed milk and fresh lemon juice, mixing until creamy. Separately whip heavy cream until peaks stand tall. Gently fold whipped cream into lemony mixture for light, airy texture.
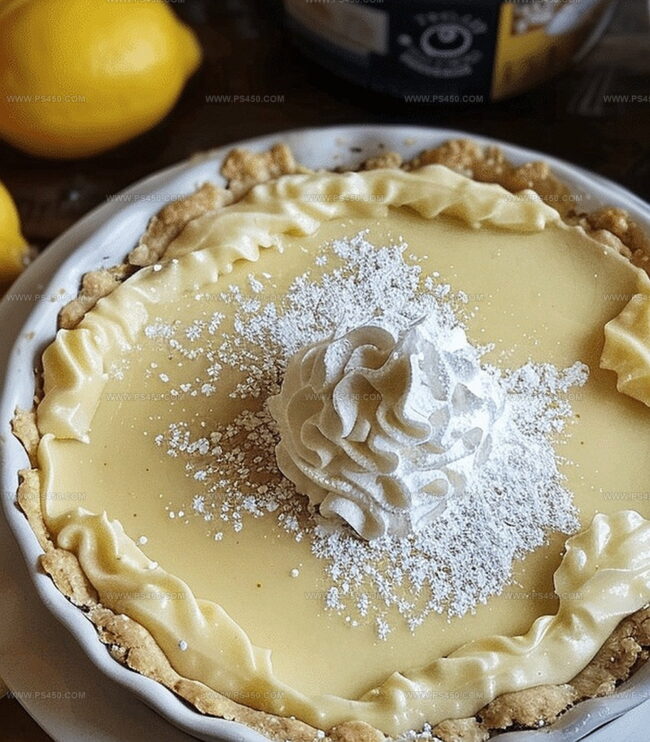
Pour filling into chilled crust, spreading evenly with gentle strokes. Smooth surface for elegant presentation. Chill pie in refrigerator for several hours until filling sets completely.
Add optional garnishes like dollops of whipped cream or delicate lemon curls. Slice and enjoy this refreshing, cool treat straight from the fridge.
Citrus Flavor Ideas for Your No Bake Pie
Serve Lemon Pie Cold and Refreshing
Chilling and Saving No Bake Lemon Pie
FAQs
You’ll need graham cracker crumbs, sugar, butter, cream cheese, sweetened condensed milk, fresh lemon juice, lemon zest, and heavy cream.
Fresh lemon juice is recommended for the best flavor and brightness, but bottled juice will work in a pinch. Just avoid using concentrated lemon juice.
When you lift the beaters, the cream should stand up straight without falling over. It should look glossy and hold its shape firmly.
Absolutely! This is a perfect no-bake dessert that doesn’t require any baking, making it ideal for hot summer days or when you want to avoid using the oven.
Print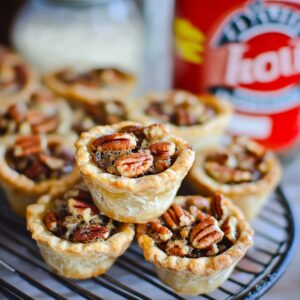
Mini Pecan Pies Recipe
- Total Time: 1 hour 15 minutes
- Yield: 12 1x
Description
Bite-sized southern charm shines through these Mini Pecan Pies, delivering classic holiday sweetness in one perfect handheld morsel. Sweet buttery pastry cradles rich caramel-like pecan filling, promising delightful indulgence you cannot resist.
Ingredients
Pecans:
- ¾ cup chopped pecans
- ½ cup light brown sugar, packed
- ¼ cup corn syrup (light or dark)
Dough Ingredients:
- 1 ¼ cups all-purpose flour
- ½ cup (1 stick) unsalted butter, cold and cubed
- ¼ teaspoon salt
- 2–3 tablespoons ice water
Filling and Seasoning:
- 1 large egg
- 1 tablespoon unsalted butter, melted
- ½ teaspoon vanilla extract
- ¼ teaspoon salt
Instructions
- Prepare the pastry foundation by combining flour and salt in a mixing bowl. Utilize a pastry cutter to incorporate cold butter until the mixture resembles coarse, crumbly texture.
- Gradually introduce ice water, blending until the dough coheres into a unified mass. Shape the mixture into a compact disk, encase with plastic wrap, and refrigerate for half an hour to firm up.
- Heat the oven to 350F (175C). Extract the chilled dough and roll it out to a delicate, thin layer approximately 1/8-inch thick.
- Employ a circular cutter or drinking glass to create precise dough rounds. Gently press these delicate circles into mini muffin tin cavities, molding them to form petite pie shells with delicate edges.
- Craft the luscious filling by whisking brown sugar, corn syrup, egg, melted butter, vanilla extract, and salt in a separate bowl until thoroughly combined and smooth.
- Fold chopped pecans into the liquid mixture, ensuring even distribution of the nutty elements throughout the filling.
- Carefully ladle the pecan mixture into each prepared pie shell, filling to about three-quarters full to prevent overflow during baking.
- Slide the muffin tin into the preheated oven and bake for 20-25 minutes, watching for a golden-brown crust and set filling.
- Remove from the oven and allow the mini pies to rest in the tin for 10 minutes, enabling them to stabilize and cool slightly.
- Gently extract the delicate mini pies from the tin, transferring them to a wire rack to cool completely before serving.
Notes
- Choose cold butter for a flakier, more tender pie crust that melts perfectly in your mouth.
- Add water gradually to prevent the dough from becoming too wet or sticky, which can make the crust tough.
- Pre-chill the dough to relax the gluten and ensure a more delicate, crisp texture when baked.
- Use a light touch when pressing dough into the mini muffin tin to avoid creating dense, heavy crusts.
- Toast pecans briefly before chopping to enhance their nutty flavor and add depth to the filling.
- Consider using maple syrup instead of corn syrup for a more natural, rich sweetness.
- Swap out regular flour with gluten-free flour blend to make these mini pies celiac-friendly.
- Reduce sugar content by using a sugar substitute or cutting the amount by one-third for a less sweet version.
- Prep Time: 20 minutes
- Cook Time: 25 minutes
- Category: Desserts
- Method: Baking
- Cuisine: American
Nutrition
- Serving Size: 12
- Calories: 180
- Sugar: 10 g
- Sodium: 150 mg
- Fat: 9 g
- Saturated Fat: 3 g
- Unsaturated Fat: 5 g
- Trans Fat: 0 g
- Carbohydrates: 23 g
- Fiber: 1 g
- Protein: 2 g
- Cholesterol: 20 mg
John Nicholson
Lead Writer & Recipe Developer
Expertise
Recipe Testing and Development, Kitchen Hacks and Time-Saving Tips, Flavor Pairing and Ingredient Selection, Engaging Food Writing and Storytelling
Education
Johnson & Wales University
John Nicholson honed his skills at Johnson & Wales University, learning how to use fresh, local ingredients and down-to-earth techniques to make cooking simple and satisfying.
His recipes blend Southern comfort flavors with a modern touch, inviting everyone to cook with ease and confidence.
Living in Charleston, John takes cues from the city’s lively food scene, local markets, and seasonal produce. He’s all about making meals stress-free through easy tips, flavor pairings, and fun experiments in the kitchen